In today’s workflow, it is essential to export high-resolution JPEGs with settings that preserve detail, color accuracy, and organization for clients or personal archives. The following guide compiles practical Lightroom export steps and recommended numbers, drawn directly from the provided material, to help you deliver professional results every time.
1. Export Location and File Naming
The first step is choosing where your files will be saved and giving them professional file names. Export your images to the appropriate folder on your computer or external drive, then use a consistent naming system that makes it easy for both you and your client to identify each image. For example: ClientName_YYYYMMDD_ProjectName_001.jpg. Using a consistent naming system keeps your files organized, makes it easy for clients to locate specific images, and looks more professional.
After we decide on the location and name the file, we’ll then setup the file settings. You can choose a specific folder if you’ve already named a folder and drop all of the JPEGs into that. I personally like to have all of my images go into a specific folder on my desktop and I name the folder something useful.
2. File Format and Quality
JPEG is the standard choice for client delivery due to excellent image quality with manageable file sizes and broad compatibility. Recommendation: export as JPEG unless your client specifically requests another format.
Quality controls the amount of JPEG compression. For client delivery, the recommendation is Quality 100 to preserve every detail from your edits. Although settings between 90 and 95 often look nearly identical, 100 ensures the highest quality, especially when storage is not a constraint.
In addition, you’ll set the color space to sRGB, which provides broad compatibility across devices and print labs. For archival high-resolution needs, you may opt not to resize to fit anything to avoid limiting size, while for social media or web use you might enable specific resizing later.
3. Resolution and Resize
Resolution is specified in pixels per inch (PPI). For professional printing, use 300 PPI. Note that PPI does not change the actual image pixels; it simply provides print information for labs. If you’re exporting for blog or social media, you may use the Resize to Fit option with appropriate dimensions, but for high-resolution prints you generally disable resizing to keep the full resolution intact.
For high-resolution archival JPEGs, you may choose not to resize. If you are preparing images for web, you can resize by the Long Edge as needed to fit platform requirements.
4. Output Sharpening and Metadata
Sharpening is applied at export to suit the final medium. For screen viewing, choose Sharpening: Screen, Standard. If printing, you might select Print sharpening instead, with adjustments based on paper and lab recommendations.
Metadata includes information embedded in the export, such as copyright and contact details. Recommendation: include Copyright and Contact Information to help identify your work and provide contact details for licensing or orders.
5. Watermarks and Post-Processing
Watermarking can protect your work, but for client deliverables you may keep it off unless specifically requested. Watermark Off is the typical default for final deliverables used for printing or sharing without branding overlays.
Lightroom exports create a brand-new file in the chosen format while keeping the RAW as your working file. The export window contains many options, but beginners only need a subset: JPEG, Quality 100, sRGB, Resize to Fit off, 300 PPI, Output Sharpening Screen/Standard, Metadata Copyright & Contact Information, Watermark Off.
6. Export Location, Naming, and Presets
When you export photos from the Develop or Library module, you decide where to export and how to name the files. You can save export settings as a preset for quick repetition. This is especially useful when delivering multiple sessions such as weddings or portraits where consistent quality and naming help clients find their images easily.
To maximize efficiency, you can use multiple presets (e.g., Full Size/Print and Web Sized) and run them in a batch. With newer Lightroom updates, you can perform multi-batch exports for the same set of images, saving time by exporting different sizes in one go. Ensure you have the latest Lightroom Classic version to access these features.
7. Practical Workflow for High-Resolution Exports
From the Develop Module, select all images you’d like to export, then choose File → Export. Decide where the images will live after export-often an external hard drive or a carefully organized folder structure such as Finals, with subfolders for social media, high-resolution images, and SEO-optimized files. Image naming should be search-engine friendly, e.g., ClientName_YYYYMMDD_ProjectName_001.jpg.
Common recommended export settings for high-quality client delivery are: JPEG, Quality 100, sRGB, Resize to Fit Off, 300 PPI, Output Sharpening Screen, Metadata Copyright & Contact Information, Watermark Off. Saving these settings as an Export Preset (e.g., Client Delivery) makes future exports quick and consistent.
For photographers who want to share files online, note that some clients may download images; if bandwidth is a concern, you might export at Quality 80-90 or consider resizing for specific platforms. If you’re unsure how prints will be produced, start with 300 PPI and no resizing, and adjust based on your lab or client needs.
8. Additional Tips and Considerations
Lightroom never edits your original RAW file; all adjustments exist as edit instructions. When exporting, Lightroom creates a new file in the chosen format (JPEG, WEBP, or TIFF) based on your settings while preserving the RAW as the working file. The Export button is in the bottom left area of Lightroom and is accessible from Grid View and other Library views. Press G for Grid View, select photos, and click Export.
Export presets help speed up your workflow. You can save presets and apply them later with File → Export with Preset. To stand out on social media, you might explore additional templates or presets, but ensure your export settings prioritize quality for prints and client delivery.
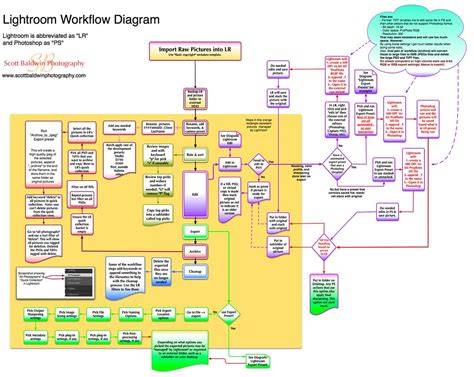
The Best Instagram Export Settings for Adobe Lightroom 2026
Table: Quick Reference Export Settings
| Setting | Recommended Value | Notes |
|---|---|---|
| File Format | JPEG | Most client deliverables and labs |
| Quality | 100 | Preserves maximum detail |
| Color Space | sRGB | Broad compatibility |
| Resize | Off (for high-res/print) | Enable only for web/social |
| Resolution | 300 PPI | Print standard |
| Sharpening | Screen, Standard | Adjust for final medium |
| Metadata | Copyright & Contact Information | Professional attribution |
| Watermark | Off | Clean final deliverables |
To ensure optimal outcomes, you can also consider documenting your final export workflow, maintaining clear naming conventions, and using presets to standardize across sessions. This approach helps you deliver consistently high-quality images to clients, especially for weddings, portraits, and other professional projects.