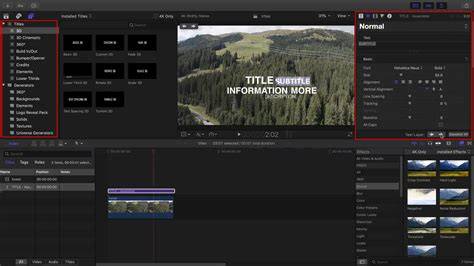
Final Cut Pro is a robust tool that allows for a variety of animations, both simple and complex. Text and Titles: Final Cut Pro has a comprehensive set of tools for creating animated text and titles. Transitions: You can create animated transitions between clips. Keyframe Animations: You can animate virtually any visual aspect of a video clip or effect using keyframes. Keyframes allow you to set specific values for certain parameters (like position, scale, or opacity) at specific points in time. Effects and Filters: Final Cut Pro includes a variety of effects and filters that can be animated, like blurs, color changes, distortions, and more. 3D Animations: Although Final Cut Pro doesn't include full 3D modeling tools, it does allow you to create some 3D animations. Animations with Motion: If you need more advanced animation capabilities, you can use Apple's Motion software, which integrates seamlessly with Final Cut Pro. Remember, while Final Cut Pro offers a lot of animation capabilities, it's primarily a video editing tool.
Speeding up editing with keyboard shortcuts and precise audio control
The fastest way would be using the shortcuts CNTRL + or - to in- or decrease levels in 1 dB increments. You can of course change levels of selected clips in the Audio Inspector via slider or numerical dB-Input and in the timeline via the horizontal volume control line (drag with mouse, for precise control press CMD while dragging). You also can level a portion of a clip by selecting a range (Range-Tool: press R) and then drag the line. If you got a Clip, Sync Clip or Multicam Clip with multichannel Audio you can also use these methods to level single channels, either in the Audio Inspector or via right mouse click “Expand Audio Components” or by pressing cntrl+cmd+S.
Backing up Final Cut Pro projects: protect your edits
Backing up your Final Cut Pro project files is crucial to prevent losing your work. Library Backups: Final Cut Pro automatically creates backups of your libraries. These backups are stored in a folder named Final Cut Backups in your Movies folder. Duplicate Libraries: To manually back up your work, you can duplicate your library in Finder and zip it. External Drive: You can also manually copy the library to an external hard drive or another secure location. Time Machine: If you're using Apple's Time Machine backup system, make sure that your Final Cut Pro library is in a location that Time Machine backs up. Cloud Storage: You can also use a cloud storage service like iCloud, Google Drive, or Dropbox for backups. Before you perform any major edits or changes to a project, it's a good idea to create a backup. go to settings > import > leave files in place. route Media into a folder of your choice. This creates Final Cut Original, ...Optimized, and Proxy Media Folders eventually. route Cache into a folder of your choice. leave Backups in Final Cut Backups. That's in Movies/Final Cut Backups.
Codecs, transcoding, and optimizing pipelines for large projects
Subvert - Subvert expands on Final Cut Pro X's captioning capabilities. Final Cut is capable of displaying almost any standard codec, even DNxHD (Avid). If codecs aren't optimized for editing it is transcoding them "on the fly". However, for best results regarding playback, rendering and export, we recommend using the Apple Pro Res family, since Apple Silicon has dedicated chips for encoding/decoding Pro Res. For bigger projects Pro Res LT seems to be the best option between data size and quality. There is even a point to be made for HEVC and even h.264 (both in .mov container!) as an editing codec in FCP. No recommendation here, but we are aware of h.264-workflows that are running smoothly since years. In this case the transcoding from original files has to be meticulously tested, to ensure that timecode sync and rendering quality is preserved. Also, for larger projects with a postproduction pipeline after editing (external Color Grading, Sound Design etc.) we recommend a strict procedure in using the same codecs all the time. It will save you a lot of headaches after the fact, regarding metadata export, relinking to original files and AAF export (via X2pro). We also highly recommend a pipeline that uses only one set of codecs going in to the edit, preferably Pro Res for Video and PCM (.wav or .aiff container) for Audio. That means to transcode any Video or Audio that is not in the correct codec before importing into FCP. We especially warn about using mp3-files in any edit that will be sent to Pro Tools! A single clip of mp3 can delay your export workflow for hours of troubleshooting.
Once you’ve got your clips imported to FCP you can use the inbuilt Proxy Workflow to conveniently reduce file sizes, for example for travel, and to take off an edge of demanding editing or rendering tasks. For so-called reference clips (also: ref-QT), exports you send to review or to postproduction with burned-in timecode so they can match your edit with original files, HEVC (h.265) is a no-brainer. It’s just the best quality to file size ratio and even export is very fast. Hint: with Apple Compressor you can build your own HEVC export-templates for FCP with your preferred data rate. If your sound designers are hesitant about HEVC just try to do a short clip of workflow-test.
Improving editing speed and optimizing workflow
Improving your editing speed in Final Cut Pro can be accomplished with a combination of technical skills, keyboard shortcuts, and optimizing your workflow. Learn Keyboard Shortcuts: Keyboard shortcuts can save a significant amount of time in the editing process. Use Proxy Media: When dealing with high-resolution video like 4K or 8K, editing can become sluggish. Use Final Cut Pro's proxy media feature, which allows you to create lower-resolution versions of your footage for smoother editing. Organize Your Media: Keep your footage and assets well-organized. Use libraries, events, and keywords to categorize and manage your footage. Use Presets: If you find yourself often applying the same settings or effects, save them as presets. Optimize Your Hardware: Make sure your computer is up to the task. Learn to Use the Magnetic Timeline: The magnetic timeline is one of Final Cut Pro's unique features. Color Coding: Use color coding for your clips and timelines. Storyboard Your Videos: Before even starting with Final Cut Pro, have a clear idea of what you want to achieve. Remember that like any skill, speed comes with practice.
Effects, transitions, and exports: expanding capabilities
Final Cut Pro comes with a variety of built-in effects that you can apply to your video clips. Video Effects: There's a broad range of video effects available in Final Cut Pro, including color corrections, distortions, blurs, stylistic effects, and more. Audio Effects: Final Cut Pro also includes a variety of audio effects. Transitions: Transitions are a type of effect that you can place between clips. Text and Generators: Final Cut Pro includes several types of text effects and motion graphics generators. Remember that you can further expand Final Cut Pro's capabilities with third-party plugins. These can provide additional effects, transitions, and other capabilities. Though looking very simple on first site, the share (=export) options are highly versatile and customisable. FCP has a built-in background export workflow that just works. You even can work along in the same timeline since Final Cut gathers everything in a separate fcpxml prior to export. With Apple Silicon Macs export speeds of Pro Res, h.264 or HEVC match or exceed all competitors. Depending on the hard drive setup and amount of used effects we are talking 90 minutes of 1080p-timelines in under 10 minutes of export time. FCP comes with only a few bespoke presets, that can be modified in a limited way (codec, resolution, chapter markers, …). For more in-depth customisation (data rate, watermarking and so on) you can create presets in Compressor and import them into the FCP share destinations (Settings > Destinations). Batch export is realised by selecting multiple Timelines or Clips (or even sections of clips) in the browser and select the preferred share destination. Regarding professional features, almost anything is possible - sometimes with a few workarounds. For example with Audio, you can natively export different sets and combinations of Stems (from Roles like Dialogue, Music, etc.) in one go. You can create Multitrack Quicktime Movies as well as multi-channel broadcast MXF. The same goes for separate and burnt-in Closed Captions. Third Parties are able to provide advanced share destinations to modify or upload directly after export. fcpxml is FCP's proprietary file format for sending timelines or even entire libraries to third party apps and plugins. Final Cut usually supports the current and the previous version of fcpxml. example: 10.9 and 10.10.
Platform, pricing, and workflow integration
Final Cut Pro vs. Platform Availability: Final Cut Pro is available only on macOS, while Adobe Premiere Pro is available on both macOS and Windows. Pricing Model: Final Cut Pro offers a one-time purchase, which can be more affordable in the long run. Performance: Final Cut Pro is known for its performance optimization for Apple hardware, which can make it run more smoothly on Macs. Interface and Workflow: Final Cut Pro uses a Magnetic Timeline, which offers a different editing experience by automatically moving clips to avoid gaps and collisions. Premiere Pro uses a more traditional track-based timeline, which can be more intuitive to those coming from other editing software. Integration with Other Software: Premiere Pro is part of the Adobe Creative Cloud, so it integrates very well with other Adobe products like After Effects and Photoshop. Support for Formats and Codecs: Both support a wide range of video formats and codecs, but there may be differences in support for specific formats. Collaboration Features: Adobe Premiere Pro has a feature called "Team Projects" for cloud-based collaboration between editors. It's important to note that both are professional-grade tools capable of high-level editing and post-production work. The choice between them often comes down to personal preference, specific project requirements, and the hardware/software ecosystem you're already working in.
Final Cut Pro supports a wide range of formats and resolutions, including 4K and 8K, and it is designed to take advantage of the high-performance CPU and GPU hardware in Mac computers. Final Cut Pro is a robust video editing software with a wide range of features designed for both amateur and professional video editors. Audio Editing and Sound Effects: Final Cut Pro offers advanced audio alignment and sound effects capabilities. Remember, the best way to familiarize yourself with these features is to dive in and start using the software. Creating and managing libraries in Final Cut Pro is a fundamental part of organizing your editing projects. A save dialog will appear. After creating a library, it's important to keep it organized. Creating Events: Inside a library, you can create events, which are like folders for your media files. Importing Media: You can import media directly into an event. Deleting Libraries and Events: To delete a library, first make sure it's closed (select it, then go to File > Close Library). Then you can delete it in Finder, like any other file. Backing Up Libraries: To back up a library, you can simply copy it in Finder to another location, like an external hard drive. Remember that managing libraries effectively can help you keep your projects organized, and make it easier to find and work with your media files.
FCP can lag with timelines longer than 30 minutes. Aside from slow drives, too less RAM or bad media management, it is the sheer amount of clips (Audio and Video) in a timeline that could hit on performance. Apple Silicon Macs do perform significantly better than Intel Macs. RAM should increase with the lengths of your projects. Though it's possible to edit 90 minutes with 16 GB, we would recommend 32-64 GB of RAM with feature-length timelines. You can segment your timeline into regions of around 20-25 minutes and put them into Compound Clips. Inside the Compounds you drive the edit. "Outside" the Compounds you compose the film. For example you could try out different styles of music. With smart Role-management you can turn on/off different music types, for example. With the aforementioned reels-system you could have even 3-hour-timelines. We are big fans of transcoding beforehand. So every video that goes in is ProRes and any Audio is transcoded to WAV. There are reports of reliable workflows with (high resolution) h264-.mov on Apple Silicon. We would also recommend having fast thunderbolt SSD-RAIDs or even enough internal SSD-storage for all your media (4-8 TB).