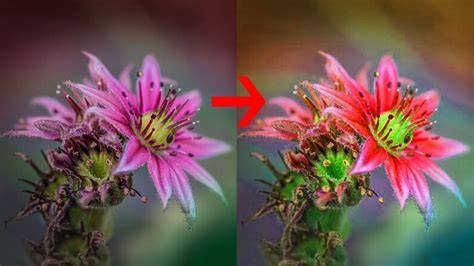
Photoshop gives you full control to alter every pixel in your image. One of Photoshop’s feature is the Invert command. When working with a flat image, we need to make sure that the original image remain intact. Avoid applying Invert command directly to your Background layer. You should always duplicate the Background layer to keep the original image and work with the new duplicated layer.
There is other way to invert pixel without directly altering the pixels, which is using adjustment layers. This invert adjustment layer works very much like the regular invert. If you take a look at its properties, there is no options available. It simply invert all the pixels underneath it, without directly altering them. Thus, the pixels are unharmed. The invert adjustment layer comes with extra mask. The mask works like any mask in ordinary layer, dark conceals and white reveals. Hit D to change foreground and background color to its default, white and black. Hit Ctrl + Delete to fill the mask with black. Activate The Brush Tool, right click to select brush tip. If we apply the invert effect into part of an image, we can increase its contrast and may get interesting result. Use smaller brush tip for more accurate result. Inverting an image will turn it into a photo negative which seems too extreme. But do you know that we can only invert its color and retain the dark and white portion of the image? Its simple. Apply the Invert command to the duplicated layer and then change its blend mode to Color. This blend will only pass the color information to all the layers underneath it. The technique works extremely well to invert the color of this car too. If you choose Luminosity blend mode, instead of color, you only pass the lightness information to all layers beneath it.
The invert command is not restricted to layers, but works on mask too. This allows us to quickly reveal hidden areas and vice versa. Take a look at the images below. In the first image, the electronic lock is inverted and the rest is normal. Here is another image. A layer mask hides the left side of the Eiffel tower and reveals the texts underneath it. That’s it! I hope this tutorial helps you understand how to invert color in Photoshop better.
One way to achieve the desired effect is to use a combination of layer blending modes and adjustment layers in Photoshop or a similar image editing software. Here's a step-by-step guide:
- Open your logo image in Photoshop.
- Duplicate the layer by pressing Ctrl+J (Windows) or Command+J (Mac).
- Change the blending mode of the duplicate layer to "Screen". This will lighten the image and make the blue background more prominent.
- Add a new adjustment layer by clicking on the "Create new fill or adjustment layer" button at the bottom of the Layers panel and choose "Invert". This will invert the colors of the entire image, including the blue and white areas.
- Clip the adjustment layer to the duplicate layer by holding down Alt (Windows) or Option (Mac) and clicking between the adjustment layer and the duplicate layer in the Layers panel. This will apply the adjustment layer only to the duplicate layer and not affect the original.
- Add another adjustment layer, this time choosing "Levels". Use the sliders to adjust the brightness and contrast of the image until the blue detail matches the tone and brightness of the original white detail.
- Finally, add a new layer at the bottom of the layer stack and fill it with white using the Paint Bucket tool.
Inverting a selection in Photoshop can be a powerful technique to refine your image editing. In this tutorial, we will explore the simple steps to quickly invert selections in Photoshop. First, you need to create a selection. After creating the selection, go to the top menu bar in Photoshop and choose "Select" > "Inverse". After creating the selection, simply press Shift + Ctrl + I (Windows) or Shift + Command + I (Mac) to invert the selection. When you have a selection in Photoshop, you can simply move your mouse outside the selected area. At this point, the area outside the selection will be displayed in a light purple color. If you're unable to see the light purple area and use this feature, it may be because you have an older version of Photoshop.
In the realm of digital art and design, sometimes it's the unexpected that truly captivates and inspires. In this tutorial, we'll guide you through the simple yet powerful process of how to invert colors in Photoshop. The exact opposite of any color can be found directly across from it on the color wheel. When you invert a color in Photoshop, the software automatically replaces each color with its complementary color from the color wheel. Color inversion isn't just a fun trick. It's a powerful tool with a range of applications across various fields.
Begin by launching Adobe Photoshop. It's always a good idea to work on a duplicate layer when making significant changes. To duplicate your layer, go to the Layers panel (usually on the right side of the screen), right-click on the Background layer, and select Duplicate Layer. With the duplicate layer selected, go to the top menu and click on Image > Adjustments > Invert. Alternatively, you can use the shortcut Ctrl+I on Windows or Command+I on Mac. While the basic inversion process is simple, there's plenty of room for creativity in the fine-tuning stage. You can adjust the opacity of your inverted layer to create a blend of the original and inverted colors. Once you're satisfied with your image, don't forget to save it.
Selective Color Inversion: Instead of inverting the entire image, you can select specific areas for color inversion. Layer Blending Modes: Experiment with different blending modes for your inverted layer. Adjustment Layers: Instead of applying adjustments directly to your image layer, use adjustment layers. And that's it! You've just learned how to invert colors in Photoshop, from the basics to the more advanced techniques.
Color inversion traces its roots to analog photography. With modern digital photography, on the other hand, the main reason to invert colors is to create a fun aesthetic. When you invert a black-and-white photo, the white pixels become black pixels and vice versa. But if you invert a color image, the resulting photo will have a flipped color scheme. Photoshop will flip every color to its opposite on the RGB or CMYK color wheel. Inverted photos show an image of the world, but in a totally unexpected way. This makes them perfect for abstract photography, photo collages, and fine art. You can also use the Invert tool in Photoshop to transform your black-and-white film negatives into recognizable photos. With this process, you can adjust a photo like you would in the darkroom, but without all the chemicals. You can invert colors in Photoshop for endless creative purposes.
To add a new layer, click into the Layers Panel, and then choose Invert from the drop-down menu. You can also create this window by choosing Layer › New Adjustment Layer › Invert from the top menu bar. Simply inverting the photo can make the colors look flat. To fix this, go to Layer › New Adjustment Layer › Levels. From there, you can adjust the Levels sliders to add dimension. View your histogram to get a sense of your full tonal range. Move your Shadows, Midtones, and Highlights sliders to add the final adjustments to your photo. Color inversion is a simple, fun way to create unique images, but you can also combine effects to make something truly unexpected. Or you can swap the colors in your photos and then invert the images. This will make your inverted colors appear even more mysterious.