Tools and methods I use for interface animations, including Rive. We’ll also review an older project to highlight what to avoid and what works better.
Principles of animation in UI
When it comes to animations, they should be clear and unobtrusive, providing smooth transitions between object states without interfering with the main task. The main principle: animations should be used wisely to support functionality, not hinder it.
Animation should help solve the task and support the user’s journey, bringing static and flat transitions to life with smooth animation. There are moments when non-functional elements can enhance user experience, like “easter eggs,” which can add excitement to using the app. These considerations are crucial when developing animations and interactions.
Choosing a tool for animation work
As a product designer, your choice might be quite limited, consisting of one or two tools for creating animations. I’ve experimented with the most popular tools such as Protopie, After Effects, Rive, Principle, and I can say that they are all quite similar in functionality.
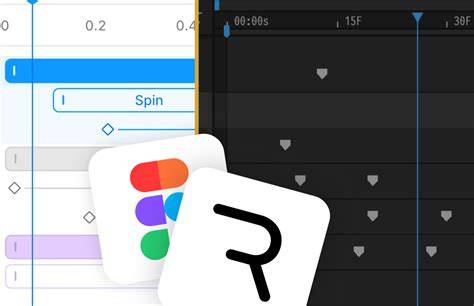
Figma Motion adds an Animate Mode directly inside Figma Design, offering keyframes, easing curves, a work area, loop modes, and an origin point per object. There’s also an AI agent that can generate full animation sequences from prompts. One key distinction: a Figma Motion export is a finished file, similar to a video, while Rive enables runtime interactivity and data binding.
Figma versus Rive for animations
Figma is suitable for quick, board-level animations and exports as MP4, WebM, GIF, or animated SVG. However, Figma Motion animations do not support data binding or complex interactivity, and they operate on a single timeline per artboard. Rive, by contrast, provides state machines, multiple timelines, constraints, bones, and a scripting layer for live interactivity and data-driven animation.
Rive’s state machine is what ships. Rigging and bones enable complex character animations without redrawing every keyframe. Constraints let objects respond to other objects or user input, for example, an eye following the cursor or a limb maintaining its length as it rotates. Multiple timelines per artboard support idle, walk, run, blink, and other states, with a state machine deciding which plays.
Importing from Figma to Rive: the practical workflow
Transferring a layout from Figma to Rive is simple. Select the frame, Edit → Copy as → Copy as SVG, then open Rive, Ctrl+V. Go to the Assets tab and transfer the file to the layout. The layout should be prepared as shapes in advance; images can be added later.
There is a faster way to move assets between the two tools: Copy in Figma, paste directly into Rive. If you copy a PNG, Rive creates a new Artboard sized to fit the image and drops the asset inside automatically. If you copy an SVG, Rive adds the SVG to the Assets panel, preserving full layer structure and keeping shapes editable. This layer preservation is the real win.
Setting up timelines and states in Rive
I created timelines for each button state: hover, default state, and transition. In general, the logic is that each state corresponds to its own timeline. For each timeline, you can choose the playback mode or set a specific playback area with Work Area mode.
In a separate artboard, I created an icon animation with its own timeline and a state machine, then added the resulting animation to the main artboard using the Nested artboard tool. A small glow on hover was added for both dark and light versions. To ensure the system recognizes movement, I attached a Transform element in the Constraints section to the blur layer after creating a Target shape.
Interactivity through the state machine
In the state machine, in the Listeners column, I created an action and selected the Pointer move mode, which reacts to mouse movement and starts the animation (timeline).
Next, the resulting timelines need to be connected in the State machine. I create triggers in the Inputs column, which include three types: Number, Boolean, and Trigger.
Actions are assigned to each trigger. Targets specify the interactive area (heatbox in my case). Interaction methods include clicking, hovering, and pointer move. Each trigger defines a condition to enter a timeline, and transitions connect timelines as nodes. Exits also require conditions and boolean values.
Additional tools and data for animations
In After Effects, Bodymovin can export a JSON file based on the composition. For Rive, you can attach parameters and descriptions: Trigger, Duration, and Interpolation (easing). All this information and more can be found in your Rive source files.
Rive supports scripting (Lua-based) with an AI agent that can write scripts. Figma Motion’s agent can generate full animation sequences from prompts. Rive’s scripting can create dynamic effects like falling snow particles or other runtime behaviors, while Figma Motion focuses on design-time animation on artboards.
Practical examples and recent directions
Recently, I’ve tried to simplify interfaces and focus on how certain interactions evoke emotions in users. For example, a smooth bank transfer flow that keeps users in the moment, or a scroll animation that reveals NFT details without distracting from the main image. The aim is to make static screens feel more alive while preserving focus.
For importing assets, a common approach is to copy sunglasses from a full character design in Figma and paste into Rive to build reusable components. The Weather Buddy character in a course was built piece by piece this way: copy glasses, paste, name the asset, repeat for hat, face, body.
Tips for effective animation practice
- Avoid overloaded animations where every block and text has its own animation; it can feel like "movement for movement's sake."
- Prefer a simple, readable interaction model with a clear user goal in mind.
- Test animations with different easing curves and reference Material Design principles for curves.
- Use state machines to discuss interactions with developers or product managers for prototyping.
- Keep some animations separate from the main layout to prevent accidental modifications to the final result.
Potential visuals and media to accompany the article
Infographic comparing Figma Motion and Rive features, timelines, state machines, and data binding to help readers grasp differences at a glance.
Rive State Machine Tutorial - All Basics Features Explained
A short video illustrating a basic Rive state machine for a button with idle, hover, and click states, showing how timelines connect to inputs and conditions.
Practical workflow summary
Copy SVG from Figma, paste into Rive, or copy-paste PNG to create a new artboard. Build timelines per state, connect them via a state machine, and assign triggers and conditions. For complex behaviors, use scripting in Rive to drive runtime interactivity, or rely on After Effects for PNG sequences if needed.
When you’re ready to publish or hand off to developers, remember to document triggers, durations, and easing, and consider embedding a mockup with a simple background to showcase the animation in context without altering the final product.
From a designer’s standpoint, the best practice is to keep interactions purposeful, readable, and supportive of the user journey, while using tools like Rive to add responsive, data-driven behavior that transcends static motion.