Photoshop is an amazing piece of software with the power to transform images, but its complexity can be daunting for beginners. As a photographer and designer, you can tailor your workflow to suit your needs, combining techniques, shortcuts, and familiar tools to achieve professional results.
Starting point: raw processing and non-destructive editing
Before diving into edits, I open RAW files in Adobe Camera Raw (ACR) to perform basic adjustments such as exposure, white balance, correcting chromatic aberration and lens distortion. The beauty of this approach is that adjustments remain non-destructive, enabling flexible experimentation as you refine your look.
Foundational techniques you’ll use often
- To save time when you need a copy of a mask from one layer to another adjustment layer; when you’ve used the brush tool to create a mask, simply hold down the Option key on a Mac or CTRL key on a PC, click on the layer mask and drag it to the adjustment layer in question.
- Normally in the Curves adjustment, you adjust points on the curve line which affect the image’s tonal range. The S-shaped curve is a classic tonal tweak for boosting contrast and color saturation. However, if you add a curves adjustment layer, change the blend mode to Soft Light and reduce the Fill down to approximately 55% (the reduction amount will depend entirely on your image & preference), this gives a similar boost to color and contrast.
- Create a separate layer, change the blend mode to Overlay and fill the layer with 50% gray. Name this layer “Dodge and Burn.” The Dodge and Burn tools are a go-to method for making selected areas lighter or darker. Use a soft Brush and set Exposure to between 6-12%. In most cases, leave Range at Midtones. If you overdo it, simply reduce the Opacity on the layer.
- I find the Layer Comps feature invaluable. It provides a useful guide to different editing stages as a before-and-after comparison, helping prevent over-editing.
- Cmd+Shift+Alt+E (Mac) or Ctrl+Alt+Shift+E (PC) creates a merged copy of all visible layers while keeping the original layers intact.
- Under File>Place, you can work with multiple images in the same document. The Patch Tool, enhanced in CS6, can fill using Content-Aware on a new empty layer. Set Adaption to Loose and tick Sample All Layers to preserve edits across layers.
- When resizing or aligning elements across a document with multiple images, the Warp tool is excellent for fine-tuning an element, especially in composites.
- Zooming for retouching can reach 300% or more. Open another window for the same document via Window>Arrange>New Window for [filename].PSD and keep it at 25% (or fit to window) to reference edits across views.
Understanding layers, masks, and non-destructive design
Photoshop is a pixel editor, meaning it alters the image’s pixels, so you’ll often rely on layers to edit non-destructively. Each element you add-such as text or photos-can exist on its own layer, enabling you to turn layers on and off or blend them in different ways. When you add text with the Type tool, the text becomes its own layer, making it easy to adjust its appearance without altering the underlying image.
Layers can behave like a burger: some layers are opaque (the bun), others transparent (letting fillings show through). Give layers descriptive names so you can manage complex composites more efficiently.
Creative tools and effects: filters, adjustments, and more
Photoshop offers a wide array of filters and effects that can be combined to create unique looks. When applying filters, avoid overloading the image with too many effects that compete with each other, as this can produce a muddy result. Experiment with different combinations to discover what enhances the image without overpowering its original character.
Filters and adjustments can be used for both artistic effects and practical enhancements. For example, you can use colorize adjustments to shift hues, Liquify to morph shapes, or posterize to create a cartoon-like transformation. RGB channels allow you to separate and manipulate color channels for stylized color effects reminiscent of older display technologies.
Practical applications for business and personal projects
Photoshop is not only for photo retouching; it’s a versatile tool for varied projects. Create infographics and flat mockups to communicate information, design professional logos, or craft posters for events. Photoshop is also well suited for preparing marketing materials, where layered compositions help you maintain consistent branding across different formats.
For personal use, you can rejuvenate old photos, perform double-exposure composites, or combine multiple images to tell a story. With the right techniques, you can transform archival photos into striking modern graphics or create striking announcements and cards for holidays, weddings, or birthdays.
Learning and ongoing workflow improvements
Photoshop provides a Discover panel with tips, video tutorials, and workflows to help you work smarter. The program also supports a thriving ecosystem of brushes, textures, and fonts, including Adobe Fonts, which can expand typographic options for your projects.
In a typical workflow, you might begin with ACR adjustments in RAW, edit in Photoshop with layers and masks, refine with dodge and burn, apply non-destructive adjustments through smart objects and adjustment layers, and finally finalize with color grading and output sharpening. The flexibility of this approach allows you to tailor the process to your style and client needs.
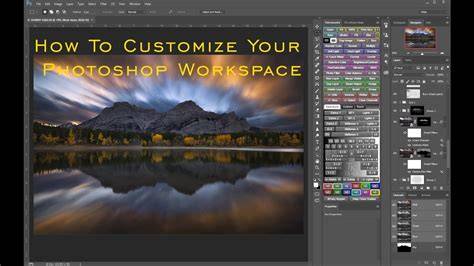
As you gain experience, you’ll discover go-to tools and shortcuts that streamline your editing and empower you to experiment confidently with new looks, layouts, and effects. Whether you’re working on a professional project, a personal creative endeavor, or educational materials, Photoshop enables you to craft visually compelling results.