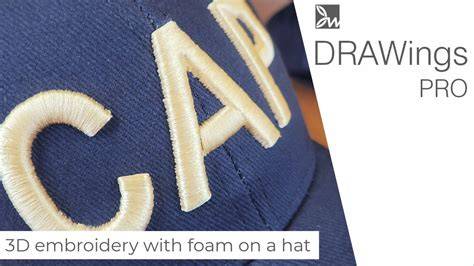
Are you looking to add that extra flair or try something different to your embroidery projects? If you’re new to embroidery or digitizing, you may be wondering what exactly foam embroidery is. Foam embroidery is where your embroidery design or lettering is puffed above the garment by embroidering on or around the foam to elevate your stitches, giving it a 3D effect and feel.
New! 3D Embroidery without Foam? The process may seem intimidating but remember to have fun with it. It was one of the most challenging forms of digitizing I’ve ever had to master. It’s not natural to stick a foreign object under an embroidery machine while it’s running. So, I did a foam piece that, to this day, I think is one of the best to have ever been created. It’s hard to believe that I digitized that design over 20 years ago!
I remember when we ran it on the 24-head Tajima machine it was like embroidery magic when it was done. The reason why? I used three pieces of 2mm foam and built up the design dimensionally. The eyes are set back right onto the surface material of the hat, then building it up 2mm, then 4mm, and finally up to 6mm which is just the dog’s jowls, brows, and top of his ears. Two other things I’d like to mention about the process. We only ever did one run on the machine. Only 24 of these hats are in existence.
The reason why is, when you put 6mm of a foreign substance under the needle of a machine, it sounds like a rocket ship taking off to the moon. Second is, this design was done as a panel program. Many years ago, baseball hats were manufactured in North America; sadly, this is no longer the case. At that time, we worked with the manufacturers, so the cap peak and crown were sent to us before they were constructed.
- Did you know there’s now an easier way to create stunning 3D embroidery designs that doesn’t require foam?
Due to the nature of 3D foam, we highly suggest only using foam with embroidery machine designs specifically digitized for their use. When choosing your desired embroidery design, you want to make sure the 3D foam embroidery designs you choose has a perforated border. You can think of it like baking cookies. If you have a cookie-cutter that has a little notch out of it when you put it into the dough and pull that dough away, it’s not going to pull away cleanly-same idea with foam embroidery.
Please note: 3D puffy foam embroidery should only be incorporated with designs that have been digitized specifically for the foam process. If you’re embroidering 3D foam onto hats, I would suggest using a tear-away stabilizer. Because it’s a hat and doesn’t have much flexibility, it’s easiest to tear the stabilizer away (hence the name). Hats are also generally not laundered much, which helps with the longevity of the foam. If you’re using 3D foam on any wearable item, I would suggest using cutaway mesh.
Stop the machine-Once all regular embroidery colors are completed, your color information sheet will give you a suggested thread color and say the word “foam” after it. Lay the foam-At this point, you will lay the foam down within the areas to be embroidered. Done!
If you’re like most embroiderers, you love to get creative and make projects but know there is still so much more you can do with your machine. Either way, you’re not alone. We’ve heard this a ton. If you’re ready to learn some new eye-catching embroidery techniques that’ll make your future projects stand out & impress, this course is for you! This course includes follow-along video tutorials, printable PDFs, and beautiful embroidery designs to follow along with so you can sew each technique yourself. The best part? Ready to learn 14 popular techniques to skyrocket your creative potential with machine embroidery? Check out our Fun Effects Embroidery Course.
Now that you know the steps involved in embroidering 3d puff designs, follow the tutorial instructions listed below to create your very own beautiful 3D foam embroidery wedding tag! The theory application listed here can be applied to other 3D foam embroidery designs. More of a visual learner? We’ve got you covered.
Practical steps and best practices for 3D foam embroidery
Step 4: Fold your fabric in half; and make sure the shiny side is faces up on both sides. Step 6: Remove your hoop from the machine. Step 7: Fold a piece of ribbon and place it at the top of the heart. Step 9: Cut away any excess ribbon. Step 11: Switch your bobbin color with the same thread color you want to use for the heart’s outline. Step 12: Place your 3D foam on top of the design and run the tack down and satin stitch. Step 14: Cut the excess stabilizer. Step 15: Remove the wet and gone stabilizer by placing it in warm water. Step 16: Finished!
If you were hoping I would explain all the properties of foam embroidery and give you a foolproof formula to digitize foam flawlessly, you might as well save your energy for a better cause. To me, “Foam” is the four-letter “F” word of the embroidery industry. Much like its literary equivalent, it should not be used lightly and only when you really deem it necessary. Remember that if you know little, little is expected of you.
There are a few things to do when digitizing 3D foam embroidery. Finding a good source for foam that stitches well is your first priority. When I first started 3D foam embroidery designs, we were going through so much of the stuff I started sourcing it myself. The end result was a “not open to the public” craft warehouse outlet where I bought foam by the case, at a fraction of the price. Next, evaluate your designs and troubleshoot your artwork before you begin digitizing. This step will save you a lot of grief.
Foam works best on large columned objects and text. Like any technique in digitizing, it’s only by making repetitive mistakes that skills are refined. Only with foam, you need to add more than the usual frustration into the equation! If I’m speaking to a group regarding foam, I tell them that you better be prepared to digitize the design and then edit it at least two or three times before you’re happy with the results.
The following brief step-by-step foam application - on a cap, in this example - should help get you started in understanding this potentially tricky process. Ok, let’s get down to business.
P.S. Looking for the most effective way to learn 3D foam digitizing and start creating your own 3D foam-friendly designs? Step 1. Digitize the regular embroidered elements of the design first, laying down the filled areas and the white lettering as you normally would. Once you finish these elements, program a stop at the top of your embroidered field. This allows you to lay down the foam while the sewing head is out of the way. Step 2. Before placing the foam down, give it a quick shot of adhesive spray to lessen movement when tacking down. Step 3. Using a manual stitch, I will usually tack down the design moving inside out. Step 4. Once you tack down the “Z” you need to carefully apply underlay about .2mm away from the outside column. Step 5. With foam, you not only have to worry about the primary column, but you also need to “cut” the ends of your columns. This will give you a clean cut when you remove the foam. Step 6. Density is the key to clean foam. Everybody’s software talks slightly different language values, so I’ll try to address it by percentage. If your normal value were 100%, the foam would require 50-40% density, over double the amount of normally needed stitches. A couple of other key things to watch out for are; shorts stitches may need to be modified (increasing the amount of stitches and elongating the short stitches, so there is enough density and coverage in your corners). Overlap your columns where they meet. Foam tends to gap, showing large bits of foam if you don’t overlap. Step 7. Repeat these steps for each letter or element until all your foam areas are done. As you can see, there are many more steps, and precise execution of underlay and columns are critical. If you’ve made it this far, congratulations! As you can see, there are many more steps than regular embroidery requires, and precise execution of underlay and columns is critical. Tearing off and finishing your foam is also a matter of preference. We would steam the panels before tearing off the foam. I’ve also heard of companies using heat guns to try and shrink the foam slightly. Both these methods can only help promote finished quality, so give them a try.
Once the foam was torn off we would have a team of people using pointed but slightly blunt objects to push in the foam wherever needed. One of the most frequent complaints I receive is that there may be a lot of looping on the finished product. A couple of possible solutions if you are experiencing these problems are; your underlay is to close the edge of your column and that your machines need to have the top and bobbin tensions increased. That is the beauty of doing large foam runs; it usually takes about three or four runs to get the bugs worked out. Tensions need to be a little tighter than your usual embroidery to allow for the mass of the foam between the needle bar and the needle plate.
To those of you that I haven’t scared off, working with foam can be very creative and profitable if you are willing to get past the learning curve. There is something to be said for having a reputation for doing a difficult technique well; you can charge for it!
In our 3D foam embroidery digitizing lesson, you’ll learn the process from production to creation -almost like we’ll be holding your hand! We’ll provide you with specific properties and theories to create foam-friendly designs, taking all the guesswork out of the equation. John will also show you his formula, which will become your blueprint for adding dimension to apparel. After this lesson, you’ll be creating clean results and be proud to show off your work!
Product highlights: Puff Stuff and 3D foam systems
Introducing Puff Stuff! Introducing Embroidery Legacy’s “Puff Stuff”! - Make ANY Embroidery Design Grab Attention with Dimension! Puff Stuff is a game-changer as it can be placed under any embroidery design like a topper. Yes, you read that right, ANY design. Usually, when buying or creating embroidery designs specifically digitized for puffy foam, the stitch count is almost doubled, and there are more jumps and trims than when using standard designs. Using Puff Stuff on your regular designs will still give your embroidery dimension while also using less run time on your machine.
Puff Stuff is great for smaller lettering or to accent finer details as it can be used with a variety of stitch types and lengths. Things can’t be this easy, can they? Using Puff Stuff is actually super simple! Simply place it underneath your design, embroider, rinse it under warm water, and let it dry. Experience your own embroidery magic using Puff Stuff by clicking here.
Note: This article discusses 3D foam embroidery and related digitizing considerations, including practical tips and historical context of foam use in hats and apparel.
Using puffy embroidery foam is a great way to elevate your stitches, giving your design a 3D effect and feel. Our how-to-use 3D foam embroidery tutorial should give you a look at how easy it is to use foam within your designs. Want to digitize your own custom 3D foam embroidery designs? Although we’ve gone over briefly how to digitize using the foam technique, we want you to have the best results, and watching our 3D Foam Embroidery Digitizing Lesson will do just that! Or to still get 3D dimensional embroidery results without having to make adjustments, don’t forget to try our game-changer product Puff Stuff!
Hopefully this tutorial has helped you better understand a bit more about embroidering with foam. Remember to have fun learning this new embroidery technique. seww puff designs every day. Stitches to create a raised, three-dimensional effect. No auto-digitizing. Most 3D puff designs completed within 2-4 hours. Review your digital proof before paying. Bold, simple designs with clean lines work best. Thin lettering, fine details, and gradients don't translate well to 3D puff. 3mm foam is standard for most cap applications. 6mm foam gives a more dramatic raised effect but requires more careful handling. Yes - but it's not a simple conversion. A 3D puff file requires completely different stitch settings, density, and underlay compared to a flat design. 3D puff digitizing is priced the same as standard digitizing - $1.50 per 1,000 stitches, starting at $7.50.
| Topic | Key Points |
|---|---|
| Stitching approach | Satin fill, no inner stitches, density adjustments for foam, capping edges |
| Foam specs | 2mm, 3mm, 6mm options; perforated borders; tear-away vs cutaway stabilizers |
| Materials | Commercial foam vs craft foam; thread types; fabrics |
| Workflow | Digitize regular elements first, stop at top, apply foam, tack down, satin stitch, remove foam |
Table of Contents
Key points: Why Satin Fill? Stitch Spacing No Underlays Digitizing Tack Down Stitches Capping Matching Foam Color Embroidering on Puffy Foam FAQs
The broader landscape: software and professional services
The definitive choice when selecting embroidery software for your home embroidery business. Puffy foam is commonly used to achieve 3D like raised embroidery. It is very popular for logos on caps and backpacks commercially, but as you can see in the tulip design I created for this article, you can also use it in decorative machine embroidery to give your design an extra dimension. Digitizing for puffy foam might be a bit more technical that your everyday digitizing, but if you make sure you follow a few rules, it is actually not that complicated. It can easily done with Hatch Embroidery Digitizer.
Key points: Puffy foam embroidery is always done with Satin fill; Stitch spacing must be set at 0.16 mm; No underlays used; Tack down stitches are added to hold the foam in place; Capping the edges to cover the edges and to stop the thread unraveling is necessary; Match foam color to thread color for best results; Loosen top thread when stitching out design.
Design considerations and equipment tips
The way puff foam works is that as the needle stitches along narrow objects, it cuts the foam with every penetration point. The foam should not be pushed down with stitches within the object. Satin fill is the only fill that has no stitches inside the object. The objects in your design should not be much wider than 7 mm. If wider, turn Auto split off to avoid stitches in the middle. The default stitch spacing in many softwares is 0.36 mm, which is too high for puffy foam; use 0.16 mm for proper penetration points.
Hoop your fabric and stabilizer as usual. Cut a piece of foam to fit your hoop and float it on the top of the fabric. Use adhesive spray on the corners to hold the foam in place, and loosen the top thread on your embroidery machine to ensure that the stitching does not push the foam down. After embroidering, gently pull the foam away from your embroidery design.
Free Standing 3D Foam - Machine Embroidery
3D puff digitizing is priced the same as standard digitizing-$1.50 per 1,000 stitches, starting at $7.50. Crafting bold logos with padding and dimensionality can be highly valuable for branding on caps or jackets. 3D puff digitizing requires specialized density, underlays, and tack-down knowledge to avoid loose edges and foam remnants.
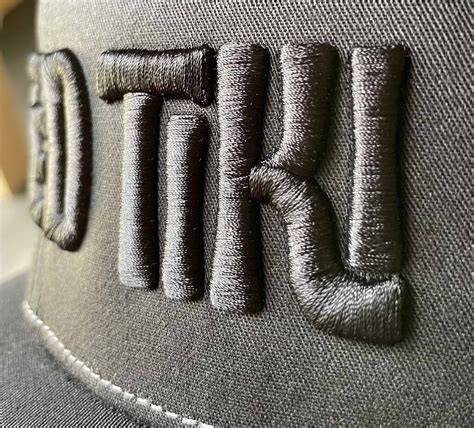
Mastering 3D puff embroidery takes practice, but with the right materials, digitizing techniques, and machine settings, you can achieve stunning results. Whether you’re adding bold branding to hats or enhancing apparel with raised designs, 3D puff embroidery is a great way to create eye-catching, high-quality embroidery pieces. The key to achieving the perfect 3D puff design starts with expert digitizing. At PRO digitizing®, we specialize in precision digitizing services tailored for 3D puff embroidery. Our team ensures the right stitch density, underlays, and settings to help you get flawless results every time. Don’t waste time struggling with complex digitizing-let us handle it for you! Send us your design today!
tags: #3d #puff #embroidery #digitizing