There’s a real art to making, editing and managing actions, which you’ll develop over time. Photoshop actions are a series of pre-recorded commands that the software can repeatedly apply to any number of images. Think of a Photoshop action like a recipe for a tasty cake. You have all the instructions and ingredients, but instead of doing everything yourself, you give Photoshop the recipe (the action), and the program does everything for you.
Foundations: Sets, Actions, and the Panel
All actions have to exist in Sets. You can’t create a new action without creating a new set first, or choosing an existing set in which it can reside. The sets are what you save to your hard drive. Don’t forget to save any action sets you make, because Photoshop won’t save them for you. Here you can see the various sets of actions in my panel. And now I’ve opened up one of the steps to see the settings used.
When you want to run an action, simply click on an entry from the “Actions” panel, and hit the play button. Please be aware that you have to select an action and not a folder. Actions can only exist within a set. Double-click on a set (or choose Set Options from the panel menu) to change its name.
To record an action, you first have to open up the Actions panel. Name your folder whatever you like - I’ll write “Chris Tutorial” in this case. You’ll get a pop-up window that will ask you to name the action. When we press “record,” Photoshop will start memorizing our steps and actions. One thing you should know is that the recording isn’t time-dependent. You can spend as much time as you want on your editing process.
Understanding the Columns: What to Toggle and Why
The first column is full of ticks, and those ticks are always on, unless you deliberately turn them off. If you’d like to run an action without a certain step, you could completely delete the step using the little Trash Can down the bottom, but that might be a bit too permanent for your taste. Notice that when you turn off a tick in an individual step, the tick for the action itself can turn red.
The second column contains tiny square dialog box icons. This is the column that you really need to know about. If you add a little black box icon to a step, it will stop to allow you to tweak it. The red box icon that appears beside the name of the action denotes that there is something happening with one of the steps inside. This column is critical for exquisite control of your actions.
Modal and Dialog Control: When Steps Pause for Tweaks
The modal control is used to enable/disable a command's dialog; hence, it’s only available for commands that have an associated dialog. If enabled, a small dialog icon appears next to the command, and the associated dialog is displayed for that command during action playback. Enabling or disabling the modal control for a set toggles all dialogs for all actions within the set.
By default the Actions panel appears in List View Mode. Button Mode turns each action into a button displaying the name, color and keyboard shortcut assigned to it in the Action Options dialog. To turn Button Mode off and return to List View Mode, simply choose Button Mode again from the panel menu. Button Mode is convenient, but you can’t create, edit or modify actions while in this mode.
Recording, Inserting, and Editing Actions
To record an action, you start by opening the Actions panel, then press the Record button. If an action is selected, new commands are appended to the end of the action; if a step is selected, new commands are inserted after the current step. You may re-record parameters for a command by double-clicking on its associated action step to reveal the command dialog for new values.
You can add extra steps in your action in several ways: insert a menu item from the flyout menu or re-record an existing step. For example, if you decide you didn’t like a specific step, you can replace it by choosing that step and selecting Record Again from the panel menu. After recording, press Stop to finish the recording session.
Insert Path is available when a path or shape is selected; this inserts the selected path into the current action as a series of anchor and handle coordinates. You can rename actions or sets via the Set Options/Action Options commands, or change their function key or Button Mode color as needed. Assigning a keyboard shortcut is especially powerful for running frequently used commands quickly.
Practical Scenarios: Common Workflows with Actions
When you edit an image in Photoshop, you’ll likely perform a series of steps to achieve the desired look. If you have multiple images requiring the same edits, actions save time and ensure consistency. You can create actions to resize, adjust contrast and saturation, apply effects, or perform more complex sequences like a symmetrical transformation across layers.
For a basic practical example, you might record a Layer Properties rename action. You’d create a new set, name the action, insert the Layer » Layer Properties item, and set a keyboard shortcut such as F2. Then you can apply this action to rename layers in bulk or on demand, after loading a document and its layers.
To share an action, use the menu in the top right of the Actions panel; ensure you’ve chosen the correct action by verifying the file name. You can save actions as sets, and you can save all actions as a text file by holding Alt/Opt while saving actions. You can also save an action as a Droplet using the Create Droplet command, or load existing action sets via Load Actions.
Extending Your Toolkit: Advanced Tips
As you gain experience, you’ll learn to organize actions by creating subfolders within the Actions folder to keep things tidy. You can place a tilde (~) at the beginning of an action’s filename or subfolder to disable them without deleting. If you have a large collection of actions, cleaning up unused items helps keep the panel responsive and reduces confusion.
Some users explore “Suggested actions” and real-time previews in newer Photoshop builds, where Photoshop analyzes images and offers action suggestions with live previews on your image. You can browse installed actions, including your own, to see what works best for a given image.
Operational Essentials: Saving, Loading, and Managing Actions
Load Actions allows you to load an existing action set. Although the contents of the Actions panel are remembered from one session to the next, they’re not actually saved until you physically save them using the Save Actions command. Also, note that you can’t save individual actions-only sets. If you want to save a single action, place it into its own set.
When you’re starting a new workflow, consider creating a dedicated folder for your custom actions. This not only keeps things organized but also makes it easier to locate and share actions with others. You can also create stops within actions to insert informative messages for other users about what the action does and what to expect.
Common Commands and Shortcuts to Remember
- Record: begin recording a new action or add commands to an existing action.
- Stop: finish recording or playback.
- Play: execute the selected action or from the current step.
- Create New Set: organize actions into sets.
- Create New Action: add a new action to a set, with optional keyboard shortcut and color.
- Delete: remove a selected set, action, or command with a confirmation dialog.
- Save Actions: save all actions to disk (sets only).
- Load Actions: load a previously saved action set.
- Insert Menu Item: add commands at a chosen point in an action.
- Record Again: rerecord parameters for a command when needed.
- Pause For Audio Annotation: optional pause during playback for audio notes.
Готовые примеры и советы по внедрению
To keep things neatly organized, let’s create a folder for our custom actions. Now everything you do in Photoshop is being recorded. By default, once your action is created all the steps will be expanded. You can remove unnecessary steps you took by dragging a step to the trash can icon in the Actions panel. You’ll also notice that there’s a box next to the checkmark icon that’s on the left of each step. If you click and activate that box, it’ll turn on the dialog for that step. That means that if there’s a step that opens a dialog where values can be selected, the action will stop at that step when the dialog for that step opens to let you enter values that work for the particular image you’re working on.
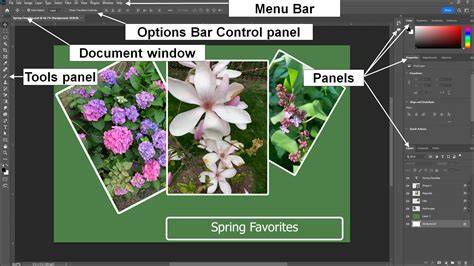
Photoshop Actions Tutorial (Create & Edit Actions!)
That’s enough theory. Time for something practical. How many times have you double-clicked on a layer to rename it? You might create a tailored action to rename layers via the Layer Properties dialog, including a dialog stop for tailored inputs. And you can test on multiple documents to ensure the action behaves correctly across images.
For broader efficiency, you can use actions to apply consistent edits across large batches of images, or to generate predictable results for retouching steps you perform routinely. The combination of recording, editing, and organizing actions empowers you to automate repetitive tasks, maintain consistency, and save significant time in your Photoshop workflow.