For 13 years of working as a wedding photographer, I realized that poor album layout can completely kill a great shooting. And I can’t see gorgeous photos in a photobook with misarable frames, decorative elements and pigeons. Therefore, I suggest you download free photo album templates and use them as you wish. If you link to my article or share it with friends, it will inspire me to write even more useful posts. I spent 3 days on creating these templates for you, so any kind of gratitude will really warm my soul :)
Basic rules on creating a photo album can guide you toward a cohesive and elegant book. The emphasis should be on photography, not on busy frames or under layers that can look pathetic in unskillful hands. Keep track of the chronology of events, ensuring a readable flow that mirrors the wedding day. Do not overload the turn; if you stick a lot of photos, the viewer's attention will be distracted. Exception is: details, similar reportage moments, pictures of one action from the same point. There is only one main photo on the turn! Can be one additional, or no at all. Diversity is our everything. Less color - less problems. Try to limit the color scheme not only in the spread, but throughout the whole book. Tinting ideally helps to smooth out all the color differences. Do not be afraid of empty space. Don't aim to fill the entire spread with photos. Don't forget to leave space for cutting. Each lab has its own rules, in average it is up to 0,5 inches from the edge. Do not place important elements like faces, text, people on the fold and edges. One deserving photo per turn is also very beautiful. Do not be afraid of it. I implore you!
Template format description and practical usage are essential aspects when designing an album. Templates were created for a 30x30cm (12×12 inches) photo book, which is a universal and convenient size. The trim line was not considered, since each lab has its own requirements. You need to resize the canvas using the command Image-> Canvas Size by yourself. If you need templates for other formats, let me know in the comments. If there is a big demand, I will make and upload the templates for the most required format. In all examples, black photographs are horizontal, gray photographs are vertical. But this is not a dogma.
How to use my templates
To maximize impact, follow these steps when applying the templates to your wedding photos. Begin with selecting a main image for each spread, keeping one strong photo per turn as a focal point. Maintain a restrained color palette across the book to ensure visual harmony. Avoid overcrowding; use white space to let elements breathe and to accommodate potential trimming. Be mindful of image orientation and avoid mixing black-and-white photos with color on the same turn. Use subtle tinting to balance exposure differences across the album. Pay attention to the chronology so that the story of the day flows naturally from page to page. Do not place faces or important elements on the fold or near the edges. Finally, keep frames and decorative elements minimal to preserve the emphasis on photography itself.
Free photo album templates
Downloading free templates can save time and help you apply proven layouts. I spent 3 days creating these templates for you, so any kind of gratitude will really warm my soul. If you link to my article or share it with friends, it will inspire me to write even more useful posts. All templates are designed with a 30x30cm book in mind, and you can resize the canvas as needed using the dedicated command in Photoshop. When adapting to other formats, communicate your requests in the comments to gauge demand.
Leather photo book example
A leather photo book can benefit from restrained layout principles: one primary image per spread, minimal frames, and careful use of negative space. This approach allows the texture and material of the leather cover to complement the photographs rather than compete with them. The template guidance applies equally to leather-bound albums, where subtlety and balance enhance perceived quality.
Do not overload the turn. If you stick a lot of photos, the viewer's attention will be distracted. Exception is: details, similar reportage moments, pictures of one action from the same point. There is only one main photo on the turn! Can be one additional, or no at all. Diversity is our everything. Less color - less problems. Try to limit the color scheme not only in the spread, but throughout the whole book. Tinting ideally helps to smooth out all the color differences. Do not be afraid of empty space. Don't aim to fill the entire spread with photos. Don't forget to leave space for cutting. Each lab has its own rules, in average it is up to 0,5 inches from the edge. Do not place important elements like faces, text, people on the fold and edges. One deserving photo per turn is also very beautiful. Do not be afraid of it. I implore you!
There is a practical border between artistic decisions and technical constraints. The last point remains: templates format. All templates were created for a 30x30cm (12×12 inches) photo book. The trim line was not considered, since each lab has its own requirements. You need to resize the canvas using the command Image-> Canvas Size by yourself. If you need templates for other formats, let me know in the comments. If there is a big demand, I will make and upload the templates for the most required format. In all examples, black photographs are horizontal, gray photographs are vertical. But this is not a dogma.
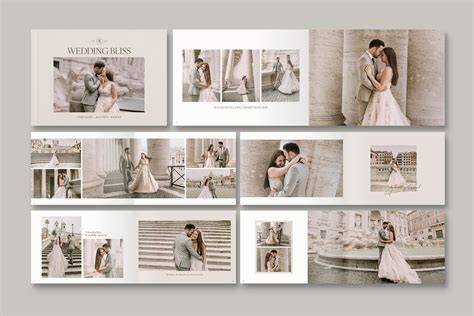
Finally, the goal is to have a clean, focused album where each turn earns its place. There is no need for excessive frames or heavy decorative elements; the emphasis should remain on the photography.