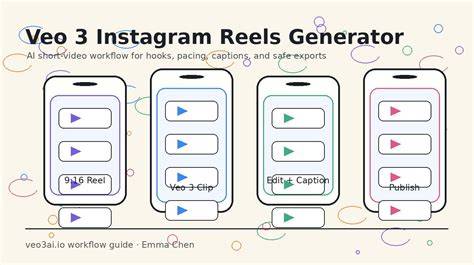
Exporting your project correctly in DaVinci Resolve is crucial to preserving the quality, compatibility, and intended use of your video. Whether you’re delivering content for YouTube, Instagram, TV broadcast, or a client project, the right export settings will make all the difference. This guide compiles the most practical, platform-specific settings and tips to help you optimize for Instagram Reels while keeping the workflow efficient.
Starting point and format basics
Go to the Deliver Page. Once your editing is complete, click the "Deliver" tab at the bottom of the interface. This opens DaVinci Resolve’s export workspace. On the left, you’ll see presets for YouTube, Vimeo, Final Cut Pro, and others. You can choose one as a starting point or create a custom export setting. Format: MP4 or MOV are the most common for general distribution. Codec: H.264 is the best balance between quality and file size; H.265 offers better compression; ProRes or DNxHR are better for high-quality, professional use.
Instagram Reels: vertical video considerations
For Instagram Reels, the vertical orientation is essential. Set your timeline resolution to 1080x1920 (vertical). Use H.264 MP4 with a bitrate that preserves quality while remaining manageable for mobile playback. Frame rate should align with your timeline, commonly 30 fps for Reels. Ensure your subject is centered to avoid cropping on different devices and avoid critical content near the edges.
Recommended export settings for Instagram Reels
- Format: MP4
- Codec: H.264
- Resolution: 1080x1920 (vertical) or match your timeline if already vertical
- Frame Rate: 30 fps (or match source)
- Quality/Bitrate: Use a bitrate that balances quality and file size, commonly around 10-15 Mbps for 1080x1920; higher if your content is complex
- Encoding Profile: High
- Audio: AAC, 320 kbps, 48 kHz, stereo
Click “Browse” to choose where your exported file will be saved. If your final delivery requires a different format (vertical, square, ultrawide), you can adjust your project settings accordingly - this guide focuses on optimizing for Instagram Reels while keeping a straightforward workflow.
Pro tips to improve export quality
- Use Render Presets: They save time and reduce errors.
- Check Color Management: Ensure your export color space matches your project settings; Rec.709 is standard for web content.
- Export a Test Clip: Before rendering the entire video, export a short section to verify quality and settings.
- Consider Delivery Requirements: Different platforms compress differently; optimize for vertical mobile playback on Reels.
Other platform-export considerations
For other destinations, such as YouTube or professional delivery, recommended settings can differ. For YouTube, a common approach is MP4 with H.264 at high bitrate (for example, 4K at around 40 Mbps, 1080p at around 15 Mbps), with the resolution and frame rate matching the timeline. For master or archival delivery, MOV with ProRes 422 HQ or DNxHR HQX can preserve maximum quality, but results in larger file sizes.
Frequently asked questions
- How do I export a video in DaVinci Resolve without losing quality? To export without losing quality, use a high-bitrate codec like ProRes 422 HQ or DNxHR HQX, match your project resolution and frame rate, and disable unnecessary compression. For YouTube or online delivery, use H.264 with a high bitrate (e.g., 40 Mbps for 4K).
- What are the best export settings for YouTube in DaVinci Resolve? Format: MP4, Codec: H.264, Resolution: 3840x2160 (4K) or 1920x1080 (1080p), Bitrate: 40 Mbps for 4K, 15 Mbps for 1080p, Frame Rate: Match source, Enable “Restrict to” bitrate for consistent quality.
- How do I export a vertical video for Instagram Reels in DaVinci Resolve? Set your timeline resolution to 1080x1920, use H.264 MP4, bitrate around 10-15 Mbps, and 30 fps. Ensure your subject is centered to avoid cropping on different devices.
- What format is best for exporting a master file in DaVinci Resolve? For archival or professional delivery, export in MOV ProRes 422 HQ or DNxHR HQX. These formats preserve maximum quality and are ideal for future editing or broadcast.
- Why does my exported video look different from my timeline? This can happen due to color space mismatches or incorrect gamma settings. Check your color management settings and ensure you’re exporting in the same color space (e.g., Rec.709 for most web content).