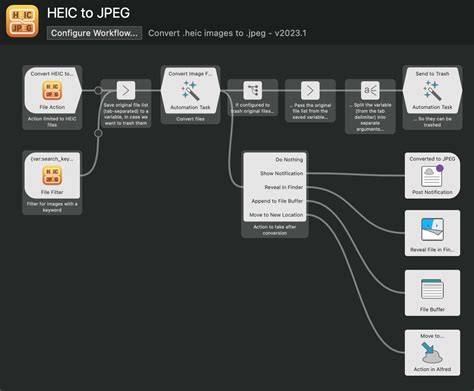
Mac users often encounter HEIC (High-Efficiency Image Container) files as the default format for photos shot on iPhone and stored on Macs. HEIC saves storage space with high image quality, but non-Apple devices and some apps may struggle with compatibility. This guide assembles practical, step-by-step approaches to bulk convert HEIC to JPG on Mac, discusses potential quality changes, and shares tips to streamline the workflow.
HEIC vs JPG: why you might convert
HEIC files are high-efficiency by design, offering strong compression while preserving image quality. The high compression, space-saving format takes up very little storage, while maintaining the quality of your images. HEIC is not universally supported by non-Apple products, browsers, or some editing tools, which motivates bulk conversion to a more universally readable JPG. If you need easy sharing, compatibility, or editing in non-Apple ecosystems, converting to JPG is a solid choice.
Bulk conversion methods on Mac
There are several reliable approaches to bulk convert HEIC to JPG on macOS without converting files one by one in Preview. The following methods use built-in tools, third-party options, or cloud-assisted workflows.
1) Using sips (built-in macOS command line)
Converting a single HEIC image to JPEG via the Terminal is straightforward. For example, you can run: sips -s format jpeg image.HEIC --out image.jpg. To batch convert all HEIC images in a folder, use: sips -s format jpeg *.HEIC --out "./".
Tip: To avoid typing the command each time, you can create a shell alias. Open your ~/.bash_profile (or ~/.zshrc on newer macOS) with nano ~/.bash_profile and add: alias heic2jpg='sips -s format jpeg *.HEIC --out "./"'. Then save and reload the profile. This makes batch conversion a single command.
2) Using Apple Photos (cumbersome for large batches)
Photos can convert HEIC to JPG, but dragging out the original quality or handling many files can be cumbersome, especially for large batches. If you have just a few dozen images, this approach may suffice, but a bulk method is preferable for hundreds of photos.
3) Preview app: selective bulk via export
While you mentioned using Preview for individual conversions, Preview can also export multiple images, but it isn’t the most efficient for hundreds of photos when you need to maintain a quick workflow. Consider it a fallback option if you only need a subset of images converted.
4) Cloud storage apps with built-in conversion
Cloud services like Dropbox can help accelerate bulk conversion indirectly: upload HEICs to the app, which can display and sometimes convert, then download as JPG/PNG. This method is useful when local processing is slow or when you want to keep a cloud-based workflow. Keep in mind that this approach requires uploading and downloading, which may be slower for very large batches depending on your connection.
5) Third-party macOS apps and CLI tools
There are CLI tools and apps that support batch HEIC to JPG conversions, sometimes with more options (preserve metadata, batch naming, quick presets). If you choose a tool, ensure it is reputable and compatible with your macOS version. The CLI sips method is built-in and reliable, with minimal setup required.
Quality considerations when converting HEIC to JPG
JPG compression can result in a slight loss of detail or color fidelity depending on the level of compression used during conversion. In practice, JPG is a lossy format, so a small amount of quality loss is possible, but for many use cases, the difference is negligible. From real-world experience, the image quality after converting HEIC to JPG is often “almost the same” to the original, especially when using reasonable JPEG quality settings. If maximum fidelity matters, consider using PNG for lossless output in certain workflows, or JPEG with higher quality settings.
Practical tips for a smooth bulk conversion
- Batch convert using sips for speed and simplicity: sips -s format jpeg *.HEIC --out "./"
- Set a default export format on macOS if needed, or create a workflow with a script for repeatable results.
- Test a small subset first to verify quality before processing the entire folder.
- If you frequently need to convert, consider creating an alias or short script to reduce repeated typing.
- Be mindful of file naming to avoid overwriting existing JPGs in the destination folder.
Handling PDFs and other formats
HEIC files can store images that may appear in other documents like PDFs. If you need to convert embedded HEIC images within PDFs to JPG, separate extraction and conversion steps are required, since PDF workflows often involve different tooling.
When to choose JPG over HEIC or vice versa
- Choose HEIC when you want higher compression with preserved quality on Apple devices or within Apple ecosystems.
- Choose JPG when sharing broadly, compatibility with non-Apple devices, or easier integration with many browsers and editors is a priority.
Additional considerations
If you’re using cloud storage like Dropbox on your Mac, note that some cloud apps can automatically convert or store as JPG/PNG to improve compatibility, which can save time when sharing. However, direct local batch conversion with sips or a trusted tool generally provides faster, more controllable results without uploading your entire library.