In this guide, we’ll explore how to change your timeline resolution in DaVinci Resolve, why you might want to adjust it, and how to do it using three practical methods. We’ll cover project-level settings, timeline-specific adjustments, and quick changes directly in the Cut page. Whether you’re delivering for YouTube, social media, or cinema, mastering resolution is essential for balancing quality and performance.
Understanding timeline resolution and its impact
Timeline resolution refers to the frame size of the timeline you are working on. It determines the quality and aspect ratio of your final output and can affect how clips look on the timeline if their native resolutions differ. When your timeline resolution differs from your project’s output resolution, Resolve may apply scaling to fit or crop clips. Changing resolution mid-project can alter the appearance of clips, potentially introducing cropping or letterboxing, depending on the scaling options.
Three practical ways to change the timeline resolution
- Change resolution via Project Settings (Master Settings)
Step-by-step: Open Project Settings (gear icon) → Master Settings → Timeline resolution. Choose from presets like 1920x1080 (HD), 3840x2160 (4K), or 1080x1920 (vertical). You can also select Custom Timeline Settings for a specific timeline. After selecting, click Save to apply. If you’ve imported clips with different dimensions, consider reviewing the Image Scaling options to manage mismatches.
- Change resolution on a per-timeline basis (Timeline Settings)
Open the Media Pool, select the desired timeline, then uncheck "Use Project Settings" to unlock timeline options. In Timeline Settings, pick a new resolution (for example 3840x2160 or 1920x1080) and confirm. The new resolution takes effect for that timeline, while other timelines remain unchanged.
- Change resolution from the Cut page presets
Switch to the Cut page and use the Timeline Resolution dropdown in the top-right area of the interface. Pick a preset like 3840x2160, 1920x1080, 1080x1920, or 1080x1080. Creating a new timeline with the selected resolution is automatic, and you can also choose Custom Timeline Settings for a tailored option. These presets provide a fast way to adapt the aspect ratio for social media or other platforms without permuting numbers manually.
How resolution interacts with aspect ratios and scaling
The aspect ratio is the width-to-height proportion of the frame. Common examples include 16:9 (HD and 4K), 9:16 (vertical for mobile), and 1.85:1 or 2.35:1 (cinematic widescreen). When you apply a new timeline resolution, Resolve scales existing clips to fit the new frame. You can choose how this scaling happens in the Format tab under “Mismatched Resolution” with options such as Center Crop with No Resizing, Scale Full Frame with Crop, Scale Entire Image to Fit, and Stretch Frame to All Corners. Each option affects framing differently and may require re-framing or re-positioning of clips.
Tips for handling mixed-resolution footage
- Use "Scale Entire Image to Fit" as the default to preserve as much of the clip as possible, then crop if necessary.
- Enable Transform scaling if you need precise repositioning after changing timeline resolution.
- In the Deliver page, double-check export resolution to ensure it matches the desired final output (e.g., 3840x2160 for 4K delivery).
Vertical video and 9:16 workflow
For vertical content, such as mobile-first social media, use 1080x1920 or 9:16, and ensure your timelines reflect this aspect ratio. If your source footage is widescreen, you’ll likely need to reframe clips using the Inspector’s Transform controls (adjust Scale and Position) while maintaining the new vertical canvas. In some workflows, you may also adjust Image Scaling in Project Settings to optimize how clips fill the vertical frame.
A quick comparison of methods for changing resolution
| Method | Pros | Cons |
|---|---|---|
| Project Settings (Master Settings) | Global change; consistent across timelines; good baseline | Alters all timelines; not ideal for mixed-resolution projects |
| Timeline Settings (per timeline) | Selective; preserves other timelines; good for mixed footage | Requires unlocking from project settings; more steps |
| Cut page presets | Fast; creates a new timeline with preset resolution; user-friendly | Less precise control for complex sequences |
Practical notes and common questions
When you change the timeline resolution, the final output resolution on the Deliver page remains independent unless you explicitly set it there. If you mix footage with different native resolutions, pay attention to the Mismatched Resolution behavior to avoid unexpected scaling artifacts. For best results, set the desired timeline resolution at the start of a project and adjust only when necessary, followed by checks on framing and quality.
If you’re working with long timelines or many clips, a quick way to manage editing efficiency is to use a dedicated control surface like TourBox, which can streamline switching between tasks and applying macro-based aspect ratio changes, especially in the Cut page. This can reduce repetitive actions and keep your editing flow steady.
Summary: choosing the right approach for your project
- For a new project with a straightforward delivery: set the Timeline Resolution in Project Settings to your target (e.g., 3840x2160 for 4K) and start editing.
- For projects with mixed footage: adjust timelines individually via Timeline Settings or the Cut page presets to match the intended final output for each sequence.
- For social media or mobile delivery: use 1080x1920 or 1080x1080 in Cut page presets and reframe wide clips as needed within the vertical frame.
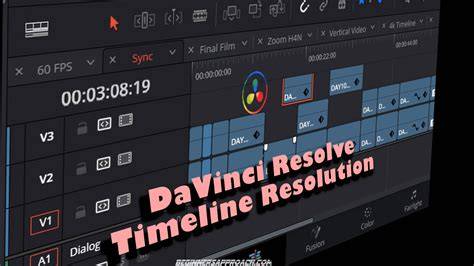
How to Change Timeline Resolution in DaVinci Resolve (Tutorial 2026)
Understanding resolution settings for DaVinci Resolve helps you balance image quality with editing performance. The three primary methods-Project Settings, Timeline Settings, and Cut page presets-cover most workflows. Always verify your final export resolution to ensure consistency with your chosen timeline resolution and aspect ratio.
tags: #change #resolution #davinci #resolve