Sometimes, a beautiful photo is spoiled by a small detail-someone photobombing in the background, an ugly trash can, or a distracting wire. Knowing how to remove objects in Photoshop is one of the most valuable skills for any photo editor, designer, or content creator. Removing elements is not just about making an image look better. It’s also critical in commercial photography, architecture visualization, graphic design, and even historical restoration. Let’s explore exactly how to clean up your pictures easily, using both traditional and new tools in Photoshop.
Why Removing Objects Is So Useful Today
Photographers and retouchers often erase objects to clean up distractions that ruin composition. Brands need clean product photos. Designers want precise graphics for ads and campaigns. Architects polish renders for presentations. Even social media creators use removal to make memes and viral content look slick.
Exclusive Tools of Endless Possibilities in One AI Editor
Explore Now! But how to remove an object in Photoshop and replace it with a background depends on the photo’s complexity, the background texture, and how much control you want. Photoshop offers several instruments-some fast and automatic, others more precise.
Real Use Cases: Who Benefits?
Learning how to get rid of objects in Photoshop isn’t just for photo retouchers. Graphic designers use it to perfect ads, banners, and social posts. Architects clean up renders and remove distracting elements. Historians fix damaged archival photos. Content creators create clean, scroll-stopping images. Marketers ensure their products are the sole focus. If you’re asking, “How do you Photoshop someone out of a picture?”-the answer lies in combining smart selection and fill tools. It’s easier than ever with today’s AI-powered Photoshop.
Tools Recap: When to Use What
- Content-Aware Fill - Medium-large objects, neutral backgrounds; Shortcut L
- Spot Healing Brush Tool - Small defects, blemishes, distractions; Shortcut J
- Clone Stamp Tool - Total control, textures, patterns; Shortcut S
- Patch Tool - Medium areas, texture-heavy surfaces; Shortcut Shift + J
- Remove Tool - Quick, smart object removal; Shortcut Shift + J
- Generative Fill - Creating/removing background elements; no fixed shortcut
- Pen Tool + Mask - Complex selections, precise removal; Steps P, Ctrl/Cmd + Enter, Add Mask
- Sky Replacement - Replacing skies in landscape/portrait shots; Menu only
Quick and Easy Object Removal Tools
These tools are great for small parts or when the background is simple. They’re especially useful for beginners or quick edits.
Content-Aware Fill: This automatic instrument analyzes the surrounding areas and fills in the space of the removed object with matching content.
- Use the Lasso Tool (L) or Quick Selection Tool (W) to outline the object.
- Go to Edit > Content-Aware Fill.
- Adjust the green sampling area as needed. Choose settings: color adaptation, scale, rotation.
- Click OK-Photoshop fills in the components on a new layer.
Use it for: Removing people, cars, signs; Cleaning up building facades; Fixing backgrounds in product or landscape photos.
Erase Tool (Erase/Remove): Quick removal for small parts. Try this to see if it fits your workflow.
Spot Healing Brush Tool: Perfect for small fixes like blemishes or dust.
- Select the Spot Healing Brush Tool (J).
- Adjust brush size to be slightly larger than the object.
- Click or paint over the element. Photoshop fills it in instantly.
Best for: Fixing wrinkles, pimples, tiny distractions; Cleaning old photos; Quick texture blending.
Generative Fill: This AI-powered function replaces or removes objects with realistic results in seconds.
- Select the object using any selection tool.
- Go to Edit > Generative Fill.
- Type a prompt or leave it blank to erase it. Click Generate and pick your result.
Best for: Removing large or complex objects; Replacing backgrounds or empty areas; Expanding images creatively.
More Accurate Object Removal Tools
These methods need more manual input but offer better precision, especially for complex images.
Clone Stamp Tool: Copy one part of an image and paint it over another.
- Open your photo. Select the Clone Stamp Tool (S).
- Hold Alt/Option and click to select the source area.
- Paint over the object to remove it. Change source point as needed to match texture.
Ideal for: Large elements; Repeating patterns; Restoring photo details. When using Clone Stamp, you’ll often be removing an object manually, which gives full control over every pixel.
Patch Tool: Drag a selection and replace it with another area. Photoshop blends the content in.
- Choose Patch Tool (Shift + J to toggle).
- Outline the object. Drag the selection to a clean area.
- Photoshop blends the new content in.
Great for: Removing creases in clothes; Fixing textures like grass or skin; Editing old or damaged photos.
Want a shortcut? Consider the Luminar Neo Plugin for Photoshop, which uses smart AI to speed up these editing workflows.
Advanced Tools for Complex Object Removal
Sometimes, a quick brush isn’t enough. Here are pro-level techniques that help when objects are large or backgrounds are detailed.
- Combine Multiple Tools: e.g., Clone Stamp for edges, then Content-Aware Fill for the middle. Some elements have shadows, overlaps, or complex borders; one tool won’t always suffice.
- Frequency Separation: Originally for skin retouching, this splits texture and color for precise edits. Use when you need to preserve texture while removing objects and want soft blends in skin or background.
- Pen Tool + Layer Mask: Pixel-perfect precision. Use the Pen Tool to outline the object, convert to selection, apply a layer mask to hide it, and then use Content-Aware Fill or other instruments behind the mask. Especially useful for removing people from complex backgrounds.
- Sky Replacement: Not strictly an object removal, but useful if the subject sits against the sky. Go to Edit > Sky Replacement, pick a new sky, and adjust brightness, temperature, and position.
If you’re struggling with background sharpness after editing, here’s a guide on how to easily sharpen your image in Photoshop.
New Feature: The Photoshop Remove Tool
Adobe’s latest Remove Tool simplifies object removal even further. Steps: Select the Remove Tool from the toolbar. Brush over the object. Photoshop automatically deletes and fills the area. Shortcuts: Press J to quickly access healing tools. Keep Shift + J to switch between them until you get to the Remove Tool. Why it’s great: It’s smart, fast, and ideal for most types of objects-especially for those wondering how to remove objects from pictures without much hassle.
Bonus Tips for Smoother Results
- Always work on a new layer: This keeps your original photo untouched.
- Use Layer Masks instead of deleting parts: You can always reverse a mistake.
- Zoom in and out frequently: You’ll spot flaws more easily.
- Blend lighting and shadows: Otherwise, the photo may look unrealistic.
- Use filters: These can help smooth transitions or textures. These tips are especially important when you want to erase a person from a photo without leaving odd shadows or texture mismatches.
Keep Practicing & Stay Updated
Photoshop keeps evolving. You might need to combine old-school methods with new ones. Here’s what you can do: Update Photoshop regularly. Experiment with different methods. Practice on simple images first. Use PSD or TIFF formats to save full quality. If you’re asking how to remove object in Photoshop, remember-there’s no “one right way.” The best results often come from mixing techniques. Takeaway: Whether you’re editing vacation photos or preparing a product ad, knowing how to erase something in Photoshop gives you power and creative freedom. It may seem tricky at first, but with the right tools and a bit of patience, you’ll get clean, professional results every time. From removing wires and blemishes to learning how to remove people from photos-Photoshop has everything you need. If you’ve clicked on this post thinking “I’m not sure I really need to know how to remove objects in my photos” then I’m here to tell you…you do need to know.
As a photographer there will be several times when something small is truly irritating you in your image (a pole in an otherwise perfect background to your subject), or when you can’t control the background at all (oh hey bright orange ropes to outline the beach dunes we can’t cross). Although I am not a huge proponent of changing the original image you took, there are definitely times when removing something small can make a big difference. In this post I will show you how to easily remove objects in Photoshop-without having to really learn how to use Photoshop. Removing Objects in Photoshop Using Content-Aware Fill: Before and After Object Removal. This senior session was great and we found this quite little section right where you walk onto the beach. The back-lighting was stunning, her dress matched perfectly, and everything was great except for that sign, the truck, and that corner of the boardwalk peeking out from the ground. I tried several approaches but ultimately chose to remove them with content aware fill. Here’s a quick walkthrough of how I selected the unwanted objects and removed them using content aware fill.
Want to see this in action? Check out tutorials showing how quickly you can implement this. Before and After Object Removal shows how a beach session was saved by removing distracting ropes; the ropes were there to protect dunes, but the orange color was undesirable for the composition. Knowing how to remove such elements affords more creative freedom while photographing. Camera knowledge and editing capability go hand in hand, and you can compose with confidence knowing you can improve in post-production if necessary.
Additional Resources and Examples
Video and blog posts discuss removing objects in Photoshop, including steps with Content-Aware Fill and practical demonstrations. The content covers comparisons with Lightroom's spot removal tool, notes on sampling areas, and considerations for layers and adjustments. The material emphasizes that Photoshop remains a preferred tool for larger object removal while Lightroom offers speed for quick fixes, and highlights the evolving landscape of AI-powered options.
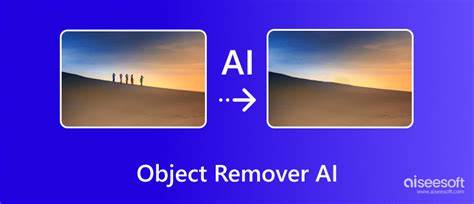
How to Remove Objects in Photoshop [Full Guide 2026]
How to Remove Objects in Photoshop [Full Guide 2026]
From removing wires and distracting elements to replacing skies, the methods span quick automatic fixes to meticulous manual edits. The core idea is to choose the right mix of tools for the given image to achieve natural blends and credible results.