Photoshop lets you add horizontal and vertical text easily to your images. One of the most exciting ways to use type is to wrap it around a path. You can add the type to an open or closed path you’ve drawn with the Pen tool or to a shape such as the rectangle, ellipse or polygon and the Custom Shape tool offers literally hundreds of vector shapes to play with. text and the path remain editable, so you can reshape the path and resize or recolor the text as you want.
Getting started: draw and attach text to a path
1. Draw a path using the Pen tool. 2. Select the Horizontal Type tool from the toolbox and then hover your cursor above the path edge. You’ll see a wavy line appear beneath the I-beam cursor. This tells you that it recognizes the path you’re about to attach the text to. 3. When a tiny, right-facing arrow appears next to your cursor, drag to the left or right to move the text. If your text disappears, that means the space between the start and end points is too small to hold all of your text. 4. 5. 6. 7. The Custom Shape tool offers tons of shapes to play around with. Select the Custom Shape tool from the toolbox. It is hidden under the Rectangle shape tool. On the tool options bar, set the Custom Shape option to Path and on the Shape drop down box, choose a Star shape. 8. Drag out the Star shape, then use the Horizontal Type tool to add some type. 9. When you’re finished, you can hide the path by clicking anywhere on the grey area of the Paths palette.
Adjusting spacing and typography on a path
Adjusting the spacing of your text on a path in Photoshop is quite simple. You can use the Character panel to adjust the tracking, kerning, and leading of your text. Tracking adjusts the spacing between all characters in a selected text, kerning adjusts the space between two characters, and leading adjusts the space between lines of text. To access the Character panel, go to Window > Character. Select your text and adjust the values as needed.
Vertical text on a path
Yes, you can create vertical text on a path in Photoshop. To do this, select the Text tool and click on the path where you want your text to start. Then, in the options bar at the top of the screen, click on the Vertical Type tool. Now, when you type, your text will flow vertically along the path.
Changing direction and editing the path
Changing the direction of your text on a path in Photoshop is straightforward. With your text layer selected, go to the options bar at the top of the screen and click on the ‘Flip’ button. This will reverse the direction of your text along the path. Yes, you can edit the path after you’ve added text to it. To do this, select the Direct Selection tool from the toolbar, then click on the path to select it. You can then click and drag the anchor points to adjust the shape of the path. Your text will automatically adjust to follow the new shape of the path.
Text on closed paths
Can I Add Text to a Closed Path, Like a Circle or an Oval? Adding text to a closed path in Photoshop, like a circle or an oval, is similar to adding text to an open path. First, create your closed path using the Ellipse tool or the Pen tool. Then, select the Text tool, hover over the path until you see the ‘Type on a Path’ icon, and click to start typing. Your text will automatically follow the shape of the closed path.
Fonts, alignment, and effects
Can I Change the Font of My Text on a Path? Yes, you can change the font of your text on a path in Photoshop. To do this, select your text layer, then go to the options bar at the top of the screen. Here, you can choose a new font from the drop-down menu. Your text will automatically update to the new font. How Can I Align My Text to the Center of the Path? Aligning your text to the center of the path in Photoshop is easy. With your text layer selected, go to the Paragraph panel (Window > Paragraph). Here, you can choose to align your text to the left, center, or right of the path. Can I Add a Stroke or a Drop Shadow to My Text on a Path? Yes, you can add a stroke or a drop shadow to your text on a path in Photoshop. To do this, select your text layer, then go to Layer > Layer Style > Stroke or Drop Shadow. Adjust the settings as needed to achieve your desired effect.
From text to shapes and reuse
How Can I Convert My Text on a Path to a Shape? Converting your text on a path to a shape in Photoshop allows you to manipulate it as you would any other shape. To do this, select your text layer, then go to Type > Convert to Shape. Your text will now be a shape layer, and you can edit it using the Direct Selection tool. Can I Save My Text on a Path as a Custom Shape for Future Use? Yes, you can save your text on a path as a custom shape in Photoshop. After converting your text to a shape (Type > Convert to Shape), go to Edit > Define Custom Shape. Give your shape a name, and it will be saved in the Custom Shape Picker for future use.
Practical tips and workflow notes
Jennifer Farley, a designer and instructor, emphasizes practical workflows and demonstrations, including working with circles and paths to create circular typography and ensuring text follows path outlines smoothly. The approach works with both modern Photoshop CC and earlier versions that support Type on a Path, Shape paths, and Custom Shapes. You can use guides, Ellipse Tool with Path mode, and Path Selection tools to precisely place and adjust text along circular or decorative paths. After completing the layout, you can hide the path and continue editing text properties as needed.
Expanded examples and variations
Using a combination of the Pen tool, Ellipse tool, and Custom Shape tool, you can create complex paths and wrap text around any vector path. The text remains editable, so you can revisit font choices, sizing, leading, tracking, and alignment at any time. When experimenting with layers, you can keep the path visible for alignment references or hide it to focus on the typography itself. The process remains consistent across different shapes and path types, making it a versatile technique for logos, badges, and decorative typography.
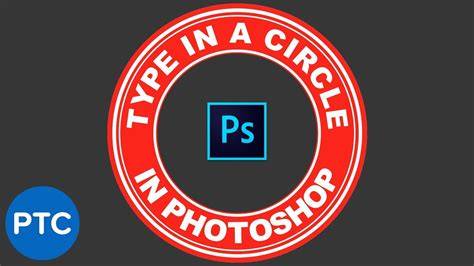
How to Type on Circle in Photoshop
In practice, you can start with a circle path, add top-half text, adjust tracking and baseline shifts to balance the composition, then append bottom-half text by tweaking baseline positioning and alignment until the logo or badge looks cohesive. If you’re transitioning from Elements, note that the core ideas-drawing a path, adding text to the path, and adjusting the text along the path-remain the same, with interface differences accounted for by locating the Path/Type options in the Toolbars and Panels.
To recap, you can:
- Draw and edit paths with the Pen tool or shape tools
- Attach text to paths with the Type tool
- Adjust tracking, kerning, and leading via the Character panel
- Switch between horizontal and vertical text on a path
- Flip text direction and edit the path after adding text
- Convert text to a shape for advanced editing and save as a custom shape