Recording voiceover narration directly into the timeline in Final Cut Pro (FCP) on iPad or Mac is a powerful way to add polished spoken content to video projects. This guide synthesizes the detailed steps and practical tips from the provided material to help you achieve warm, professional VO results, optimize microphone setup, manage takes, and refine audio with essential settings.
Recording a voiceover: setup, start, and basic workflow
You can record voiceover narration or other live audio directly into the timeline from input sources such as built-in and external microphones. By default, Final Cut Pro includes an automatic countdown when you record a voiceover. The recorded audio clip appears in both the timeline and the browser.
To record a voiceover, go to the Final Cut Pro app on your iPad. Open a project. In the timeline, position the playhead where you want to start recording. Tap in the toolbar (or press Shift-V on a connected or paired keyboard). The first time you do this, you’re prompted to allow Final Cut Pro to access the microphone. The voiceover controls appear. You can drag the handle at the top to position the controls anywhere on the screen.
To start recording, tap in the voiceover controls. Use the voiceover audio meter to make sure the volume doesn’t exceed peak levels (shown in red), which may result in audible distortion. If a red peak indicator appears at the top of the meter, tap anywhere in the meter to clear it, then re-record that audio clip. To stop recording, tap in the voiceover controls. When you stop recording, the playhead returns to the start point you set in step 2, and the audio recording appears directly under the primary storyline at the playhead position. To close the voiceover controls, tap in the toolbar (or press Shift-V on a connected or paired keyboard).
Tip: You can start and stop recording repeatedly while playing through your project, creating multiple audio recordings in one pass. Tap below the viewer before tapping in the voiceover controls. The timeline plays continuously as you start and stop recording. When you’re finished recording, tap below the viewer.
Adjusting voiceover recording settings: control and monitoring
To adjust the microphone input level, go to the Final Cut Pro app on your iPad. Open a project. Tap in the toolbar (or press Shift-V on a connected or paired keyboard). Tap in the voiceover controls to open the recording settings. You can:
- Drag the Input Gain dial to adjust the input level; or tap the Input Gain field, then use the keypad to enter a new value. Tip: To reset the input level to its default value, double-tap the Input Gain dial.
- Change the input device or input channels (mono or stereo): Tap to the right of Input and choose an option. If your input device has multiple inputs, choose an input from the Channel submenu.
- Listen to your microphone input over headphones or a connected audio device as you record: Turn on Monitor. The Monitor control appears only when a third-party device or headphones are connected.
- Adjust the monitor level when monitoring is on: Drag the Monitor Gain dial, or tap the Monitor Gain field and use the keypad to enter a new value.
- Hide the audio meter in the voiceover controls: Turn off Meter.
- Turn off the automatic countdown before recording: Turn off Countdown.
- Allow timeline audio to play while recording: Turn off Mute Timeline Audio While Recording.
Note: If you’re using the built-in microphone to record and playing the project audio through the iPad speakers, turning off this option will cause timeline audio to be recorded. You can capture 4 seconds of audio before the recording starts with Pre-Record Buffer.
Creating and managing multiple takes and auditions
Final Cut Pro supports multiple takes and auditions to help you choose the best delivery. To record multiple voiceover takes, follow the same steps as above. When you stop recording, the new take is added to the audition. You can record additional takes for the same section, and each new take is added to the audition. By default, FCP creates an audition containing all takes you record. To review and select takes, open the audition from the timeline (Clip > Audition > Open), choose a take, and play it. When ready, finalize the audition to leave only the chosen voiceover clip in the timeline.
Record live audio in Final Cut Pro by choosing Window > Record Voiceover and following the prompts. To start recording immediately without adjusting settings, you can use the shortcut Option-Shift-A. The recorded voiceover files appear in both the browser and as connected clips in the timeline. Each audition can contain multiple takes, enabling you to compare performances side by side.
Tips for achieving a warm, professional VO sound
A professional voiceover sound often results from a combination of microphone choice, preamp, room treatment, and careful editing. Real-world practice and referencing high-quality VO spots can help you match dynamics and tone. A large-diaphragm condenser mic, proper mic distance, and gentle compression with subtle reverb can contribute to a warm, full voice. When comparing references, look for spots with more VO than music and study how dynamics are handled. In practical workflow terms, use a compressor/limiter with conservative settings to preserve naturalness, then add light reverb if appropriate. Close proximity to the mic can boost low end and presence, while careful monitoring helps avoid distortion and clipping.
In practice, many VO professionals recommend starting with a high-quality mic and a suitable preamp or mixer with phantom power for clean gain. It’s also beneficial to record in a treated space or with a portable reflection filter to reduce room noise. The combination of equipment choice, technique, and post-processing in Final Cut Pro yields the most professional results.
Integrating imported references and practice material
When preparing a demo reel, it can be useful to import a variety of national spots to study VO versus music balance and voice dynamics. Analyzing different mic types (dynamic, condenser, ribbon) and diaphragm sizes can inform your own equipment choices. While Final Cut Pro is not a dedicated sound editor, it provides robust layering and auditioning capabilities that support effective VO production and polishing.
The process of recording, auditioning multiple takes, and selecting the best delivery is central to building a compelling VO demo reel. By combining well-chosen gear, mindful technique, and FCP’s voiceover features, you can achieve a professional, warm voice that serves your narration effectively.
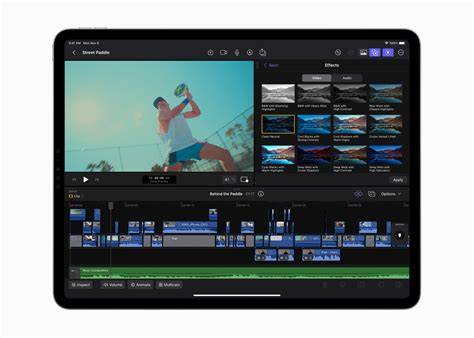
How to Record Your Voice-over In Final Cut Pro
In addition, you can tailor the workflow to your needs by adjusting input devices, monitoring, and pre-record buffers to suit your environment and microphone setup. The result is a clear, well-balanced English voiceover suitable for reels, demos, and broadcast-quality projects.