Fog overlays are an accessible and powerful tool for photographers, filmmakers, and digital artists who want to infuse their images with mystery, atmosphere, and a dreamlike quality. Using fog or mist in post-production can transform a shot by adding depth, softening backgrounds, and creating a cinematic mood-even when real weather isn’t cooperating. In this guide, we’ll explore how to work with fog overlays in Photoshop, practical tips for applying them, and a roundup of free and premium resources to expand your creative toolkit.
Why use fog overlays in Photoshop?
Utilizing fog, haze, and mist overlays in a shot has various benefits. Visually, it can give your scene depth and imbue it with motion as the haze moves across the screen. Tonally, fog and haze can add a layer of mystery that is perfect for horror, thriller, and dramatic stories. Fog overlays are also a convenient alternative when weather conditions are unfavorable or when you want to achieve a consistent look across a photoset or project.
How to apply fog overlays in Photoshop
Start with a photo you want to enhance. Download a fog overlay texture in PNG with transparency for easy compositing. Open your photo in Photoshop, then go to File > Place Embedded and choose your desired fog overlay file. If the overlay doesn’t match the image size, resize it to fit the frame and confirm. In the layers panel, select the blending mode dropdown and set the mode to Screen for a natural blend. Adjusting the opacity can fine-tune the density of the fog to suit the mood of the shot.
Use a soft mask to blend edges where the fog should fade into the scene. A rectangular marquee tool can help define the visible portion, and masking techniques such as Invert (Ctrl/Cmd+I) can refine what remains visible, ensuring the fog sits where you want it most. With some care, you can create the illusion of fog rolling across a landscape, creeping through trees, or drifting over a cityscape.
Creative considerations when choosing fog overlays
Overlays come in a wide range of densities, colors, and textures-from subtle morning mist to dramatic, dense fog. For landscapes, a lighter mist can add depth without obscuring essential details, while an intense overlay can yield a moody, dreamlike scene. Portraits can benefit from a soft haze that softens skin tones and adds an air of mystique without overwhelming facial features. Winter shots often pair well with crisp, cool fog textures that enhance the chilly atmosphere.
When integrating multiple overlays, consider hierarchy and light direction. Position fog to align with natural light sources, allowing highlights and shadows to interact believably with the fog. You can also stack overlays and adjust their opacities to achieve the desired density and mood. Remember that the goal is to enhance storytelling, not distract from the subject.
Resources: free and premium fog overlays for Photoshop
A wealth of fog overlay packs exist, ranging from free textures to large premium bundles. Free resources often include a variety of textures intended for Photoshop workflows, with easy drag-and-drop installation and Screen blending behavior. Premium packs frequently offer dozens of overlays with different densities, colors, and a mix of fog, mist, and smoke textures, often created from real haze to provide authenticity.
Applications and templates can dramatically shorten your workflow. Some packs are designed specifically to work with architectural renders, landscapes, and themed portraits. The versatility of these overlays means you can quickly add atmosphere to a cloudy day or emulate a dense fog bank rolling through a scene. When selecting overlays, check the resolution and whether the pack provides transparent PNGs compatible with Photoshop compositing.
Practical tips for better results
- Always operate overlays on separate layers to maintain nondestructive editing. - Use Screen blending mode to achieve a natural fog look; adjust opacity to taste. - Mask and feather the fog edges to blend with the scene realistically. - Consider color temperature: cool fog can enhance moody scenes, while neutral fog works well in balanced shots. - Test different overlays on similar images to understand how density and placement influence mood. - For architectural renders, overlays can simulate rain, haze, or mist to convey atmosphere and scale.
Examples of workflow adjustments
Changing the layer order and blending modes can dramatically alter results. A common approach is to place the fog overlay above the base image and then apply a Layer Mask to reveal only certain portions of the fog. If the overlay is too strong, reduce its opacity or duplicate the layer and apply a gradient mask to fade fog into the distance. For more realism, vary fog density across the frame, such as denser fog near the horizon and lighter fog toward the foreground.
Table: overview of typical fog overlay attributes
| Attribute | Typical Range | Impact |
|---|---|---|
| Density | Light-Heavy | Affects visibility and mood |
| Color temperature | Cool to neutral | Influences tone and atmosphere |
| Texture detail | Soft to crisp | Realism vs. stylization |
| Opacity | 5%-60% | Density control on composite |
| Positioning | Foreground, midground, background | Depth cueing |
Fog overlays are a powerful tool for adding atmosphere to both stills and video. For motion projects, seamless textures can help simulate depth as haze drifts through frames, while still photography benefits from the instant mood boost that fog brings. Free resources and premium packs provide a spectrum of textures designed to work with common post-production workflows, ensuring you can achieve cinematic quality with a few simple steps.
How to Create a Simple Fog Effect in DaVinci Resolve Studio
Downloadable packages often include multiple presets designed for rapid application. With these tools, you can apply a fog texture to a landscape or portrait in minutes, achieving a photorealistic result that enhances storytelling without heavy retouching. As you gain experience, you’ll develop a sense of when and where fog overlays should appear to maximize impact while maintaining natural look.
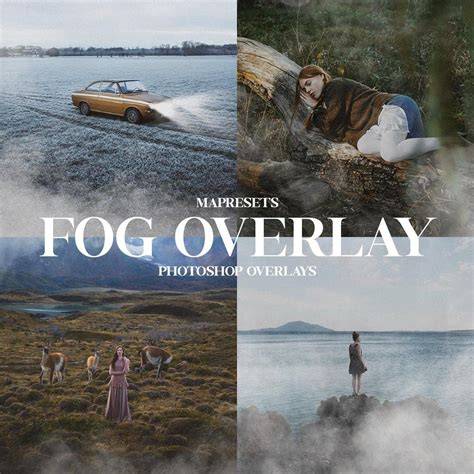
In summary, fog overlays for Photoshop offer a flexible and intuitive path to elevate photographs and visual narratives. By choosing suitable textures, blending thoughtfully, and leveraging masking techniques, you can craft images that feel cinematic, mysterious, or simply more evocative than the original capture.