Have you ever wanted to do a face swap? Maybe you, just like me, want to make some photo manipulations? But then you realize that you don’t know what to do. OH NO! Well, you don’t need to worry anymore. Follow this tutorial and you will be able to do anything in no time. I will show you how I achieved this, with some tips along the way.
Preparation and planning
In response to this ask. Dramatic intro done, let’s get all the prep work done: Decide what you want to do. I want to make Lydia (Teen Wolf character) into a superhero. To do that I need to find a superhero to manipulate her face on. And I picked the episode of Charmed where the sisters are superheroes.
Get your caps, preferably HQ. Match the angles of the faces. So in the image where I’m gonna put a face on, the original face is turned a bit and looking to the left. So I tried to find something similar. Below you can see the pictures I chose, and what I mean by angle of the face. Also, similar (ish) lighting is good. They’re facing the same way, and there’s similar coloring in terms of lighting. Here they also both have pale skin and red hair, but that is less important, especially the hair color.
Open images and align layers
Now for the actual editing! Open up the picture the face is going on. Open up the picture with the face and remove the unnecessary bits. Make the two faces similar size, clicking on this tool in the tool window or shift+T. Make sure that the chain is linked and re-size. A tip is doing the resizing in increments (small steps) so that you don’t end up with a too small face.
When I’m fairly happy with the size, I duplicate the layer (ctrl+shift+d and there’s also an icon in the layer menu with two images on top of each other) and invisible the bottom one by clicking on the eye. This so that I have a back-up in case I mess up too much. Delete everything you don’t need. This is mine. And then I decided that her facial expression was uninteresting so I switched images. To get this one to match I flipped it using below tool and also rotated it using below-below tool. But otherwise I did the same thing.
Masking and color matching
Let’s get down to the actual matching part! Below will be a rundown of what I did to make my images match. You may not need to do all these steps, or you may need to do some other stuff. This is more of a general guide than a step-by-step tutorial. IMPORTANT! The adjustments are made on duplicates of the below layer. This way I can easily undo my actions.
First I lighten up Lydia’s face. At the moment it’s too gray and dark. This is my curve: Then I start with the hair. Looking at the image, I can see that I need to erase parts of it and I also want to make it more orangey, like the woman’s hair beneath. It would also fit more with the warmth of the background and the outfit. I erase some hair, and the rest of her dress. The purple and grey parts you can see at the bottom of the hair is the dress. Then I make a new layer, paint some orange over her hair and set it to soft light. I paint with a soft brush, like the default brush, and also apply some gaussian blur and lower the opacity to make it blend better. I merge the layer with orange on with the layer beneath. To do this right-click and then click merge with below layer. And now, even though the hair needs more work, I’m going to work on the neck, which is what was originally asked about. Here the skin is matched via curves, and they have very similar skintones anyway. If it’s not this easy to match, I’d suggest using the hue slider in the hue saturation tool (Colors>Hue Saturation). You can also use a color picker. First I fix the necklace, using the color picker to pick the same pink as the rest of the necklace. Then I use the copy tool to pick up skin, and paint over the hair. It’s this symbol: Pick a suitable spot, press ctrl and click. The spot that’s marked will now be your “paint”. The spot can’t be transparent, so create a new layer from visible. I also used the smudge tool to blend. It’s the hand with a finger sticking out. I then zoom out and blend more with the same technique. I used a textured brush for this to make it look more natural, specifically an acrylic brush (I think that it looks more natural). And now I have this: And now the hair. I use one of my duplicate layers to get some hair. I duplicate it and cut out pieces of the hair and match it. And this is what I got: And with that I’m done with the photo manipulation. But after this I made more adjustments until I got the graphic I wanted. Those adjustments include sharpening, among others. GIMP is an acronym for GNU Image Manipulation Program. It is a freely distributed program for such tasks as photo retouching, image composition and image authoring. It has many capabilities. GIMP offers a wide toolset, similar to Photoshop in many ways, and is a great option if you're looking for a no-cost image editor.
Why GIMP for face swaps
GIMP. The GNU Image Manipulation Program, or GIMP, is one of the best-known free alternatives to Photoshop on the market. Is this legal? Yes, under terms of the General Public License this is perfectly legal, provided that the seller also gave you the source code of GIMP and any modifications he/she introduced. GIMP is a free to use, open-source answer to image editors looking for an Adobe Photoshop alternative. It's also quite beginner friendly and has a thriving community filled with tips and tricks to help produce the alterations and revisions that your image requires. Both programs have great tools, helping you edit your images properly and efficiently. The tools in Photoshop are much more powerful than the equivalent tools in GIMP. Bigger software, stronger processing tools. Both programs use curves, levels and masks, but real pixel manipulation is stronger in Photoshop. No, professionals not use gimp. professionals always use Adobe Photoshop. Because if professional use gimp their works quality will decrease. Let's keep working with GIMP! Today we're going to do some face swaps. We'll build on our understanding of layers by adding a new element: masks. Have fun with it!
Two paths: GIMP vs Photoshop and practical workflow
These instructions are based on a very helpful YouTube video. First, we need to find some images for our face swap project. You will need 2 pictures. They can be whatever you want! Want to put your face on a dog? Sure! Want to put your friend's face on a cat? Great! Want to put Harry Potter's face on Iron Man? Go for it!
You have a few options for sourcing your images: Images you find on the internet, Download the image (.jpg or .png file) to your flash drive, Have a picture taken of yourself or someone else in PNG. If you want to take a picture of someone else, you must ask for consent! Have Miss Liz help you take the picture with her phone (it's got a great camera!). She will then upload the picture to the Project Files page for you to download to your flash drive. NOTE: The best face swaps result from well-chosen images. They are most successful when the faces being swapped are pointed in the same direction. Size is not as big of a concern as face orientation, because the images can be scaled. But don't fret! Face swaps are inherently hilarious. Next step is to start up the GIMP software and then open your images as layers: FILE > OPEN AS LAYERS > SELECT YOUR IMAGE(S). You can SHIFT+CLICK multiple images to open all your images at once. Rename your layers. Renaming layers can make your work a lot easier, especially if you have a lot of layers. Double click the layer name to rename it. Make sure your layers are in the proper order. Remember that layers in GIMP are like a collage; one image is laid over the top of another. Your image(s) probably needs to be resized. Select the Scale tool and scale the top face layer until the face is the same size as the face in the base layer. Remember that you will need to click "scale" (or press ENTER) to apply your scaling before you move to the next step. Remember that the scale tool will be active until you select another tool. This applies for every tool!
Move the top face layer until the face matches up with the face in the base layer. You'll end up with something like this. Look at Miss Liz's face over Chris's face. Now we want to get rid of everything in the top layer image except for the facial features. We can do this by first adding a mask to the top layer. Right click the top layer and Add Layer Mask. Use the paintbrush to remove all unwanted parts of the top layer. Now we want to color correct the top layer so that it matches the base layer. Make sure the top layer (not the mask!) is selected. Select COLORS > CURVES. If something looks a little off, repeat these steps as necessary, always making sure you have the right layer or mask selected. Note: there are many other ways to do a face swap in GIMP. Some people use a Gaussian blur. Sometimes a photo is perfect, except for that one friend’s face. They might be blinking or making a funny expression, ruining an otherwise amazing shot. But if you have another photo of them, you can swap out a blinking face for a warm smile. For example, fixing group photos of friends and family with a face swap is an edit that photographers make all the time. And even if you’re not a huge social media follower, we’re pretty sure you’ve seen at least a few selfie face swap pics or face-swapping memes. Novelty face swap apps are a dime a dozen on Android and iOS, but for a more realistic look, you’re going to need to have more control over your edits. With Photoshop tools, no one is going to know that your bestie wasn’t smiling in that trip photo.
So, how’s it done? If you have photos of similar size and composition, it’s easy to layer them on top of each other in Photoshop for a basic face swap. Start by bringing in two images - the main photo and the one with the new face you want to use. Line up the faces in the two pictures. Add a layer mask onto the top layer with your main image. Select the Brush tool and set the opacity to 100%. Using the black brush, paint over the face you want to swap out on the layer mask. This method works with pictures that are roughly the same size and composition. But sometimes, you might want something a bit more complex, such as a cat face swap or creating a meme. Photoshop’s Object Selection tool lets you grab whatever you like from a photo. You can use it to grab a single feature, like an eye, a nose, or an entire face or head. Using the Object Selection tool you can cut out the face you want to swap into an image. It’s a good idea to work with a face that’s larger than the face you’re trying to swap out. It’s easier to fit a large face over a small one. Drag the face from the new image and place it over the face on your main photo, Then, you can gradually resize and align the features. Turn down the opacity in the face layer so you can see the original features underneath the face you’re using. Match the eyes, nose, and mouth, and gradually move the new face over the original. Once you have it placed to your liking, adjust the opacity back to 100%. The lighting and skin tones of people’s faces can vary wildly, and sometimes one person’s look can change across different photos. Match the multiple skin tones with the Match Color feature (Image › Adjustments › Match Color), using whichever image you want to match colors from. Gradually adjust colors to match the skin tones together.
How to Put Your Face on a Different Body Using GIMP
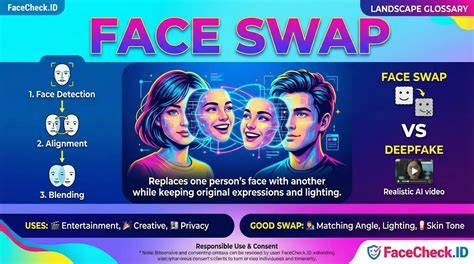
In summary, a successful face swap blends alignment, masking, and color matching. Start with properly oriented and similarly lit source images, create precise masks to isolate facial features, and adjust curves, hue, and saturation to harmonize skin tones. Practice with duplicates to safely undo any missteps and refine edges for a natural look.