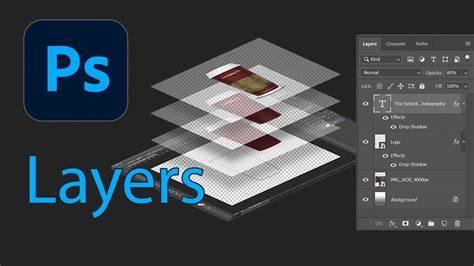
Merging photos is a simple editing technique that allows you to combine two or more images into one final photo. Learning how to merge photos in Photoshop is useful for creating composites, blending exposures, or combining images for creative effects. In this guide, you’ll learn a clear, step-by-step method to merge photos cleanly and professionally.
Why Merge Photos to Create Composite Images?
Creating a composite is simply when you merge photos to create another image, but it’s a little bit more complex than simply overlaying one image on top of another. You must carefully blend your layered images together, adjusting them to create a harmonious composition. Once you’ve got the technique to merge photos mastered, you can replicate it and create complex composites that take your photography to the next level. Also, when you merge photos together, you can create a narrative and in turn, create your own unique pieces of art.
The Idea Behind Merging Photos
Every good merged photo starts with an idea and in my example, I’ve used the idea of students I used to teach in colleges and schools leaving their education and moving on into university or the workplace; generally into the city to continue on with the next stage of their lives. This tutorial will arm you with a wide set of skills to enable you to merge photos together for varied design and artwork projects. We’ve chosen three images (which you can download from the form above to follow along!) which work quite well together, but you don’t have to limit yourself to a small number of images, when you’re confident, you can just repeat the processes with your own images. We’re going to merge photos in Photoshop, but if you haven’t got Photoshop there are other programs that you can use that have a similar workflow.
Open the Photos You Want to Merge in Photoshop
Watch the video for the full in depth tutorial. Below is a synopsis of the steps taken.
Step 1: Remove the Background Before You Merge Photos
- Open the man image > Turn it into a layer by dragging the lock symbol into the bin > Name this layer ‘man.’
- Select the Object Select Tool > Select the Man
- Inverse the selection. Go to Select > Inverse selection.
- Press the backspace button to delete the background. Press ‘Ctrl/Cmd + D’ to deselect.
Step 2: Add the River Image to Merge Photos
- Drag and drop the river picture onto your image > Click the tick in the option bar to apply it > Make sure the river layer is above the man layer.
- Clip the river layer to the man layer - Right click on a blank part of the river layer and select ‘Create Clipping Mask.’
- Take the Opacity of the river layer down to around 40% so you can see through it.
- Select the Move Tool > Move the river layer as shown in the video.
- Press ‘Ctrl/Cmd + T’ to enter Free Transform > Resize the river layer to suit > Reposition it as well if you need to.
Step 3: Remove Parts of the River Layer to Merge Photos
- Add a mask to the ‘river’ layer.
- Select the Brush Tool > Choose Black as a foreground colour > Set the Opacity and Flow to around 40% > Set the brush hardness to 0%
- Brush over the bottom of the river image so it blends in with the man. Adjust the opacity and flow to suit.
- Bring back the opacity of the river layer to 100% > Select the image of the river layer, not the mask.
- Select the Quick Selection Tool > Click in the sky of the river layer to select it. Click ‘Select and Mask’ > Under ‘View Mode’ select ‘Overlay’ > Move the Opacity slider to around 50% > Move the Shift Edge slider to 30% > In the Output Settings, Output to: Selection > Click OK.
- Select the mask of the river layer > Press ‘Shift + F5’ or ‘Edit > Fill’ > Choose Black and make sure the Blend Mode is set to Normal and the Opacity is at 100% > Click OK.
- Press ‘Ctrl/Cmd + D’ to deselect.
Step 4: Add More Space and Refine the Image to Merge Photos
- Select the river image > Adjust the opacity to suit.
- Select the crop tool > In the options bar untick Delete Cropped Pixels and Content-Aware > Click the Clear button to remove any crop ratio settings.
- Drag the top handle up above the head as shown in the video > Click the tick to apply it.
- Hold down the Ctrl/Cmd key and click on the mask of the river layer. This will create a selection of the white parts of the mask.
- Select the Lasso Tool > Remove parts of the selection by holding Alt/Option > Add to the selection by holding Shift > Remove and add parts to the selection as shown in the video.
- Select the man layer > Add a layer mask to it > Remove any parts left over using the brush tool and black paint as shown in the video.
- Adding additional space above the head for the next image to merge.
Step 5: Add the City Skyline to Merge Photos
- Make sure you have no layers selected. Drag and drop the ‘city skyline’ picture onto your image > Click the tick or press Enter to apply it > Take down the opacity of this layer to around 40%.
- Double check it’s the top layer and that it isn’t clipped to any other layer.
- Make sure the city skyline layer is selected and press ‘Ctrl/Cmd + T’ to enter Free Transform > Resize and move the city skyline to suit > Click the tick to apply.
- Hold down the Ctrl/Cmd key and click on the mask of the man layer > Inverse the selection. Select the city skyline layer > Add a layer mask to this layer.
- Bring back the opacity of the city skyline layer to 100% > Select the image of this layer, not the mask. Use the Object Select tool to select the sky > Make sure ‘Hard Edge’ is ticked. Select the mask of the city skyline layer > Press ‘Shift + F5’ > Choose Black and make sure the Blend Mode is Normal and the Opacity is 100% > Click OK.
- Mask out any other areas with the brush tool. Refine edges with tools as needed.
Step 6: Add Effects and Reveal Key Details to Merge Photos
- Group all layers apart from the Colour Fill 1 layer > Name group ‘man, river, city’.
- Add a Gradient Map Adjustment Layer above the group > Select a Gradient Preset (e.g., Sepia 1).
- Add a Curves Adjustment Layer above the Gradient Map layer > Create an RGB ‘S’ curve.
- Reveal the eyes - Select the mask of the river image > Brush with a small soft brush to reveal eyes and adjust as needed. Do the same for the ears.
Step 7: Enhance Face Blending to Merge Photos
- Select the man layer > Hold Alt/Opt and drag the layer above the group and below the Gradient Map layer to create a copy. Change the Blend Mode of the copy to Screen > Reduce opacity to around 30%.
- Select the river layer > Increase the opacity of this layer to suit. Adjust the opacities until you achieve the desired look.
- Reduce the contrast of the city skyline. Add a Curves Adjustment layer above the city layer > Clip the curves layer to the city layer > Adjust the Curves to taste.
- Group the man copy, Gradient Map and Curves layer > Name the group ‘effects.’
- Add a Colour Fill layer above the other layers > Choose a color that harmonizes with your image > Select the mask of the Colour Fill layer > Mask out this color to reveal the white underneath and achieve the final effect.
This was my final result when I merged these photos together.
Final Tips for Successfully Merging Photos
In this tutorial, we’ve explored the fundamentals to merge photos in Photoshop and create stunning composites. We’ve also touched upon a few other key techniques that you can use in your Photoshop workflow, such as blend modes, layers, masking and much more. If you wanted to learn more about these techniques in more detail, we have a dedicated course just for Photoshop, and you can find out more about that here.
Like this? Use the Object Selection tool in Photoshop to easily select and transfer objects between images. Draw a selection around the object in either rectangular or lasso mode, and the tool will automatically select it for you. Try the Select Subject tool to select the most prominent subject in an image. Select only part of an image with the Quick Selection tool. Click and drag over the area you want to select. Select images from consistently colored areas.
LayerRearrange the images’ stacking order in the Layers panel to change which ones are in front or behind. Questions? Yes, you can rearrange layers in Photoshop by dragging them up or down in the Layers panel. The ability to combine images together is a very useful skill for photographers. Although most want to get the image right directly in the camera, there are instances where merging images together prove useful (and necessary). There are many different ways to merge images together. Of the hundreds of approaches to this task, the best one is the method that works for you.
This tutorial will showcase my personal, manual preference of merging images. There are ways to automate image merging in software, but it is better to know the manual method before doing so (as they say, learn the hard way to be able to use the easy way!). Make sure that the images are the same resolution. Try to pick images with a similar light source. Although you can add artificial shadows and highlights, it is quite difficult to ensure that these simulated sources look natural (although absolutely possible).
Try not to over-complicate the merge. I can think of many instances in which a photo shoot could be better enhanced by combining different images together. When merging from the same location, the benefit is that lighting and shooting settings are the same (or similar). If you are merging images from a different location, try to pair elements that can blend in well together!
Secondly, take the lasso tool in Photoshop and draw around the object, model, or animal you want to add to your base image. You can also utilize the selection tool or quick selection tool to do this. In this particular image, because the colors and tones are all very similar to one another, I found the lasso tool to be a much faster way of selecting the part of the image I need. Note: You cannot do this kind of work inside Lightroom.
Next, paste the image into the spot it belongs in the other image. I like to lower the opacity when placing so that I can see exactly where the subject should be positioned. Fourthly, to blend the image into its rightful place, I utilize layer masks and the brush tool. The benefit to these two tools used in unison is that if you accidentally erase a part of the layer that you want to keep, you can always undo your mistake. All you need to do is select the top layer, click “add layer mask”, and then select the brush tool. When utilizing the brush tool, the black color will act as an eraser and remove the top layer, while the white color will bring the top layer back. Make sure that the brush is very soft, as that helps blend.
Adding a new background is quite possibly the most common use of the image merging skill. The same steps apply to this type of merging as with the aforementioned. If you’re working with hair or fur, a tip is to try to pick backgrounds whose light and dark areas match with the original background, as that allows you to not have to work around those very fine details (and can leave them untouched).
Animals are notorious for not sitting still, blinking, looking away at an inopportune moment, or otherwise being uncooperative for photographs. Similarly to the aforementioned merging methods, follow all of the same steps. Make sure you pay attention to how the fur flows, and use that to your advantage when blending! In the photo example case here, the wolf’s neck and head were placed onto the body of the base image.
Like animal photography, sometimes it is necessary to take a head from one image and put it on the body of another. Occasionally, you will like the model’s pose but not her facial expression, or like the model’s expression but not her pose. There is a good overview of how to merge and combine images in Photoshop. What other applications can you think of to use this technique?
Sometimes you don’t have to choose from the best photo, you can combine 2 different shots into the same image. For this example, the ocean is crashing on a rock in 2 different places but not at the same time. To make a bigger splash, I captured both splashes and will combine them. The challenge? This was handheld, so they aren’t aligned. Auto. With the mask selected, paint on the image to reveal the top splash. That’s it. A very simple technique, but very powerful and useful. You can use this for many things, like group photos and choose the best facial expression on each. Or stack more than 2 images and mask out the parts you need.
Learn how to reshape animals and people with the puppet warp tool in Photoshop. An essential, but unknown tip for using Harmonization to match colors between layers in Photoshop. Blending images in Photoshop is like mixing ingredients to bake a cake - you want to combine them just right to get the best result. By learning this, you can make your photos look amazing or even create pictures that look like a dream! In this guide, we will show you different ways how to blend images in Photoshop. We'll talk about how changing the layer opacity, using special blend modes, and using a layer mask can help you mix your images just right.
We'll also tell you about Luminar Neo, which is another auto-edit photo software you can use, and we'll compare it with Photoshop to see which one might be better. Whether you're just starting out or you already know a bit about Photoshop, this guide will help you get better at blending images and making your photos look super cool!
How to Blend Images in Photoshop: Getting Started
Method 1: The Power of Layer Opacity
Understanding the Opacity Value: Imagine you have two images you want to combine. They could be anything - a landscape and a portrait, a city scene and a nature shot, whatever you like. You start by placing these two images on separate layers in Photoshop. The secret to blending these images lies in the Opacity value. This option is located in the upper right of the Layers panel. By default, it's set to 100%, meaning that your top layer (Layer 1) completely hides the one beneath it. But when you adjust this opacity value, making it lower, the top layer starts to become transparent. This allows the bottom one to start showing through.
For example, if you change the opacity of your top layer to 75%, you're allowing 25% of the image beneath it to combine with 75% of the top image. This creates a neat effect where elements of both images begin to merge. Want to blend them even more? Simply reduce the opacity further. Say you bring it down to 30%; now you see more of the bottom image and less of the top, creating a deeper blending effect.
Quick Tip: Adjusting the Opacity value using the keyboard: You can quickly change the opacity value using your keyboard. Just press the numbers to set the opacity level - press 1 for 10%, 2 for 20%, and so forth. If you want a specific value like 25%, press 2 and 5 quickly after each other. Press 0 for 100% opacity, or hit 0 twice in quick succession to get 0%. This keyboard shortcut can make your blending process faster and more intuitive.
To switch to a different blend mode, like Screen, you can press Shift+Alt+S (Win) or Shift+Option+S (Mac). And then, if you want to restore the opacity back to 100%, press 0 on your keyboard. So, there you have it - a simple yet effective way to start merging two images together in Photoshop using the layer opacity!
Method 2: Blending Layers In Photoshop With Modes
Layer blend modes in Photoshop open up a whole new world of merging possibilities, akin to adding spices to a dish for different flavors. They're fantastic for combining any two images - be it a photo with a texture, two photos, or any other creative combination you can think of.
Deciphering the Blend Mode Option: Blend modes are essentially different ways layers can interact and merge with each other. You can find the Blend Mode option in the upper left of the Layers panel, right across from the Opacity option. Usually, a layer's blend mode is set to 'Normal,' which means there's no mixing happening with layers below it. But the real fun begins when you click on 'Normal' and explore the dropdown menu filled with blend modes. Each mode has a unique way of combining your images. For instance, 'Multiply' darkens the image, 'Screen' lightens it, and 'Overlay' increases contrast by mixing the layers in a balanced way. The effects vary greatly depending on the images you're using, offering a range of creative outcomes.
Merging Blend Modes with Layer Opacity: After selecting a blend mode, you can fine-tune your mixing by adjusting the layer's opacity, just as we discussed in the first method. This combination of blend mode and opacity adjustment allows for even more control over how your images merge. For example, if you choose the 'Soft Light' blend mode, it merges the two images in a way that enhances contrast but in a subtler, more natural-looking manner than 'Overlay.' Another interesting blend mode is 'Divide,' which is less commonly used but can produce some really cool effects with the right images. Once you've chosen your blend mode, you can play around with the opacity. Lowering the opacity makes the effect less intense, giving you a blended image that's more subtle and nuanced.
Quick Tip: Navigating blend modes with keyboard shortcuts: To speed up your workflow, you can cycle through different blend modes using keyboard shortcuts. First, press 'V' to select the Move Tool. Then, hold down the 'Shift' key and use the plus (+) and minus (-) keys to move up or down through the blend modes. This lets you quickly experiment with different modes to see which one gives you the best result for your images.
Bonus Tip: Shortcut combinations: We have for you the whole quick guide to Photoshop's layer blend mode shortcuts. Use combinations Shift+Alt for Windows or Shift+Option for Mac, followed by a specific letter. For example, "N" is for Normal, and "M" is for Multiply. Read our previous post, “How To Merge Two Pictures,” to master the basics in other programs as well!
Method 3: Merge Photos In Photoshop With Layer Mask
Layer masks in Photoshop are a game-changer for combining images. They provide a level of control and precision that's not possible with just layer opacity or blend modes. Layer masks are perfect for mixing parts of images together, letting you decide exactly where and how the blending occurs.
The Process of Adding a Layer Mask: To start using a layer mask, first, ensure your top layer is selected. Then, click the "Add Layer Mask" icon at the bottom of the Layers panel. A mask thumbnail will appear next to your layer's preview thumbnail, indicating that the mask is ready to use.
How a Layer Mask Influences Blending: Layer masks work on a simple principle: white reveals and black conceals. So, any part of your layer where the mask is white remains visible, and where it's black, the layer is hidden. This feature lets you selectively blend parts of one image with another. Utilizing the Gradient Tool for Seamless Blending: A great way to create a smooth transition between your images is to use the Gradient Tool with a layer mask. Select the Gradient Tool and choose a black-to-white gradient. When you apply this gradient to your layer mask, it creates a transition area where your images blend seamlessly. The black part of the gradient hides the layer, and the white part reveals it, with the gray area in between creating a gradual blend. Opting for the Black-and-White Gradient for Best Results: The black-and-white gradient is often the best choice for blending images. It provides a smooth, natural transition between the two images without any abrupt changes.
Step-by-Step: How to Blend Two Photos in Photoshop Using Masks: Select your layer mask by clicking its thumbnail. Choose the Gradient Tool and the black-to-white gradient. Draw the gradient across the area where you want the images to blend. The direction and length of your gradient drag will affect the merging. Release the mouse button to apply the gradient and blend your images. If it doesn't look quite right, just reapply the gradient until you're satisfied.
Quick Insight: Viewing and Toggling a Layer Mask: You can view your layer mask in the document by Alt-clicking (Windows) or Option-clicking (Mac) on the layer mask thumbnail. This can be helpful for seeing the gradient and understanding how your images are blending. To toggle the layer mask on and off, Shift-click the thumbnail. This lets you quickly compare your blended image with the original.
Bonus Tip: Shortcut combinations: You can select the Gradient Tool by pressing “G” on your keyboard. Quickly cycle through the gradient tools, pressing Shift + G. Use the keyboard shortcut Alt/Option + Click on the gradient swatch to open the Gradient Editor.
How to blend the edges of two images in Photoshop? Place one image on top of the other and add a Layer Mask to the top image. Use the Gradient Tool on the mask to create a smooth transition between the two images, adjusting the gradient direction as needed. Refine the mask with a soft brush and experiment with opacity or blending modes for a seamless effect.
Why Consider Luminar Neo Over Photoshop?
Luminar Neo represents the next step in the evolution of photo editing, especially with its AI-driven tools. It's a powerful alternative to Photoshop, particularly for those looking to add a creative touch to their photos with ease. Luminar Neo is an advanced yet user-friendly photo editing software that is a simpler alternative to Photoshop, especially for beginners. It simplifies the process of blending images and adding creative effects without requiring extensive technical skills. With AI-powered tools, everything from basic adjustments to more complex techniques can be done in just a few clicks, making it accessible to users of all skill levels. The two of Luminar Neo’s standout features for merging photos are its AI Layers and AI Masks, which allows you to easily blend images by overlaying one photo on top of another and using AI to create smooth transitions. Another powerful feature is HDR Merge, which is perfect for merging multiple exposures into one high-quality image with incredible detail and color. These tools make it much easier to achieve professional results without mastering complex software like Photoshop. While Photoshop offers many tools, its complexity can intimidate many users. Luminar Neo, on the other hand, is much simpler, allowing users to experiment and create easily. The intuitive interface and advanced AI features like Sky AI, Relight AI, and Enhance AI automatically enhance your photos, making it a fun and creative experience for those looking to improve their images without a steep learning curve. Check our article about Layering in Luminar Neo to expand your creative possibilities. So, if you want to blend photos together and like the idea of having smart, AI-powered tools to help you, Luminar Neo might be a good choice. It's user-friendly and lets you be creative without all the complexity of Photoshop.
Meta Description
Keywords