Making an image transparent - even partially, can give you endless ways to enhance your material. For instance, you can overlay images to create unique compositions, place a logo against any background, and combine images to create new product mockups. The simple answer is Photoshop. Photoshop is a popular image manipulation tool that allows you to add transparency to your photos in a range of different ways. Ready to get started? Let’s go!
Understanding transparency and layers
If you’re wondering how to make a picture transparent, one easy option is to learn how to make layers transparent. When you make a layer transparent, you can add it to other images, or place it onto products without worrying about background edges and opacity. Select the opacity level in the box that appears at the top of the Layers. Maybe you want make the background transparent in Photoshop while keeping the focus of your image clear and opaque. That way, you can combine pictures or move the subject of your image elsewhere.
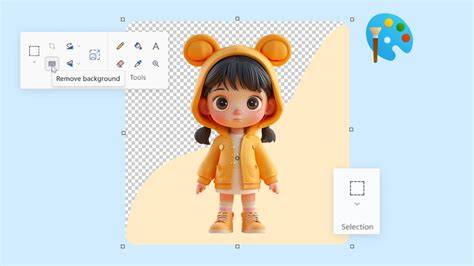
With the correct layer selected, click the Remove Background button below the image. Once you have a transparent background, you can easily refine it using the Add to mask and Subtract from mask buttons to paint over areas you want to restore or remove. Alternatively, you can also use the Brush tool on the left-hand side of the image to add back any elements from the photo that shouldn’t have been removed and the Eraser or Magic Eraser to make additional areas of the picture transparent. If you want to merge or combine pictures, then you might need to make parts of your layer transparent. To do this, you’ll need to select your layer again like above, but make sure that the layers underneath that image are transparent.
Foundational tools for selecting and isolating subjects
There are a number of great tools to use for making selections and creating different layers in Photoshop. Once the subject has been selected, you can remove the background or change it to anything you want. So, now that you’ve learned the basics on how to create images that are transparent in Photoshop, let’s take a look at several individual tools that help you create selections and make transparent backgrounds. The following tools are listed in terms of increasing complexity, but make sure to try them all out! Some techniques work better for certain subjects than others.
If you want the easiest way to select a subject, Photoshop offers a menu option called Select Subject. For some subjects, particularly people, this tool can do a great job. For others, it needs a lot of refinement. However, it works well with any of the other tools for refinement. The Magic Wand tool selects similarly colored regions. Click the Magic Wand icon in the toolbar (shift + W). Set the tool to Add to Selection at the top to allow multiple clicks. Click on the areas you want to select, adjusting the Sample Size and Tolerance as needed. The Quick Selection tool works like a brush, selecting similar-looking areas as you drag it across the image. It’s similar to the magic wand but works better for more photos that are more complex or have multiple colors. To deselect unwanted areas, hold down the Option key (Alt) while dragging.
Sometimes, it is just too hard to use an automated tool to make the selection. If you have a blurry subject, either from motion or shallow depth of field, automated tools don’t know where to stop. Just like you did with the automated tools, click Select » Inverse from the top menu and then hit Delete to create a transparent background. Photoshop has one last tool to help select subjects against a contrasting background, the Color Range tool. You can see a preview of the selection in the black and white box. When you’re happy with how it looks, click OK to make the selection.
Preserving transparency and saving correctly
Once you’ve learned how to make a picture transparent in Photoshop, it’s important to make sure that you can use those images without them accidentally taking on a new background when you open the file. To preserve transparency, you need to save your image in the right format. PNG: The most common format for transparent photos on the web. When saving your new transparent photo, click on the Format drop-down menu and select the format you want. If you can’t see a PNG file option, then you may be editing your image in the CMYK format, which means that you’ll need to convert it into the RGB mode, so you can save as a PNG file.
In addition to PNG, GIFs don’t support alpha transparency, which means every pixel needs to be 100% transparent or not. Yes, you can make the background of an image transparent in Photoshop Elements and with various techniques for partial transparency. When you create see-through effects within text, right-click the text layer and choose Blending Options. Then, adjust the Fill Opacity slider. For shapes, you can use the Eraser tool with varied opacity to create soft, partially transparent edges. To export a transparent image as a PNG in Photoshop, we first need to ensure our image is set up correctly.
Advanced selections and non-destructive workflows
Layer masks are powerful tools for creating transparent areas in an image. The mask appears as a white thumbnail next to the layer thumbnail. White areas of the mask reveal the layer content, while black areas hide it. We can paint on the mask with black or white brushes to hide or reveal parts of the layer. Selecting specific areas of an image is crucial for creating transparent elements in Photoshop. The Magic Wand tool is excellent for selecting areas with similar colors. We can adjust the tolerance to control how closely colors must match. To use the Magic Wand, we click on the area we want to select. The Contiguous option limits selection to adjacent areas. The Lasso tool offers manual control for irregular selections. For precise selections, we can zoom in and use a graphics tablet for better control. We can combine Lasso tools with other selection methods. The Pen tool offers unparalleled precision for complex selections. We create paths by placing anchor points and adjusting curve handles. The Quick Selection tool allows us to paint our selection quickly. It works by analyzing color and texture to guess the area we want to select. The Object Selection tool uses AI to identify and select entire objects.
Photoshop offers powerful tools to remove backgrounds from images efficiently. Photoshop's Quick Actions provide a fast way to remove backgrounds. To use it, we select the layer containing our image and click Remove Background in the Quick Actions section. For images with clear contrast between the subject and background, this method works exceptionally well. However, complex images may require additional refinement. When Quick Actions don't provide perfect results, we turn to the Refine Edge tool for more precise control. The Refine Edge tool analyzes the contrast and texture in these areas to create a more accurate selection. We can adjust settings like Smooth, Feather, and Contrast to further improve the selection quality.
Practical workflows: finishing and using transparent images
Transparent images are essential for various design projects. Next, we select the layer containing the logo or graphic. Press Delete to remove the selected area. Select PNG or GIF format, as these support transparency. Start by creating a new layer for your text or shape. For partial transparency, add a layer mask. To create see-through effects within text, right-click the text layer and choose Blending Options. Then, adjust the Fill Opacity slider. For shapes, we can use the Eraser tool with varied opacity to create soft, partially transparent edges. Once you've created a transparent image in Photoshop, it's crucial to save and export it correctly to preserve the transparency.
To export a transparent image as a PNG in Photoshop, we first need to ensure our image is set up correctly. While PNG is the most common format for transparent images, other options exist. For web use, we recommend sticking with PNG. When working with transparency in Photoshop, we can create composite images by combining multiple layers with varying levels of opacity. Transparent images have become essential in modern digital media. We often use transparent backgrounds in marketing to create eye-catching designs. Transparent elements add depth to social media graphics, making them more engaging. In web design, transparent PNG images allow for creative layering. Making product images transparent is crucial for e-commerce. We use transparency to create 360-degree product views, allowing customers to see items from all angles. Transparent images also enable easy creation of product mockups.
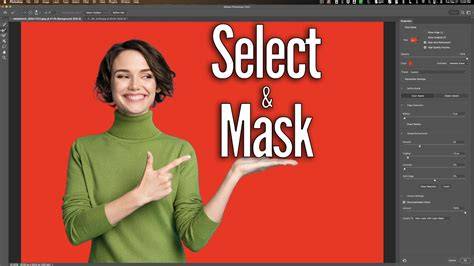
Mastering transparency in Photoshop involves honing your workflow and exploring advanced techniques. Efficiency is key when working with transparent images. Use the eraser tool with E key for quick transparency adjustments. For precise opacity control, use number keys. Press 5 for 50% opacity, 7 for 70%, etc. To create complex transparent elements, we employ advanced methods. Refine Edge (Select and Mask) is crucial for hair and fur. Access it via Select > Select and Mask. For marketing materials, we often use Blend If. This powerful feature creates partial transparency based on luminosity. Lastly, when saving, choose PNG format for web graphics with transparency.
- Start with a solid selection of the subject using Select Subject, Magic Wand, Quick Selection, or Color Range.
- Remove the background via Remove Background or by creating and refining a mask.
- Refine edges with Refine Edge or Select and Mask for difficult subjects like hair.
- Save as PNG (or GIF with limitations) to preserve transparency.
- Use layers and masks for non-destructive editing and flexible composition.
Creating transparent images in Photoshop involves several techniques and considerations. Next, we select the area we want to keep using tools like the Magic Wand or Quick Selection. Removing a white background in Photoshop is straightforward. We then delete the selected region. Using a large, soft brush with black as the foreground color, we paint on the mask where we want transparency. We then use selection tools like the Magic Wand or Quick Selection to select the background. In the latest Photoshop version, we achieve image transparency using various tools. The Object Selection tool quickly selects subjects. Meanwhile, the Refine Edge brush helps with complex edges like hair.
Disclosure: Our content is reader-supported. This means if you click on some of our links, then we may earn a commission. Southie is a writer for Envira Gallery. Creating transparent images in Photoshop is a valuable skill for graphic designers and photographers alike. In Photoshop, you can make an image transparent by using tools like the Magic Wand, Quick Selection, or Pen Tool to isolate the subject. We'll guide you through the process step-by-step, covering different techniques to achieve transparency in your images. Adobe Photoshop offers a powerful set of tools for image editing and creation. To start a new project in Adobe Photoshop, we click "File" then "New" in the top menu. We can choose from preset sizes or enter custom dimensions. The Photoshop interface consists of several key panels and tools. The Properties panel adapts to our selected tool or layer, providing relevant options and adjustments. On the left, we find the Tools panel with various editing instruments. The Move tool helps position elements, while selection tools like the Magic Wand allow us to isolate parts of an image. Layers are the foundation for creating transparent images in Photoshop. Layers in Photoshop act like transparent sheets stacked on top of each other. Each layer can contain different elements of an image, such as text, shapes, or photos. We can adjust the opacity of entire layers or use blending modes to create unique effects. To view a layer's contents, we click the eye icon next to it in the Layers panel. To start working with layers, we often need to convert the background to a regular layer. We can duplicate layers by right-clicking on a layer and selecting Duplicate Layer or using Ctrl+J (Cmd+J on Mac). To rearrange layers, we simply click and drag them up or down in the Layers panel. Layer masks are powerful tools for creating transparent areas in an image. The mask appears as a white thumbnail next to the layer thumbnail. White areas of the mask reveal the layer content, while black areas hide it. We can paint on the mask with black or white brushes to hide or reveal parts of the layer. Selecting specific areas of an image is crucial for creating transparent elements in Photoshop. The Magic Wand tool is excellent for selecting areas with similar colors. We can adjust the tolerance to control how closely colors must match. To use the Magic Wand, we click on the area we want to select. The Contiguous option limits selection to adjacent areas. The Lasso tool offers manual control for irregular selections. For precise selections, we can zoom in and use a graphics tablet for better control. We can combine Lasso tools with other selection methods. The Pen tool offers unparalleled precision for complex selections. We create paths by placing anchor points and adjusting curve handles. The Quick Selection tool allows us to paint our selection quickly. It works by analyzing color and texture to guess the area we want to select. The Object Selection tool uses AI to identify and select entire objects. Photoshop offers powerful tools to remove backgrounds from images efficiently. Photoshop's Quick Actions provide a fast way to remove backgrounds. To use it, we select the layer containing our image and click Remove Background in the Quick Actions section. For images with clear contrast between the subject and background, this method works exceptionally well. However, complex images may require additional refinement. When Quick Actions don't provide perfect results, we turn to the Refine Edge tool for more precise control. The Refine Edge tool analyzes the contrast and texture in these areas to create a more accurate selection. We can adjust settings like Smooth, Feather, and Contrast to further improve the selection quality.
Transparent images are essential for various design projects. Next, we select the layer containing the logo or graphic. Press Delete to remove the selected area. Select PNG or GIF format, as these support transparency. Start by creating a new layer for your text or shape. For partial transparency, add a layer mask. To create see-through effects within text, right-click the text layer and choose Blending Options. Then, adjust the Fill Opacity slider. For shapes, we can use the Eraser tool with varied opacity to create soft, partially transparent edges. Once you've created a transparent image in Photoshop, it's crucial to save and export it correctly to preserve the transparency.
Transparent Effect in Photoshop | Transparent Orange Manipulation #SmartGraphics
In product photography and graphic design, it’s often necessary to remove a distracting background from your shots in order to put the focus where it belongs - on your main subject. With image editing tools, you can actually make backgrounds disappear completely. Detect backgrounds and subjects with a little help from artificial intelligence. Adobe Sensei-powered tools automatically remove backgrounds in the Layers panel. Showcase your style and boost brand identity by using transparent backgrounds. Use mask layers to hide and reveal selected portions of your background - nondestructively. Tap into global refinement sliders to smooth and feather the edges of your image. Quickly "paint" a selection with a fully customizable round brush tip. Make a solid color background transparent with one click of this wand. Just click on any part of an image and all other pixels of the same color in the image will be selected. Use your mouse or stylus to make selection borders with a freehand drawing. Use Refine Edge to fine-tune rough or smooth edges of selections you made with the various selection tools. Follow this step-by-step guide to isolate your subjects as you create a transparent background in Photoshop.
Yes, there are a number of free Photoshop alternatives and free transparent background makers. Many online transparent image makers provide simple PNG backgrounds with full transparency. These tools often have a simple interface and can be convenient for quick edits. However, they may have limitations in terms of image quality, file size, or advanced editing features. Additionally, when using an online PNG maker, it’s important to review the tool’s privacy policy, as you’ll be uploading your images to their servers.