Lightroom presets are pre-defined settings that apply specific adjustments to your photos. You can choose the presets from Recommended, Premium, and Yours. By default, a thumbnail preview of presets is available when a photo is opened in the Detail view. Select > Single-Group Mode to view the preset details of a single selected group. When Single-Group Mode is active, opening a group will close any other open group. When it’s off, you can open multiple groups at once. You can select to mark a preset as a Favorites and access it more conveniently.
Understanding presets and their purpose
Lightroom presets are saved editing settings that adjust exposure, color, tone, contrast, and detail all at once. If you are brand new to presets, start here first: What Are Lightroom Presets? The preset will instantly adjust your photo. Presets are designed as a starting point, not a final edit. Learning how to apply presets to a photo is one of the fastest ways to improve your editing workflow and create consistent, professional-looking images.
Presets work great on RAW files and processed image files like JPEG. RAW is not an acronym, it refers to unprocessed and uncompressed photographs taken by a digital camera. Shooting in RAW allows for highly detailed images and lossless quality, so we end up with large sized files but full of editing potential. Adobe Lightroom on mobile lets you import presets created by other photographers and export your own custom presets to share or use across devices. Presets you create in Lightroom automatically sync across devices when signed in with your Adobe ID and an active subscription.
Types and features of presets
Recommended presets generate adjustments based on your photo using Adobe Sensei and adapt over time as the AI learns. Use the Amount slider to adjust the intensity of the preset. In Recommended Presets, hover over the preset thumbnail and select More like this to view more similar presets. Inside the Premium Presets there are Adaptive Preset Styles that use AI to mask backgrounds and subjects for individual editing. Adaptive Presets can also use AI to mask backgrounds and subjects for individual editing, and they can bring the subject into focus with background refinement.
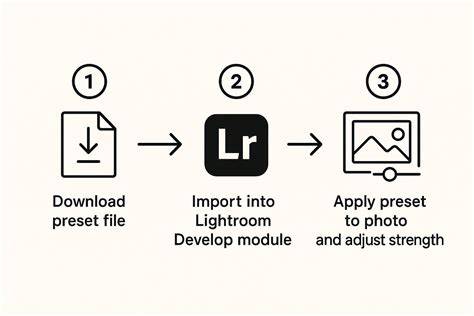
Presets can be saved and shared, and you can export or import them. The exported DNG file contains all the edit settings from your photo and can be shared with others or imported into Lightroom on another device. Preset files typically come in .xmp, .DNG, or .lrtemplate formats. You can import these files directly into Lightroom on mobile, and they’ll appear in the Yours preset category under User Presets. If your downloaded presets are in a ZIP file, extract them before importing.
How to apply presets step by step
- Open Lightroom and add a photo to begin editing. This example uses a RAW file.
- Click Edit to open the Adjustments panel. Then open the Presets panel to view available options. The preset will instantly adjust your photo when applied.
- In the Presets panel, select a preset category (e.g., Autumn, TM01) and click to apply. You can preview the changes as you browse presets.
- To customize after applying a preset, use the Edit panel to tweak attributes like Exposure and Vibrance. Presets are starting points designed to keep edits fast and consistent.
- To save a customized preset, go to the Presets panel, choose to Save Preset, name it, select the Presets Group, and set which settings to include. This creates a reusable preset for future photos.
- To apply a saved preset in bulk, switch to Photo Grid (G) and use Copy and Paste Edit Settings or apply the saved preset from your Yours group to multiple photos at once.
Saving and managing presets
After applying a preset, you can save your customized version by choosing a name and a Presets Group. You can also choose to include all or only specific adjustments when saving. Lightroom’s flexibility is incredible, and saving presets helps maintain consistency across a project or portfolio.
Installing presets and cross-device use
To install presets in Lightroom, go to File > Import Profiles & Presets, browse the folder with the new presets, and import. The imported presets are stored under the Yours tab in the Presets panel. Lightroom can sync presets across devices when signed in with an active subscription, so you can edit on desktop and mobile with the same toolkit.
For Lightroom Mobile, you can install presets from ZIP files after extraction, import DNG files or preset packs, and organize them in the Presets folder on your device. The mobile workflow may involve creating a new Album named after the preset pack and adding DNG files to enable quick access and use on the go.
Additional notes and tips
What are Presets in Lightroom? They are a starting point for edits, not a final edit. If you’re unsure which editing style fits your photos, open your photo, try different presets, and apply with one click. You can use the filter categories to narrow the search and preview the exact changes each preset would apply to your photo.
When working with Profiles versus Presets, remember Profiles affect how a RAW image is displayed and have an amount slider, but they do not adjust the same set of sliders as Presets. Presets allow direct manipulation of exposure, color, and other attributes, making them more flexible for achieving your creative vision.
Lightroom Tutorial - How to Apply a Preset Upon Import
Whether you’re a beginner or a seasoned editor, mastering presets can dramatically speed up your workflow, help maintain stylistic consistency, and unlock creative potential across devices and projects.