Changing skin color in Photoshop can salvage a photo affected by lighting, exposure, or color casts, and it can also be used creatively to achieve a desired mood or storytelling effect. This article compiles step-by-step techniques drawn from a detailed draft, presenting practical methods to retouch skin tones with precision and care.
Understanding skin color and why it varies
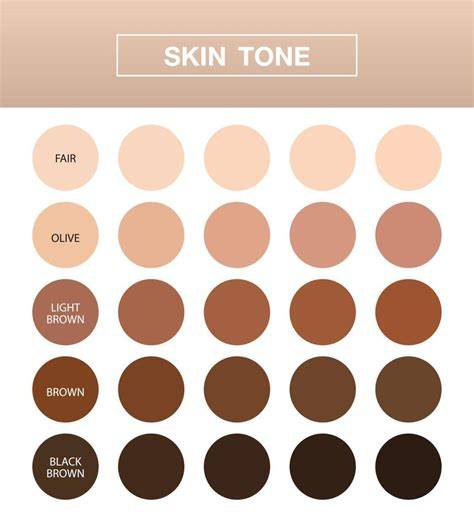
Skin color defines the tone of the external layer of skin varies from person to person based on skin pigment. The 4 Major Kinds Of Skin shades are Light, Fair, Medium, and Deep. Group variations exist within ethnicities, and lighting can shift tones toward red, yellow, or blue. Matching and correcting skin tones requires careful selection and controlled edits to preserve a natural look.
Technique 1: Using an Adjustment Layer for controlled color changes
- Open the photo from the File menu or press Ctrl+O.
- Duplicate the layer to preserve the original, by pressing Ctrl+J or clicking the thumbnail; the new layer is typically named “Layer 1.”
- Choose an adjustment tool (circular icon) and select Hue/Saturation to adjust color by moving the sliders left or right.
- Isolate skin color because the adjustment can affect the entire layer. Convert the non-skin areas to black-and-white temporarily if needed, using the Paint Bucket Tool to fill the background with black or white to focus on skin tones.
- Paint selectively with the Brush Tool to color only the skin areas. Adjust brush size and zoom in for precision.
- Refine the result by adjusting the opacity of the Hue/Saturation layer to achieve a true-to-life shade, and ensure lips retain natural color by repainting them and re-attenuating the saturation as needed.
- Merge and finalize after creating a clean blend. Add a Layer Mask to merge adjustments cleanly, and then merge visible layers (Shift+Ctrl+Alt+E).
- Finish touches to harmonize hair and eyebrows with the new skin color by darkening them with the Burn Tool if necessary.
- Save your work with File > Save As or Ctrl+S; choose the desired file format.
Notes: This method is a balance between control and natural appearance. If the color shift looks too uniform across the image, refine masking to protect non-skin areas and adjust layer opacity to blend more realistically.
Technique 2: Brush Tool for quick painting adjustments
- Open and duplicate the image as above.
- Use Brush Tool to paint color onto a new adjustment layer. This method is straightforward but may offer fewer options for nuanced edits.
- Experiment with blending to see how different brush modes and opacities affect the skin tone. Save periodically to compare results.
Technique 3: Eyedropper and Color Range for precise skin selection
- Open the image and duplicate the layer.
- Color Range selection to isolate skin tones: select Color Range from the menu and choose Skin Tones or Samples. Adjust fuzziness to refine the selection, and check “Detect Faces” if available to isolate facial skin.
- Apply an adjustment layer (e.g., Solid Color or Hue/Saturation) to target the selected skin with controlled color changes.
- Refine with a mask to ensure only skin areas are affected. Paint on the layer mask with black to hide edits in non-skin regions and white to reveal them as needed.
- Fine-tune by adjusting the color or saturation and blending modes to achieve a natural balance across highlights and shadows.
Matching skin tones across images
For portraits that require consistency, you can sample a reference skin tone from another image and apply it to the target photo. Create a new adjustment layer, sample colors, and use a brush or Curves/Levels to align the tonal distribution. Use a layer mask to confine changes to skin regions only and maintain natural transitions along the jawline and neck.
Practical workflow: Step-by-step quick reference
- Open image and duplicate the layer for safe editing.
- Make a skin selection using Color Range, Detect Faces, and adjust fuzziness.
- Create a new Hue/Saturation or Curves adjustment layer.
- Mask the layer to apply edits only to skin areas.
- Adjust skin color with targeted sliders and refine with opacity, blending modes, and selective color if needed.
- Use the Brush or Burn Tool to polish transitions on hair, eyebrows, and lips.
- Merge layers when satisfied and save in the appropriate format.
Tips for natural-looking results
- Apply small, iterative adjustments rather than large, one-shot changes.
- Focus adjustments on midtones first, then refine highlights and shadows for a balanced look.
- Use layer masks to protect non-skin areas and maintain detail in lips, eyes, and hair.
- Compare before/after views by toggling visibility of adjustment layers to ensure a natural progression.
In practice, color correction tools like Color Range, Hue/Saturation, Curves, and Selective Color provide a robust toolkit for skin-tone retouching. These methods can be used individually or in combination to achieve sun-kissed, even-toned, or creatively altered skin appearances while preserving realism.
Point Color: The Best Way to Get PERFECT Skin Tones! - Photoshop Trick
For broader color management, consider exploring Color Range with Skin Tones presets and Curves-based adjustments to shape tonal balance. When preparing images for print, remember to account for CMYK values and maintain perceptual consistency across devices. The key is small, precise edits that respect natural anatomy and lighting.