Understanding Pixlr’s editing capabilities is crucial for photographers, influencers, and content creators who require precise control over image appearance. Pixlr offers an intuitive platform with a vast array of editing tools that can be applied using various techniques and methodologies.
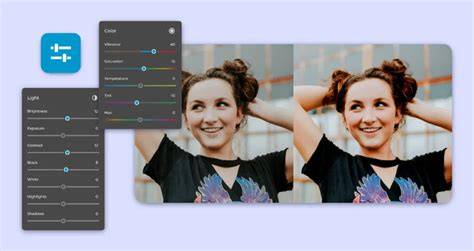
Open your Pixlr application and access the adjustments panel. The editing toolbar in Pixlr is easily accessible by navigating to the top of the interface. Pixlr features numerous adjustment tools, making it an ideal choice for photographers and non-professionals who wish to edit their images. These adjustments are crucial in ensuring the desired outcome is achieved.
Basic Adjustments and How to Copy Them
Exposure adjustment tool allows users to fine-tune the overall brightness of their image. Select your desired tool based upon your editing requirements, be it color, saturation, or exposure. Modify the levels and settings for your chosen adjustment tool as needed.
Color and Saturation Adjustments: A color picker can be used for selecting colors within an image and adjusting their saturation level. Tone and Contrast Adjustments: Pixlr offers tone correction tools, providing detailed control over contrast, brightness, and shadows.
To copy edits, you can apply the same adjustment settings to another image or duplicate adjustments across layers. Selective editing is an essential aspect of digital image editing, and Pixlr offers a range of tools to achieve precision and finesse in your edits.
Masking and Selective Edits
Pixlr’s masking tools are designed to help you select specific areas of an image with precision. To get started, navigate to the ‘Tools’ tab and select the ‘Mask’ option. From here, you can choose from various shapes, including rectangles, circles, and polygons, to create a mask that fits your needs.
Clone Stamp vs. Healing Brush: When it comes to removing imperfections from an image, Pixlr offers two powerful tools: the Clone Stamp and the Healing Brush. The Clone Stamp tool is ideal for removing large areas of similar color or texture, such as blemishes or scars. This tool works by duplicating a sampled area of the image and applying it to the targeted area. On the other hand, the Healing Brush tool is better suited for removing small imperfections or blemishes. This tool works by sampling an area of the image and blending it with the surrounding pixels to create a seamless repair.
Working with Layers
Layers are a fundamental concept in digital image editing, and Pixlr offers a range of tools to help you work with layers efficiently. In Pixlr, layers are used to separate different elements of an image into distinct files. This allows you to edit each layer independently and apply effects, adjustments, and retouching without affecting the underlying image.
Selective editing and copying edits between images are facilitated by duplicating adjustment layers or applying saved presets to new files. While Pixlr offers a robust set of features and tools, it is ultimately limited by its free status. However, Pixlr remains a powerful tool for achieving high-quality edits and creative effects, and its free status makes it an accessible option for many users.
Pixlr - Mask 2
| Tool | Purpose | Best for |
|---|---|---|
| Exposure | Adjust overall brightness | Light backgrounds, high-contrast scenes |
| Saturation | Modify color intensity | Vivid colors without oversaturation |
| Mask | Selective editing | Precise area corrections |
| Clone Stamp | Remove large areas of similar color/texture | Blemishes, scars, uniform textures |
| Healing Brush | Repair small imperfections | Fine retouching |
Considering the points above, users may conclude that Pixlr’s more user-friendly interface and greater convenience with a cloud platform could make it the better choice. Open your Pixlr application and access the adjustments panel. Select your desired tool based upon your editing requirements, be it color, saturation, or exposure. You can copy edits by duplicating adjustment layers or applying presets, ensuring consistency across images.