Lanyards made with gimp are a fun, practical craft that people of all ages can enjoy. This guide focuses on finishing the square stitch, the most widely used method in lanyard making, and outlines a clear, four-step closing process to neatly seal the work.
Finishing the Square Stitch: Step-by-Step Closure
Make one last square stitch on the lanyard by taking the strand on the right side and crossing it over to the left side above the left strand. Move the strand on the bottom left over to the right. Lift the bottom strand over the strand that goes to the right and thread it under the strand that goes to the left. Move the top strand over the strand going to the right and thread it under the strand going to the left. Move one strand around the strand to its left. Push the strand up through the middle of the stitch and out.
Take the next strand to the left (the one you just went around) and move it around the strand to its left. Push the strand up through the middle of the stitch and out. Continue with the next strand on the left, move it around the strand on its left and up through the middle of the stitch. Pull the four strands that now rest in the middle all together to tighten them. Pull one strand at a time now to make them even and tighter. Trim the ends of your strands to the length you prefer.
Tip: This article focuses on finishing the square stitch used most widely for lanyard making. Lanyards are a fun, practical craft project that people of all ages can do. You can make them to hang on key chains, belt loops, and even water bottles.
Alternative Finishing Techniques for the End Knot
If you’ve started a lanyard and are getting close to the end, you may be wondering how to finish it off. Take a strand of one color in your lanyard and wrap it around the strand on the opposite side that is the same color as it. For example, if your two colors are black and green, hold one green strand in your hand and wrap it around the other green strand that is on the opposite side. Take the strand that you are holding in your hand and push it up through the middle of your lanyard stitch. You don’t have to pull this knot tight yet. Take the strand that you are holding and push it up through the middle of your stitch to create another small knot.
This strand might be harder to push through since there are more strands to go through now. There will be more strands that are left out after you do your first two knots. Pull on your strands that are hanging out with gentle force until they are pulled taut and can’t be moved around easily.
Use a pair of sharp scissors to cut off any excess strands of your lanyard that you don’t want. Take each strand individually and wrap it around the one next to it, going in a clockwise direction. Grab one strand and bring the end up through the center of the knot. Pull it so that it comes all the way through, but it doesn’t tighten it all the way. Take all three of the strands in your hand and pull them until the knot is tight.
Your lanyard might have excess strands hanging off of it if you didn’t use all of your material. Be mindful of heat when finishing with flame-based methods for end-point sealing. Your lighter is a useful tool, but it must be used carefully to avoid damage.
Heat Sealing the Ends (Careful Method)
Note that heating the ends can help seal synthetic fibers, but it requires caution. Your lighter can melt the end of the lanyard to secure it, but do not apply direct flame for too long. The flame from your lighter will be hot enough to melt your lanyard end within a couple of seconds. Don’t hold the lighter on your lanyard for too long, or it may catch fire. After heating, let the lanyard cool down for a short period before handling it to prevent burns or warping.
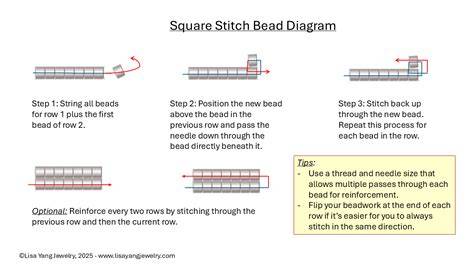
*UPDATED* How to Make the Box/Square Stitch Lanyard | littlechungussss
Practical Notes and Variations
- Consider trimming the ends evenly for a neat appearance.
- Check that all strands are taut but not overly stretched to maintain the shape.
- If using multiple colors, ensure the color order remains consistent through the final turns.
Across these steps, the objective is to produce a clean, secure end that holds the design together while keeping the lanyard functional for hanging on key chains, belt loops, or water bottles.