Affinity Designer on iPad offers a comprehensive toolset that rivals the desktop version, including Vector and Pixel personas, intuitive UI, and a broad spectrum of import/export options. This article explains whether you can export from Affinity Designer iPad to Illustrator, what works, what doesn’t, and a practical step-by-step workflow to minimize issues when transferring designs to Illustrator.
Can you export Affinity Designer iPad files to Illustrator?
Yes, you can. However, exporting isn’t always straightforward, and the process can involve compromises depending on the formats you choose. Affinity Designer iPad supports several export formats that Illustrator can read, but not every feature translates perfectly. This is a common pain point for teams that rely on precise gradients, layers, and effects when moving between apps.
Formats that actually work in Illustrator
SVG, PDF, and EPS are the primary formats that tend to translate more reliably into Illustrator. Each format has its own caveats-gradients, clipping masks, and certain live effects may require adjustments after the import. The article outlines a practical workflow to optimize results and reduce the need for rework.
My workflow: Step-by-step export from Affinity iPad to Illustrator
- Finalize Your Design - Ensure elements are organized, groupings are logical, and essential edits are complete before exporting. A clean structure reduces later tweaks in Illustrator.
- Go to Export Options - Open the export panel in Affinity Designer iPad and choose a suitable format for Illustrator based on your project needs.
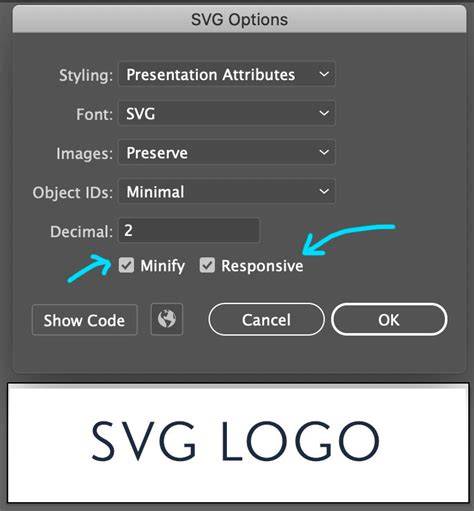
- Configure Export Settings - Tailor settings to preserve as much fidelity as possible. For SVG, enable preserving layers where available; for PDF, keep vector data and avoid rasterizing critical elements; for EPS, check compatibility with Illustrator’s expectations.
- Save and Transfer - Save the export to a transferable location (iCloud Drive or another cloud service) and move the file to the computer if needed for a direct Illustrator import, or open Illustrator on iPad if supported in your workflow.
- Open in Illustrator - Import the exported file into Illustrator and inspect bearings such as fonts, fill types, gradient ramps, and layer structure. Be prepared to adjust fonts and gradients post-import.
For SVG:
SVG is generally reliable for vector shapes and paths. If you notice differences in stroke weight or join styles, adjust directly in Illustrator after import. Complex blends or effects may require reapplication in Illustrator.
For PDF:
PDF preserves vector data well and can retain grouped objects and layers better than SVG in some cases. However, some live effects from Affinity may not render identically in Illustrator and could need tweaks to fills or transparency settings.
For EPS:
EPS can be a solid bridge for simple vector artwork, but newer Illustrator versions implement EPS differently. Check for embedded fonts and ensure that text is converted to outlines if necessary to avoid font substitutions.
In cases where Affinity Designer iPad doesn’t export directly to .ai format, using SVG or PDF as an intermediary often yields the most stable results. If your project is highly dependent on advanced effects, you may need to recreate or adjust those effects in Illustrator after import.
Common export problems (and how to fix them)
- Fonts look different - Convert text to outlines if you don’t need font editing in Illustrator, or ensure the fonts are available in Illustrator’s environment.
- Colors shift - Use consistent color spaces (sRGB or CMYK as needed) and verify color management during export and import.
- Layers are flattened - Keep layer structure intact by choosing formats that preserve layers (SVG/PDF) and avoid flattening options during export when possible.
- Effects don’t translate - Recreate effects in Illustrator if they are rasterized or not supported by the import format; rely on native Illustrator tools for final polish.
- Affinity iPad doesn’t export directly to .ai - Use SVG or PDF as bridging formats, then import into Illustrator and refine.
Tips for a smoother cross-platform workflow
- Keep designs simple where possible to minimize translation issues between formats.
- Organize layers and groups logically to ease reassembly after export.
- Prefer vector-centric elements for export to preserve editability in Illustrator.
- Test with a small starter file to verify the chosen format meets your fidelity requirements before committing a large project.
Visual guide: quick reference of the export path
Finalize design → Export options → Configure settings → Save/Transfer → Open in Illustrator. This sequence helps maintain fidelity and reduces rework during the handoff.
Practical notes from real-world use
During collaborative projects, teams often rely on Illustrator as the core workflow component. Affinity Designer iPad excels in providing a near-desktop level feature set on a tablet, but the export process to Illustrator remains the bottleneck for some complex projects. The key is choosing the right intermediary format and being prepared to adjust elements in Illustrator post-import.
Tables and data alignment
| Export Format | What Translates Well | Potential Issues |
|---|---|---|
| SVG | Vectors, paths, basic fills | Gradients, effects, and masks may require adjustment |
| Vector data, layers | Some live effects may not render identically | |
| EPS | Simple vectors | Font handling and compatibility variations |