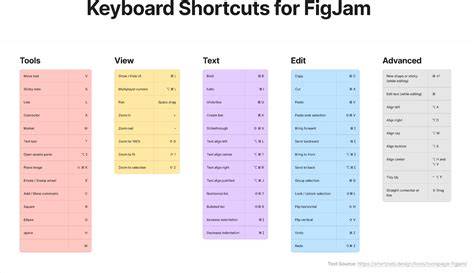
Recently, I've mastered Figma shortcut keys, and my workflow has become noticeably faster. While these might seem like late-to-the-game or mundane tips, I'd like to share the Figma shortcut keys that I, as a Web/UI designer, use constantly in my daily work based on my own personal bias and experience.
Copy & Paste and Replacement Shortcuts
Paste and Replace (⇧ + ⌘ + R) This is super useful when you want to replace an element that has already been placed with another element. It is also valuable when replacing a regular object with an instance. It is also convenient to use it in conjunction with Matching Layers for bulk replacement. If the original object is no longer needed after replacement, I sometimes use ⌘ + X (Cut & Copy).
By using Paste and Replace, one element is swapped for another. It is also convenient to select all elements you want to replace with Matching Layers and perform a bulk replacement.
Copy as PNG (⇧ + ⌘ + C) This is a feature that allows you to copy a frame or other selected elements as a raster image within Figma. I often use this when I've created a banner or thumbnail image and want to place it into a screen capture of the actual publishing medium to check the readability of the text and the overall balance. You can paste it with ⌘ V. (Create → Copy/Paste as PNG → Check in preview → Fine-tune → Copy/Paste as PNG... an infinite loop) Copy as a PNG image and paste it into any frame or rectangle.
Copy/Paste Properties (⌥ + ⌘ + C/V) This is slightly similar to the command mentioned above, but you can copy and paste information such as fills, strokes, and effects (= properties). This is useful when you have set an image to a rectangle's fill and want to replace it with another image in Figma. It's also useful when you want to place an image different from the one set in the component onto the instance side! Paste properties such as fills and strokes.
Paste Over Selection (⇧ + ⌘ + V) When you copy and paste text normally in Figma, the original style (Font Size, etc.) is carried over, so I use this when I don't want to change the text style on the paste side when copying and pasting text. Copy & Paste as plain text.
Frame, Group, and Layout Operations
Add Auto Layout (⇧ + A) Select all the elements you want to apply Auto Layout to, and press ⇧ + A to apply it. Since situations where you want to apply Auto Layout occur frequently, the shortcut key is the fastest way to do it. (At the same time, it automatically aligns the elements at equal intervals.)
Remove Auto Layout (⌥ + ⇧ + A) Used when removing the Auto Layout set in 05. Since Auto Layout is basically applied to frames, removing Auto Layout results in elements being placed inside a regular frame. When you remove Auto Layout, the objects remain aligned inside the frame.
Ungroup (⌘ + ⇧ + G) or (⌘ + ×) Used when ungrouping, but also when removing the Auto Layout set in 05. The difference from 06 is that the frame (group) that had Auto Layout applied is removed entirely. I use this or 06 depending on whether I want to keep the frame or not.
Frame Selection (⌥ + ⌘ + G) Wraps selected elements in a frame. This is handy for grouping images on LPs or UI elements. If you check "Clip content" for elements placed inside a frame, you can export them in a trimmed state, making hand-off to developers easier (be careful so that shadows are not cut off!).
Display, Canvas, and View Toggles
Show/Hide UI (⌘ + \) Temporarily hides the layer panel on the left and the properties panel on the right. This is useful during meetings to share the screen. On a JIS keyboard, ⌘ + > can work instead of ⌘ + \.
Zoom In/Out (⌘ + +/-) Zoom the entire canvas. Holding ⇧ while pressing +/- moves the screen horizontally. This is handy for detailed checks and is a relief for tendonitis.
Show/Hide Layout Grid (⇧ + G) 12-Column grids or 8pt grids help verify alignment. You can toggle visibility from the eye icon in the layout guide panel.
Show/Hide Rulers (⇧ + R) Rulers help align elements beyond the grid. Red guides are rulers, not grid lines.
Create Section (⇧ + S) Sections group artboards or parts into a single area for easier viewing. Double-clicking section edges equalizes padding within the section.
Open Quick Actions (⌘ + K) The Quick Actions panel is at the top of the tool panel where you can search for and run commands and plugins. It’s convenient for typing keywords or calling up recently used plugins.
Zoom to Fit (⇧ + 1) Shows the entire canvas to get an overview of progress across artboards.
Zoom to Selection (⇧ + 2) Zooms to the currently selected artboard for quick focus during presentations.
Selection, Nested Elements, and Constraints
Deep Select (⌘ + Click) For deeply nested Auto Layouts, you can click once to reach the bottom-most child. I use this constantly to navigate complex structures.
Ignore Constraints (⌘ + Drag) Temporarily ignore the constraint rules while adjusting a parent element, useful when rearranging layout without moving child elements. You can optionally stretch with ⌥ while dragging to scale left/right or top/bottom evenly.
Swap Fill and Stroke Colors (⇧ + X) Swap fill and stroke colors to quickly create outlines from a filled shape, a common trick when designing banners or icons.
Scale (K) Launch Scale to resize selected objects within a frame without changing aspect ratio, useful for icons inside frames. Absolute or ratio-based entries are possible.
Show Preview (⇧ + Space) Quickly check your design in the preview mode without leaving the current workspace.
Typography, Components, and Alignment
Outline Text (Cmd/Ctrl + Shift + O) This is essential for exporting icons or logos in vector outlines for developers.
Create Component (⌥ + ⌘ + K) Register reusable UI parts as components to improve consistency. Instances inherit changes from the component, though overrides are possible. Components can be accessed from the Assets tab.
Detach instance (⌥ + ⌘ + B) Break the link between a component and its instance, turning it back into a regular object. This cannot be applied to the component itself.
Align horizontal centers (⌥ + H) Aligns multiple objects along the vertical axis or to the parent. Align vertical centers (⌥ + V) completes center placement when used together with horizontal alignment.
Transformations and Layer Management
Flip horizontal (⇧ + H) Create symmetrical decorations by flipping a copy of an element. Flip vertical (⇧ + V) for vertical symmetry in banners or UI decorations.
Bring to front ( ] ) Move the layer to the very top within the same frame; great for banners and important UI elements.
Send to Back ( [ ) Place background materials at the back; you can move layers one by one with ⌘ [ ] if needed, but the back/front extremes are often sufficient.
Select Children (Enter) Select all child elements one level down within the parent, which is very convenient when dealing with many nested elements. Press Enter repeatedly to drill down further.
Select Parent (⇧ + Enter) Jump back to the parent level; helpful for quickly navigating the layer hierarchy. Collapse opened layers with ⌥ L to keep the canvas tidy.
Hide/Show Selection (⇧ + ⌘ + H) Quickly hide or reveal specific elements to keep focus on current tasks.
These shortcuts keep a Web/UI designer's workflow fluid, enabling rapid iteration, easy handoff to developers, and clutter-free canvases during reviews. The Quick Actions panel, in particular, accelerates access to commands and plugins, letting you type your intent and execute without hunting through menus.