In this article, we go through the process of downloading and installing DaVinci Resolve 19, with practical tips to get you editing as quickly as possible. This guide covers choosing between the free version and DaVinci Resolve Studio, selecting the right operating system, and completing the installation with minimal friction.
Starting the download: find the official installer
First, go to your web browser and search "Da Vinci Resolve 19" and click here on Blackmagic Design Da Vinci Resolve 19. Scroll down and you'll see the option to download the free version or buy the studio version, which, if you are a pro editor or you're aiming to start getting paid for your editing work, I highly recommend because it has a ton of useful features.
Otherwise, to download the free version of Resolve, click on Free Download Now, which will bring up this window with a few different options. On the left side, we have the free versions of either Da Vinci Resolve 18.6, which is the last version of Resolve that was released, or the latest Da Vinci Resolve 19 beta version. The beta version is going to have the latest and greatest of Da Vinci Resolve, but it might be a little unstable because it's still in beta. Personally, I like staying up to date with all of the new stuff coming out in Da Vinci Resolve, so I choose beta, and to be extra safe whenever I upgrade, I make sure I've saved a backup of all of my projects.
Choosing between free, beta, and Studio versions
On the right side of this window, we have the paid Studio versions. If it says Studio in the name, that means it's paid. Also, depending on your operating system, you would choose Mac, Windows, or Linux. I'll click to download the free version for Mac. You're going to be asked to fill out your whole life story-just kidding, it's just a little bit of info-and you can then click on Register and Download on the bottom right.
When this window pops up, click on this Da Vinci Resolve 19 zip file and your system might save it by default to your Downloads folder. My computer asks me where I'd like to save it, so I'm fine with my desktop. Click Save, and now it's going to take some time to download.
How To Export Video In Davinci Resolve 19 Tutorial
Preparing the installer: unpacking and launching
While you're waiting, I highly recommend you check out my 14 Tips video because there are a bunch of things you might not know how to do in Resolve that are easy to learn and apply and can save you tons of time and your sanity. Check it out if you want to learn some time-saving tips.
Once Resolve's downloaded, you'll see a zip folder wherever you saved it. On a Mac, you can just double-click on this zip folder. On a PC, I believe you can right-click and choose Extract All. Okay, and now we have this Da Vinci Resolve DMG file, and on Windows, I believe it would be an EXE file. You can delete the zip folder. Double-click on this file to open it up. Click on Install Da Vinci Resolve, continue, and make sure you thoroughly read every single word of this stuff-does anyone actually ever read every single word of this stuff? Do whatever you're comfortable with; I just click Agree and move on.
During installation: selecting components and permissions
If you see a pop-up window that says, "In order to install Resolve, you must install these components," you can just checkmark them and hit Install. This will take 5.67 GB of space up on my Mac. You can change the location you'd like to save this here if you'd like. Install, and you might need to enter your password. This will take a few minutes to do its thing, and in the past, when it's finished, it's asked me to restart my computer, so if you see that prompt, it's fine to restart.
Okay, and the installation was successful, so we can close this window too, and we can delete this DMG file or EXE file-we don't need it anymore. Go up to the search bar, type in Da Vinci Resolve, click on it to open it up. It might take a minute, and here we are, ready to start editing.
First run and validation: starting the app
Now that Resolve's installed and you're ready to start working, I highly recommend you check out this video next, which is going to give you some great timeline tips to make editing a lot easier and more efficient. If you want to know the gear that we recommend and use or our favorite music for video projects, check out the description below. We have over 200 tutorials on our channel, and we release new ones every week, so to stay in the loop, subscribe. I hope you have a lovely day, and we'll see you in the next video.
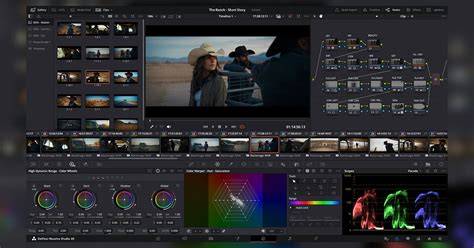
DaVinci Resolve 19 is a major update with AI tools and over 100 feature upgrades. For editors, improvements to the transcription workflow make it possible to edit clips based on the transcribed text directly on the timeline. DaVinci Resolve is widely praised for its color grading tools, built-in Fusion for motion graphics, and Fairlight for audio-all in one app.
What to expect on hardware and ongoing use
The free version works well for basic editing if your system meets the minimum specs: a decent multi-core CPU, at least 16GB of RAM (32GB preferred), and a dedicated GPU with at least 2-4GB of VRAM. Yes, you can use DaVinci Resolve on a budget PC, but with limitations. The interface can seem overwhelming at first, but Resolve is quite beginner-friendly once you understand the layout.
Think about whether you need Studio features for advanced work, especially if you collaborate in teams or require advanced AI tools and licensing management. For studios and larger teams, the new Organizations app in Blackmagic Cloud enables easier sharing and license management, which can be a key advantage for larger workflows.
Tips for post-install optimization
To maximize efficiency, consider backing up your projects before upgrading, as mentioned in the installation notes. The process described here emphasizes keeping a backup of all projects whenever upgrading to a new major version.
With Resolve installed, you can begin exploring the interface, color grading, Fusion for motion graphics, and Fairlight for audio. If you want more practical guidance, there are many tutorials available to help you get up to speed quickly.
- Download the installer from the official Blackmagic Design site.
- Choose Free Download or Studio based on your needs.
- Download the appropriate version for your OS and unzip if needed.
- Run the installer and approve necessary components.
- Restart if prompted and launch DaVinci Resolve to start editing.