Transforming a static image into an engaging motion piece involves understanding how to work with layers, frame-by-frame tweaks, and smooth motion principles. This guide consolidates practical steps drawn from hands-on experiments and tutorials to help you animate a static photo in DaVinci Resolve, including related techniques for frame-by-frame animation, parallax, and text integration.
Understanding the goal: animated static images and frame-by-frame animation
When you link a static image to a moving background, it can create the illusion that a subject in the frame is moving toward or reacting to the environment. The aim is to animate distinct parts of a subject (like a schoolgirl) while keeping the rest of the scene consistent, and to achieve natural motion by applying frame-aware editing techniques. This often involves converting to frame-by-frame animation and managing how keyframes affect different parts of the image across frames.
Preparing your project and assets
Start by setting up a clean project with appropriate resolution and frame rate. A square resolution and 30fps provide a stable baseline for social media and general playback. Import your static image (for example, School_girl_side) and ensure it is properly linked or parented to the background so the composite remains coherent as the background moves. Organize your design layers with clear naming to facilitate later per-layer animation and masking.
Choose the right visuals and structure your layers to support animation. For effective photo animation, manage file sizes, use layered design, and name structured layers to save time. The goal is to create a framework that allows you to manipulate individual parts without affecting unrelated areas.
Key animation concepts to apply
- Timing: control when objects move or change on the screen to feel natural.
- Easing: create fluid motions so animations don’t look robotic.
- Anticipation: add realism by showing a subject preparing for a movement.
- Frame-by-frame control: convert a layer to frame-by-frame animation and apply keyframes with careful spacing.
Understanding these principles helps you craft better animations that connect with viewers, whether for ads, social media, or storytelling.
Step-by-step workflow: animating a static image with frame-by-frame control
- Step 1: Create a new project and sequence. Open your animation tool, set a square canvas for flexible platform fit, and keep the frame rate at 30fps for smooth motion. Create a background layer and a separate layer for the static image (e.g., School_girl_side).
- Step 2: Import and position assets. Import the static image and align it within the scene so that the background movement interacts naturally with the subject. Link or parent the static image to the background as needed to preserve coherent movement.
- Step 3: Convert to frame-by-frame animation. On the School_girl_side layer, convert to frame-by-frame animation and select the option Keyframe every fourth frame. This creates a per-frame timeline for the subject while the background continues to move.
- Step 4: Manage frame-based changes. When moving the girl to a new position in a specific frame, observe that she remains in the original positions across other frames unless you adjust those frames. If you modify eyes or mouth in one frame, the changes tend to propagate to other frames, so you’ll need to apply changes selectively per frame or use masking to isolate edits.
- Step 5: Masking and layer distribution choices. If you break apart or distribute to layers, you still might not achieve per-frame independence for facial features. In practice, you can mask individual parts (eyes, mouth) or keep facial features on separate sub-layers that you animate independently, then composite them back to the main layer. This approach avoids cross-frame propagation of edits.
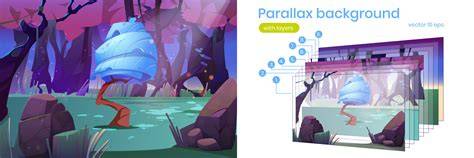
- Step 6: Animate background separately. Animate the background to create motion parallax with the static subject. A motion tween or similar keyframe-based movement can be applied to the Background to simulate depth and movement while the School_girl_side layer remains controlled per-frame.
- Step 7: Animate text layers (optional). If your composition includes text, group and animate those layers toward the end of the timeline using Fade In and Scale In effects. Stagger entrance times for a dynamic flow and to avoid crowding the scene.
- Step 8: Review and export. Preview the full animation, adjust timing between background, subject, and text, and ensure smooth transitions. Export using the format that best suits your distribution platform and desired quality.
Practical tips for achieving convincing motion
- Work with layered masks to isolate facial features and limbs. Editing a single frame’s eyes or mouth should not unintentionally alter the same areas across all frames; isolating those features helps preserve frame-specific changes.
- Use a consistent lighting and shading approach across frames. Subtle changes in lighting can reveal the image is a composite and reduce the illusion of motion realism.
- Consider frame pacing: longer holds for static poses and shorter intervals for dynamic or interacting moments between subjects and the background.
- When integrating text, stagger its animation to avoid simultaneous appearance with other elements, which can overwhelm the viewer.
Enhancing with tools and related workflows
Beyond straightforward frame-by-frame animation, tools and workflows such as parallax from 2.5D techniques can add depth to static images. For example, you can build a basic 3D layout within Fusion using Image Planes, Merge 3D, Camera, and Renderer nodes, then apply Depth Map and Displace 3D to simulate parallax. This approach enables camera movement to create cinematic depth while keeping static elements intact. Add finishing touches with lens flares and film grain for a polished look.
When planning an animation project, it’s helpful to outline the process and prepare templates. A library of templates and ready-made scenes can speed up iteration. The concept of “picture animation” translates well to marketing assets, announcements, and social media content, delivering engaging motion experiments from static imagery.
Metadata and optimization considerations
Export settings should match the intended platform, balancing quality and file size. If a project contains multiple scenes or layers, consider trimming and optimizing assets prior to export to enhance playback performance. For designers new to motion, starting with a single image and a simple background motion provides a gentle ramp into more complex 2.5D techniques.