End credits are widely used in filmmaking, television productions, documentaries, and other kinds of video content. They add a finishing touch to your video projects and acknowledge the production crew while leaving a lasting impression on viewers. Several tools can create rolling credits, but iOS users, especially iPhone users, have a limited list of options, as most professional software are not available to use on mobile devices. IMovie, a versatile video editing tool available across various Apple devices, is a good option. This article will guide you on how to make scrolling credits on iMovie on iPhone and add that professional touch to your video projects.
1. iMovie on iPhone vs Mac for credits
The process of adding credits to iPhone is similar to iPad but quite different on Mac which have both centered and scrolling text options. Customizing your scrolling credits to fit the tone and theme of your video adds a bit of artistry to your creative project. To edit your text credit, click on the text box on the screen above the timeline. A combination of centered and scrolling credits is popular for certain video projects. However, combining centered and scrolling credits on iMovie iPhone is not possible as the scrolling feature is not supported on iPhone.
Key limitation on iPhone
As of now, you can't make scrolling credits in your iPhone. The same thing is not possible, as this is only in the software used on your MacBook.
2. iMovie on Mac: combining centered and scrolling credits
To combine centered and scrolling credits in iMovie on Mac, simply add centered and scrolling text templates side by side on the timeline. Adding custom graphics or visual effects to scrolling credits on iMove is ideal for themed videos, presentations, or personal projects. Custom graphics can come in different forms depending on the theme and purpose of your video.
3. Step-by-step: basic iPhone workflow (for reference)
- Step 2: Add a background clip at the end of your video on the timeline if you want your credits to display on a black background.
- Step 3: Move your cursor to the part you want your credits.
- Step 4: Select the text style highlighted below among the options and click on Closing to add your end credits.
Step-by-step, the iPhone approach involves choosing a background, adding text, and adjusting timing, but the crucial limitation is that the scrolling credits feature is not supported on iPhone. The technique is primarily demonstrated for Mac users who have access to both centered and scrolling templates.
4. How to create scrolling credits on Mac (for cross-platform understanding)
In Mac, you can place centered and scrolling templates side by side on the timeline to achieve a combined end-credit sequence. The process includes adding a background, inserting the credits, and using the inspector to adjust timing. You can extend the credit duration by dragging the edge of the credit clip. A proper credit sequence can feel professional and polished, distinguishing a film from a simple cut to black.
5. Using custom graphics and transitions
Adding custom graphics or visual effects to scrolling credits is ideal for themed videos, presentations, or personal projects. Custom graphics can come in different forms depending on the theme and purpose of your video. If you’ve set a theme for your movie, titles related to the theme appear at the top of the browser. With your iMovie project open, click the Media Library button to show the browser if necessary. Position the playhead at the beginning or end of the movie. If you want a background for the title sequence or end credits other than black, do any of the following: Click Backgrounds, then double-click the background that you want to use. Drag a background to the beginning or end of the timeline. If you don't want a special background, go to the next step.
To use your own background for the sequence, add a video clip, photo, or image as the background. Click Titles, then double-click the title in the browser that you want to use or drag the title to the timeline. If you used a background or other clip, the title is added as an attached clip above the other clip in the timeline. Adding credits to the end of a movie is a great way to show who starred in the movie and give credit to them. In rolling credits, the names start at the bottom, then scroll up to the top and out of frame.
6. Practical tips for timing and pacing
In rolling credits, the speed is determined by the length of the title and the number of lines. To tweak timing, use the inspector to sync the credits with visuals or audio. The title can only be as long as the clips in the project, so you may need to lengthen the black space or background to accommodate longer credits. If you want the credits to appear over different graphics or multiple images, you can add a slideshow as a background. For a polished finish, add a fade-through-black transition at the beginning.
7. Advanced workaround: adding images that scroll with credits (iMovie-only approach)
If you want an image to scroll with the credits using iMovie alone, you can attempt a workaround by first creating a scrolling image effect in another app (like Keynote, then exporting as an image) and then bringing that image into iMovie. The Ken Burns effect can simulate scrolling for the image, and you can align the credits to scroll at the same speed by adding trailing black space and adjusting timing. Keep in mind this approach requires careful timing and may not be as seamless as using dedicated scrolling credits templates on Mac.
8. Final production notes and common questions
Yes, you can save credits as a separate project and export them as a file to reuse in future iMovie projects: highlight the credits section, copy it, create a new project, paste, and save as a file. You can then drag this credits file into the end of other projects as needed. For those asking about exporting to DVD or CHAPTERS, remember that DVDs are SD and do not carry high-definition quality; exporting from iMovie with chapters is not supported in the standard workflow. If you are aiming for professional outputs, consider projects that stay within iMovie's editing capabilities or move to more advanced software for post-production needs.
In summary, iMovie on iPhone provides limited support for scrolling end credits; Mac users have robust options with centered and scrolling templates, backgrounds, and graphics. By leveraging appropriate backgrounds, templates, and timing adjustments, you can craft credits that feel professional and cohesive with your video's tone and style.
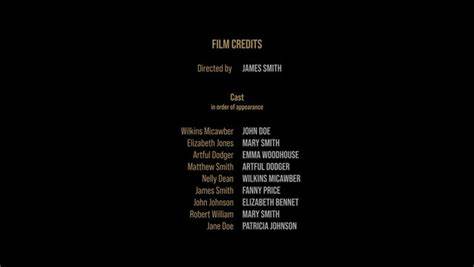
Visual example of a credits layout and black background.
How To Add Credits With iMovie
Video guide illustrating how to combine centered and scrolling credits on Mac.
Tables and quick reference
| Platform | Scrolling Credits | Centering Credits | Notes |
|---|---|---|---|
| iPhone/iPad | No | Possible on Mac | Scrolling not supported on iPhone/iPad |
| Mac | Yes (combination) | Yes | Use side-by-side templates on timeline |
| Backgrounds | Yes | N/A | Can use black or custom backgrounds |