The move tool in SketchUp (keyboard shortcut M) will allow you to move objects quickly and easily. You can also copy and rotate objects with the move tool. The easiest way to move an object is to select it first. Then activate the move tool and select where you wish to grab it. It is handy to be able to grab at certain corners or midpoints for aligning items. Then drag the item to its destination and click again to drop it. You can also select an existing point on the model if you wish to drop it off at an exact point. Or, you can specify the distance you wish to move it.
The move tool can also copy items. After you have started your move tool and picked up the item press the “Ctrl” button on your keyboard and this will activate a copy leaving your original item intact. When the copy is activated you will see a + sign next to your cursor.
You can rotate items upon its center axis with the move tool as well. Select the item to move/rotate, activate the move tool, and hover over any one of its faces. You will see four red + signs appear. If you click on any one of those plus signs you will begin to rotate the part.
Selecting and Grabbing Points for Precise Placement
To move an object accurately, start by selecting it. Then use the move tool to grab from strategic points such as corners or midpoints. This makes alignment with other geometry straightforward and predictable. You can also choose an existing point on the model to drop at an exact location. If you need precise distances, you can specify the distance you wish to move the object.
Copying with the Move Tool
Copying is a powerful feature of the move tool. After you begin the move, press Ctrl to create a copy while preserving the original object. A plus sign appears next to the cursor to indicate that you are duplicating the item. This approach is useful for creating repeated elements or testing different configurations without losing the initial model.
Copying Objects with the SketchUp Move Tool - 2 Minute SketchUp Tips
Rotating Objects Using the Move Tool
Rotation is integrated into the move tool workflow. When you hover over a face while the move tool is active, four red plus signs appear. Clicking one of these signs initiates rotation around the model's center axis for the selected item. This provides a quick way to adjust orientation without switching tools.
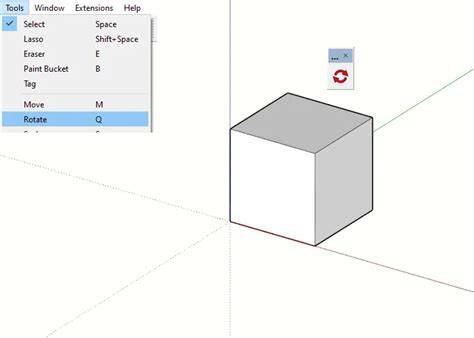
In practice, a typical workflow looks like this: select the object, activate the move tool (M), click a grabbing point such as a corner or midpoint, drag to the target location, and click to drop. For copies, hold Ctrl during the move to create duplicates. For rotations, hover over a face and click a red + handle to rotate around the center axis.
| Action | Shortcut / Tip | Result |
|---|---|---|
| Move object | Select > M | Drag to a new location and drop |
| Copy object | Ctrl while moving | Creates a duplicate with a + cursor |
| Rotate object | Hover over face after M | Click a red + handle to rotate around center |
Practically, using the move tool effectively hinges on selecting the right grabbing point, leveraging copy for rapid iteration, and using rotation handles for orientation adjustments. By combining these capabilities, you can build complex arrangements quickly while maintaining control over placement and alignment.