Chroma keying in Alight Motion allows you to remove a specific color from video or image layers and replace it with transparency or another background. By selecting a Key Color and adjusting Threshold and Feather, you can create clean cuts, refine edges, and minimize color fringing. This article consolidates the essential steps and best practices extracted from the provided draft to help you achieve professional-looking results.
Choosing the Key Color and using the Eyedropper
Apply Chroma Key to any video or image layer, and set Key Color to the color that you want to make transparent (this is best done using the Eyedropper tool).
Use the Eyedropper to sample the background color from the scene. The chosen Key Color should be the color you want to remove, typically a solid, uniform backdrop such as a vibrant wall, cloth, or pop-up screen. Isolate the area to be edited so that the key color is representative of the background rather than foreground objects.
Threshold and Feather: how they affect transparency
The color to be keyed out is determined by the Key Color, and the amount by which the color of a pixel can differ from the Key Color and still be made transparent is controlled by Threshold. Increase this to make a broader range of colors transparent.
The softness of the transition between transparent and visible pixels over the given threshold is controlled by Feather. Near zero, transparent areas have a hard edge. As this value increases, colors close to the Threshold will become partially transparent. This can result in a smoother edge, but can also result in more of the background or key color showing through, creating a colored fringe around the layer.
Practical steps: from setup to edge refinement
- Apply Chroma Key to the target video or image layer.
- Set Key Color with the Eyedropper to the area you want to remove (the background color).
- Start with a modest Threshold to capture the most uniform background.
- Increase Threshold gradually to include colors that deviate slightly from the original Key Color (shadows or lighting variations).
- Fine-tune Feather to soften the edge. If the edge is too harsh, raise Feather a little; if too soft and you see background fringing, reduce Feather.
- Review the result against the composite scene and adjust as needed to minimize color spill and ensure foreground objects remain intact.
Lighting and background considerations for cleaner keys
For the background (the parts of the video you want to remove), make sure you have a solid, vibrantly colored wall, cloth, or pop-up screen covering the entire space, and try to light it as uniformly as possible. Changes in color due to shadow will be more difficult to remove in editing. If using a cloth, try to avoid wrinkles. Try to keep foreground objects (people or other things you don't want to remove) as far in front of the background as possible to reduce fringing from light reflected off the background.
Color correction integration with chroma key
Isolate part of a video or photo to apply color correction only to that area (for example, to make only greens more vibrant by isolating them with Chroma Key and then adjusting with the Saturation / Vibrance effect). This allows for nuanced control without affecting the entire frame.
Common issues and quick fixes
- Fringing: If you notice a colored fringe around edges, slightly reduce Feather or fine-tune Threshold to tighten the key.
- Shadow color leakage: Increase background lighting uniformity or sample a more representative Key Color if shadows create inconsistent keying results.
- Partial transparency of foreground elements: Ensure objects are clearly separated from the background and adjust Feather downward to maintain edge sharpness on foreground subjects.
Tips for maximizing results
- Work with a neutral or complementary backplate beneath the foreground to assess transparency quickly.
- Use a separate layer for the background replacement so you can re-time or re-edit without reapplying the key.
- Test with different lighting angles to minimize reflections that can alter color in the key area.
Table: key parameters and their effects
| Parameter | Effect |
|---|---|
| Key Color | Color to be removed; chosen with Eyedropper for best accuracy |
| Threshold | Range of color similarity considered transparent; higher means broader removal |
| Feather | Softens edges; higher values create smoother transitions but may reveal background |
| Shadow/Lighting | Variable colors complicate keying; uniform lighting helps |
| Foreground Distance | Greater distance reduces edge fringing from background light |
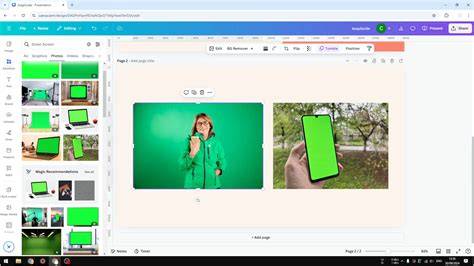
Note: This article uses the provided material to describe practical chroma keying steps in Alight Motion and does not introduce new external sources.
Chromakey For Beginners: Everything You Need To Know
By following these steps and considerations, you can achieve clean background removal in Alight Motion, with smooth edges and minimal artifacts, suitable for composite scenes and creative projects.