In this tutorial, I'll show you how to improve your portraits by giving your subject beautifully smooth skin with Photoshop! We'll start by learning how to remove pimples and other minor skin blemishes using Photoshop's Spot Healing Brush. To follow along, you can use any portrait photo. The original image. I used Photoshop CC but this tutorial is fully compatible any recent version up to Photoshop 2023, plus older versions like Photoshop CS6. With the image newly-opened in Photoshop, the Layers panel shows the photo on the Background layer. Before smoothing the skin, start by removing any unwanted blemishes. Click on any unwanted skin blemishes with the Spot Healing Brush to remove them. Photoshop will instantly "heal" the blemishes by replacing the problem texture with good skin texture from the surrounding area. For best results, make your brush slightly larger than the blemish. To change your brush size, press the right bracket key ( ] ) on your keyboard to make the brush larger or the left bracket key ( [ ) to make it smaller.
If we look at the woman's forehead in my image, we see what looks like a large pimple just to the right of center. To remove the blemish, I'll click on it with the Spot Healing Brush. Photoshop analyzes the area I clicked on, finds good skin texture from the area surrounding it, and then blends the good texture in with the problem area's original tone and color. As you're retouching the skin, keep in mind that while it's okay to remove temporary problems like acne or other minor skin issues, it's usually not okay to remove permanent features like moles or even certain scars, as these are part of what makes someone who they are. Continue working your way around the person's face to remove any remaining blemishes. Here's a side-by-side comparison of what the woman's skin looked like originally (left) and after some quick retouching with the Spot Healing Brush (right). With most photos, this initial skin cleanup should take no more than a few minutes.
With the blemishes removed, we're ready to smooth and soften the skin, and again, it's best to work on a separate layer. To smooth the skin, we'll use Photoshop's High Pass filter. If you're familiar with the High Pass filter, it's most likely because you've used it to sharpen images in Photoshop. Even though we'll be using High Pass to smooth skin, not sharpen it, many of the steps are the same. The High Pass filter looks for edges in the image and highlights them. An edge is an area where there's a big, sudden change in brightness or color between neighboring pixels. With portrait photos, the edges are usually along the person's hair, around the eyes, the mouth, and so on. Skin texture, on the other hand, has relatively low amounts of detail with much smoother transitions. These areas are not considered an edge, so rather than highlighting them, the High Pass filter fills these areas with neutral gray.
If we were sharpening the image, the High Pass filter would allow us to sharpen the edges (the details) without affecting the skin. But for smoothing skin, we use High Pass for the opposite reason. We'll detect the edges not so we can sharpen them but so we can smooth and soften everything except the edges. The High Pass filter detects edges and highlights them, and the Radius option at the bottom of the High Pass dialog box controls the "thickness" of the edge highlighting. In other words, once Photoshop has detected an edge, the Radius value tells it how many pixels on either side of it to include as part of the edge.
Low Radius values will highlight only the finest details in the image. But to make sure we don't end up softening these important details, we need to highlight the areas around them as well, which means we need a larger Radius value. If your subject is further back in the photo, or you're working on a lower resolution image, a smaller Radius value of 18 pixels or even 12 pixels might work better. Why these specific values? It's because it's important for the next step that you choose a Radius value that's easily divisible by 3. For example, 24 divided by 3 is 8, 18 divided by 3 is 6, and 12 divided by 3 is 4. Nice, easy numbers. Click OK to close the High Pass dialog box. Your image will turn mostly gray.
We need to blur the High Pass filter effect. It may seem counterintuitive, but the blurring will actually help to bring out more good texture in the skin. In the Gaussian Blur dialog box, set the Radius value to exactly one third of the value you used for the High Pass filter. In my case, I set the High Pass radius to 24 pixels, so I'll set the Gaussian Blur radius to one third of that, which is 8 pixels. This blends the High Pass result in with the image, creating a high contrast, over-sharpened effect. It may look terrible, but don't worry.
In the Layer Style dialog box, look for the Blend If sliders at the bottom. There are two sets of sliders, one labeled "This Layer" and one below it labeled "Underlying Layer". Notice the slider below each end of the gradient bar. These sliders control how the "Smooth Skin" layer blends with the image below it based on the brightness levels of the layer. Start by reducing the lighter halos. Press and hold the Alt (Win) / Option (Mac) key on your keyboard, click the slider on the right and begin dragging it towards the left. Holding the Alt (Win) / Option (Mac) key tells Photoshop to split the slider in half so that as you're dragging, only the left side of the slider moves while the right side stays in place. Watch your image as you drag the slider and you'll see the lighter halos fading away.
Here's the result after dragging the first slider. Most of the lighter halos are now gone, or at least, they're much less noticeable. To reduce the darker halos, press and hold your Alt (Win) / Option (Mac) key, click the slider on the left and drag the right half of it towards the right. Again, you'll need to drag almost all the way to the right for most of the dark halos to disappear. And here's my image after dragging both sliders. Her skin is looking very smooth, but so is everything else in the image.
To limit the smoothing effect to just the skin, add a layer mask. A black-filled layer mask thumbnail appears on the "Smooth Skin" layer. Make sure your Foreground color (the brush color) is set to white. You can see your current Foreground and Background colors in the color swatches near the bottom of the Toolbar. The swatch in the upper left is the Foreground color. Before you begin painting, check your brush options in the Options Bar. Then paint over the skin to reveal the smoothing effect. A soft-edge brush will work best. We already know that we can change the brush size from the keyboard using the left and right bracket keys. Add the Shift key to change the brush hardness. I'll start by painting over her forehead. Since we're painting on the layer mask, not on the layer itself, we don't see the brush color as we paint. Next, I'll paint over her nose, her cheeks, and around her eyes to reveal the skin smoothing in those areas. Adjust your brush size as you go to avoid painting over details that should remain sharp. If you do slip and paint over the wrong area, press the letter X on your keyboard to set your brush color to black, and then paint over the mistake to hide the smoothing effect. This switches your view from the image to the layer mask. The white areas in the mask are where you've painted to restore the skin smoothing. Black areas are when the smoothing effect remains hidden. It looks a bit creepy, but viewing the mask is a great way to make sure you haven't missed any spots, and you can paint directly on the mask if needed.
At this point, we've smoothed and softened the skin, but the effect is too intense. To reduce it, lower the opacity of the "Smooth Skin" layer. In general, an opacity value of between 40% and 60% works best, but it will depend on your image. And with that, we're done! And there we have it! For more portrait retouching tutorials, learn how to reduce wrinkles, how to change eye color or how to whiten teeth with Photoshop!
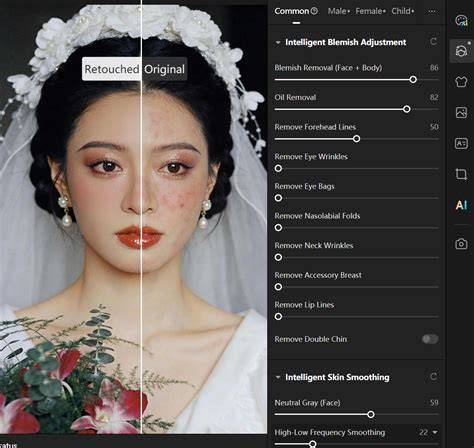
How to RETOUCH a Portrait in 3 Seconds with EVOTO AI
Steps at a Glance
- Remove blemishes with Spot Healing Brush on the Background layer.
- Prepare for smoothing on a separate layer.
- Apply High Pass to detect edges and create a smoothing mask.
- Blur with Gaussian Blur to blend high pass result.
- Refine with Blend If sliders to control halos.
- Mask the smoothing with a layer mask, painting white on skin areas.
- Fine-tune opacity to taste.
In practice, this approach preserves essential facial details while achieving a natural-looking skin smoothness that remains respectful to the subjectâs features.