When you unzip the template package you received from us, you will notice that there are several different files inside. Many of our templates include a PSD file which is a native Photoshop file. You can simply double-click this PSD file and it will open into Photoshop. If there is not a PSD file available, you can use the PDF file. In Photoshop, select File > Open from the top menu and select the PDF. The Import PDF window will appear.
This step is only required if you are using the PDF version of the template. After you check your settings click OK to continue.
Open and Prepare the Template
Layer 1 - This layer is the content of the PDF Template you opened. Very Important: Make sure you create a new layer to work on so you do not design on the layer with the template guides!
Open the PSD template in Photoshop (File > Open; or drag it into the program). The template itself will be on a locked layer on top (Window > Layers) and is called 'Template'. It will show you the bleed area and safety margin to help set up your artwork. Click on the eye on the left side of the layer to turn off the blue borders (safety margin and bleed area) - do NOT unlock the layer. You will still see the blue guides which mark the safety margin and bleed - those guides will NOT print.
You are now ready to start designing. Make sure the important information is within the safety zone (the white part when you turn on the template layer) and any background colours or images should spread to cover the entire bleed area as should any objects that creep in from the side of the page. Before you submit the PSD file(s) for printing, it's essential to delete the layer with the template. Select the template layer, click on the lock symbol above it (now it's unlocked) and then click on the trash can in the lower right corner.
Using the PDF Template
Open the PDF template in Photoshop (File > Open; or drag it into the program). You will be prompted how you would like to import the PDF. In Pages mode, select all pages (for templates with three pages, select the last two). Set the Resolution to “300 pixels/inch”, Mode to “CMYK Color”. (You should not need to adjust the width and height - they should be 0.25 inches larger than finished product size). Click OK to create the documents. This should create two Photoshop documents - one for the front, and one for the back. The template itself will be on Layer 1 (Window > Layers). This will show you the bleed area and safety margin to help set up your artwork. Please create a new layer for your artwork before you start designing (Layer > New > Layer).
You are now ready to start designing. Make sure the important information is within the white/transparent part and any background colours or images should spread to cover the entire bleed area as should any objects that creep in from the side of the page. Before you submit the PSD files for printing, it's essential to delete the layer with the template (Layer 1).
Inserting Artwork and Text
Photoshop templates are useful for creating holiday cards, marketing materials, and other graphics. Inserting and sizing the photos so they work in the template is where many people get frustrated. Placing photos in a template typically involves using a clipping mask. Basically think of a clipping mask like a piece of paper with a shape cut out of it. When you use a clipping mask, you are putting that piece of paper on top of a photo. You can move the photo around below the piece of paper, and resize it as needed so that the part you want shows up.
Note that in this model, the photo is below the “paper”/mask layer. However, in the Layers panel, the photo layer is shown above the mask layer, but with a small arrow next to it that indicates it is clipped “under” the mask. Install any fonts used in the template before opening it if possible. You may get an error message about missing fonts not being available. Find the correct font or an alternate font from the drop-down list.
Look at the Layers panel. You may see groups of layers (shown with file folder icons), such as Text, Elements, and Images. Press Enter to accept the image placement. Move/resize the picture so that it appears roughly where you want it. In the Layers panel, drag the layer with the picture you added directly above the box that will serve as your mask layer. The mask layer is the opening you want to use as the “frame”.
NOTE: If you only see “Release Clipping Mask“, the template already had the clipping masks created for you. In this case, you should see a little arrow on your image layer and the layer above your image. The layer above is usually called something like “Place image here”. Now you can edit the text and other elements. Expand the text group if there is one. Double-click each text layer and edit the text for your needs.
When you are finished, you will want to save the image as a JPG or PNG for printing or sharing online. - To save for print, go to File > Save As, select the file type of JPG. Make sure “ICC Profile: sRGB” is selected, and then click Save.
Tips for Print Readiness
Before you submit the PSD files for printing, ensure that the important information remains within the safety zone and that the background fully covers the bleed area. If you are working with Photoshop Elements (PSE), be aware that grouping layers may differ; you may need to ungroup layers using a bundled action or upgrade to the full Photoshop for smoother workflow. For beginners, starting with a clipping mask approach is often the most reliable method to ensure photos align with the template frame.
- Open template and check for a Template layer; keep it hidden while designing.
- Place artwork on new layers to preserve the template guides.
- Use clipping masks to fit photos into designated shapes.
- Delete the Template layer before final print to avoid printing guides.
- Save in Photoshop PDF with PDF/X-4:2008 preset for best printer compatibility.
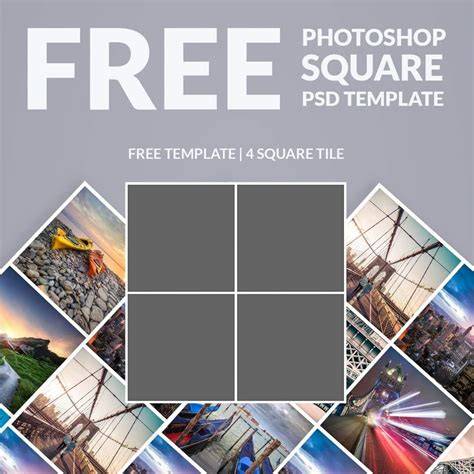
Photoshop Tutorial: How to Create Clipping Mask in Photoshop
Install any fonts used in the template before opening it if possible. You may get an error message about missing fonts not being available. Click OK. Open the Layers panel. You may see groups of layers, such as Text, Elements, and Images. Photoshop Elements cannot work with layer groups, so you will either need someone with the full version of Photoshop to ungroup these for you, or you can search for and download an action for PSE to ungroup layers. There are many available online for free.
In summary, templates are powerful tools for consistent, professional-looking graphics when you follow careful steps: choose the right file (PSD or PDF), prepare with the correct bleed and safety margins, work on new layers, use clipping masks for image placement, edit text in dedicated text layers, and save in a print-ready format.