Do you want to learn how to select and edit parts of your image quickly and easily? You will learn how to configure the Magic Wand tool and how to make and refine selections in Photoshop. The Magic Wand tool in Photoshop is basically a tool for selecting similar colors. Principle: It works by creating a selection based on the color you click on. It automatically selects the surrounding areas that have a similar color, putting them in a selected state. Drawbacks: It may not work well with images that have scattered hair or require precise edges. Overall, the Magic Wand tool in Photoshop is widely used and is a tool that both professional designers and avid Photoshop enthusiasts will come across.
For example, it can be challenging for Photoshop beginners as it requires a certain level of skill and precision in selecting areas. The Magic Wand tool in Photoshop is a commonly used selection tool, which can usually be found in the left toolbar of Photoshop. By default, Photoshop remembers the most recently used tool in the toolbar. In Photoshop, the Magic Wand tool is grouped together with the Object Selection Tool and the Quick Selection Tool. If you still can't find the Magic Wand tool, you can click on the "Edit Toolbar" button above the color picker in the left toolbar. By clicking on the "Edit Toolbar" option at the top of the pop-up menu, you can access the Customize Toolbar panel.
How the Magic Wand Tool Works and When to Use It
The Magic Wand tool selects objects based on their color in the image. Suppose you want to select all the pencils, but you find it challenging to select them directly. Let's give it a try. You can use a parameter of the Magic Wand tool called "Tolerance". You can think of tolerance as the allowed color difference. Since we've accidentally selected some non-background blue, it means our tolerance for color difference is somewhat high. It seems that the tolerance value is a bit too small. Let's continue increasing the tolerance and see what happens. However, when the tolerance value reaches 17, the background is still not completely selected, and a portion of the blue pencil is selected.
Can't you use the Magic Wand tool to select these pencils then? Of course, you can! Let's try a different approach. Click on the areas that are not yet selected. This will add more of the background to the selection. Repeat this process until all of the background is selected. Finally, all you need to do is invert the selection (Ctrl+Shift+I), and now all the pencils will be selected.
When "Sample Only Contiguous Pixels" is selected, and you use the Magic Wand tool to select a color, if parts of that color are separated by other colors, they will not be selected. For example, to select two blue circles, you can first select "Sample only contiguous pixels" and use the Magic Wand tool to click on one circle. Then you can try unselecting "Sample only contiguous pixels" and click on the other circle. Like other selection tools, the Magic Wand tool also has options for "Add to selection", "Subtract from selection", and "Intersect with selection".
The Tolerance parameter defines how broad a color range will be included in the selection. A higher tolerance selects a wider range of colors. Anti-aliasing smooths jagged edges. Contiguous vs. Non-Contiguous determines whether the tool only considers neighboring pixels or can include similar colors anywhere in the image. Add to and Subtract from selection help build complex selections incrementally. Sample All Layers lets you sample colors across all visible layers, not just the active one.
Practical Scenarios and Step-by-Step Examples
To use the Magic Wand effectively, you should consider these common workflows. First, select a background area with similar colors and, if needed, invert the selection to isolate your subject. For solid-color skies or backgrounds, the Magic Wand excels at quick removal or replacement. If the initial selection misses parts of the target due to color variation, hold Shift to add more areas to the selection. If you need to refine edges, you can use Select > Modify > Smooth to soften jagged edges, and then contract or expand the selection to tighten the boundaries.
After you have your selection, you can create a layer mask to isolate the selected area. First, ensure the selected layer is active in the Layers panel. Then click the Add Layer Mask icon to generate a mask based on your selection. You can press Ctrl+D (Cmd+D on Mac) to deselect when needed. Keyboard shortcuts can greatly enhance efficiency: activate the tool with W, hold Shift to add to a selection, and hold Alt/Option to subtract from it. You can also intersect selections by pressing Shift+Alt/Option together.
The Magic Wand Tool is particularly powerful when used in combination with other tools. You can blend its results with the Quick Selection Tool for intricate shapes, or use it alongside the Lasso Tools for manual refinements. For gradients or multi-tone areas, adjust the Tolerance to capture the intended color range, and use Anti-Aliasing to achieve smoother edges. In cases where you want to replace a sky or a solid background, the Magic Wand is often the quickest starting point.
Advanced Tips and Considerations
- In Contiguous mode, only adjacent pixels within the tolerance range are selected; in Non-Contiguous mode, similar colors across the entire image are selected.
- Anti-Aliasing helps create smooth edges, but you can toggle it if you need crisper or rougher edges for specific effects.
- Sample All Layers allows color sampling from all layers, which can affect your selection when colors appear on multiple layers.
- For difficult edges like hair or fur, the Magic Wand alone may not suffice; you may need Refine Edge/Select and Mask or other selection tools for best results.
- After making a selection, applying a Gaussian Blur to the edge or using a feathering approach can help blend the result into a new background.
Different Contexts: Photoshop Elements and Cross-Version Notes
In Photoshop Elements, the Magic Wand Tool is located in the Toolbox and shares a Button Group with tools like Quick Selection and Refine Selection. Its options include Tolerance, Anti-aliasing, Contiguous, and Sample All Layers, plus a Refine Edge feature for edge improvements. The core principle remains: it selects areas based on tone and color with a single click and can be refined through additional options and tools.
In modern Photoshop versions, you can access more advanced masking workflows through Select and Mask, where you can use components like Quick Selection, Refine Edge, and the On-Object controls to tweak results further. The fundamental concept remains: the Magic Wand provides a fast initial selection based on color similarity, which you can refine or replace with masks for non-destructive editing.
Practical Examples and Workflows
Example 1: Replacing a Sky
- Open an image with a clear sky background.
- Use the Magic Wand with an appropriate Tolerance to select the sky area. Hold Shift to add any missed sections.
- Inverse the selection to isolate the sky in the background, then create a Layer Mask or paste a new sky image on a new layer and mask accordingly.
Example 2: Isolating a Solid-Color Object
- Click on the object with the Magic Wand to select all contiguous pixels within the tolerance range.
- Refine the edges with Smooth or Feather, and then mask the selection for clean isolation.
Example 3: Working with Text or Graphics
- For text or flat-color graphics, the Magic Wand can quickly select the filled areas. Adjust tolerance to capture similar tones and use Add/Subtract to refine.
Related Concepts and Complementary Tools
The Magic Wand Tool is most effective for solid or near-solid color regions. It complements tools like the Quick Selection Tool for complex shapes and the Lasso Tools for manual outlining. For more precise results, the Select Subject option in Select and Mask can perform broader object detection, which you can then fine-tune with the Magic Wand as needed.
When youâre ready to take your workflow to the next level, consider integrating hardware like TourBox, which can map common Photoshop actions (brush size, zoom, layer navigation) to physical controls, accelerating your editing process. This approach helps you automate repetitive steps and keep your focus on creative decisions.
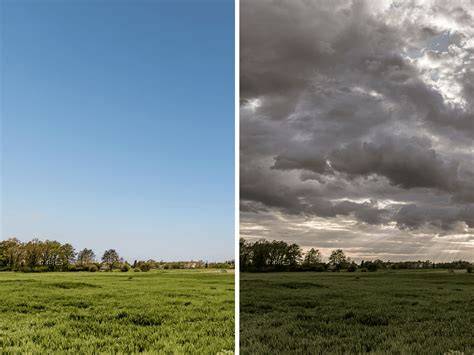
Images illustrating color-based selection and masking can help readers visualize how the Magic Wand interacts with tolerance, contiguous versus non-contiguous selections, and edge refinement.
A short video can demonstrate a practical workflow: selecting a solid-background subject, refining the selection, and applying a mask to place the subject onto a new background.
Notes on Workflow and Best Practices
Overall, the Magic Wand is a fast starting point for selections based on color and tone. Its power lies in quickly capturing large swaths of uniform color and then allowing you to refine with masks, feathering, and edge adjustments. Practice with different Tolerance values, Contiguous settings, and sample modes to understand how each change affects your results. As you gain experience, youâll know when to rely on the Magic Wand and when to turn to other selection tools for precision work.
To begin using the Magic Wand tool in Photoshop, you'll first need to acquire the software. Adobe Photoshop is available for both desktop and iPad devices, making it a versatile tool for various users. There are different types of Creative Cloud plans available, such as individual plans, plans for students and teachers, and even plans for businesses. Some plans offer just Photoshop, while others include a suite of creative apps. During special occasions like Cyber Monday, Adobe may offer discounts on their plans, making it the perfect time to invest in a subscription. Whether you're a professional designer, student, or teacher, Adobe Photoshop and its Magic Wand tool can help elevate your work and streamline your editing process.
In summary, the Magic Wand tool in Photoshop helps select pixels based on tone and color, making it ideal for background removal, quick selections on solid-color areas, and as a starting point for more complex edits. Its effectiveness increases when combined with other tools and masking workflows, and with practice, you can achieve professional results efficiently.