Layer masks are those awesome functions that allow you to mask out parts of your layer. If you want the layer to only affect a small portion of your photo, you have to erase/mask out everything except that little area. In reality, this only takes a second but that’s a long time in the editing world where everything is created to make your job super fast and easy. So instead of wasting a whole second, I just click the layer mask and hit Ctrl+i for ‘invert’.
Layer masks are effective for hiding and showing different parts of an image. You may find it easier to mask the area you don’t want to edit rather than the area you do. Inverting a mask is simple and gives you plenty of opportunities to experiment along the way. When you use the Brush tool in tandem with masking, painting white will reveal your adjustments or add to your mask, while black areas will conceal your adjustments or subtract from your mask.
Understanding the basics of masking and inversion
A layer mask is a nondestructive editing tool, which means you can use it to make edits to your work that are easy to undo. With layer masks, your edits only affect the area of your image that you specify. For intricate editing tasks, you need an intricate layer mask. This is where inversion comes in.
Remember that when it comes to layer masks, black conceals (the pixels on the masked layer), while white reveals them. A second way is I like to use texture layers to add depth and pop to the iris of eyes. To blend one image or solid color into another, apply a layer mask to the image or solid fill layer that’s on the top. Invert that layer mask by hitting Command+I on Mac or Ctrl+I on Windows.
How to invert a standard layer mask
First, select the layer mask you want to invert. If you already have a mask, and want to invert it, open the Paths panel. Copy your vector mask to a new path, and delete the original mask. Select it: Use the Select and Mask workspace to place your mask over one area of your image. Invert it: Use Command+I on Mac or Ctrl+I on Windows to invert the mask, rendering its opposite.
To invert a mask for a normal bitmap layer, simply click the layer mask thumbnail and press Ctrl+I (Windows) or Command+I (Mac). This flips the mask so that what was hidden becomes visible and what was visible becomes hidden. This is especially useful when you’ve painted with black to hide areas and want to quickly reverse those edits.
Inversion versus vector masks
Sometimes vector masks are a better solution than pixel-based layer masks. Vector masks have the advantage of crisper edges, and they are completely editable using Bezier curve-editing skills. Can one reverse the default vector mask behavior? Yes-use the Pen tool, the Freeform Pen tool or one of the shape tools to draw a path. The result is a mask with white background and a gray shape. I’ve used Photoshop for years, and never needed to reverse a vector mask to achieve the desired result, until today.
If you just want to create a normal vector mask, follow steps 1-3 and skip to 6. If you already have a mask and want to invert it, copy your vector mask to a new path, and delete the original mask. A vector mask can be inverted by adjusting the path or by swapping the fill colors of the path itself.
Practical tips for inverted masking in workflows
A layer mask is a nondestructive editing tool, which means you can use it to make edits to your work that are easy to undo. With layer masks, your edits only affect the area of your image that you specify. For intricate editing tasks, you need an intricate layer mask. This is where inversion comes in. Layer masks are effective for hiding and showing different parts of an image. You may find it easier to mask the area you don’t want to edit rather than the area you do. Inverting a mask is simple and gives you plenty of opportunities to experiment along the way.
Not quite sure when to use an inverted layer mask? Sharp and jagged edges, whether they’re from pixelation, aliasing, or another issue, can often be difficult to fix. To blend one image or solid color into another, apply a layer mask to the top image or solid fill layer. Invert that layer mask by hitting Command+I on Mac or Ctrl+I on Windows.
- Select the layer mask you want to edit.
- Choose the desired editing method (brush, gradient, or selection).
- Invert the mask with Ctrl/Cmd + I to render its opposite.
- Refine edges as needed to ensure seamless blending.
- Continue non-destructive edits until satisfied with the result.
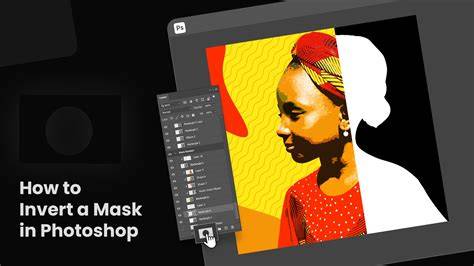
Want to actually see this in action? Such a simple request, but not one of Photoshop’s most “discoverable” features. If you’re looking for a visual demonstration, a quick search for practical masking tutorials can help bring these steps to life.
60 Second Photoshop Tips - Inverting Layer Masks (Episode 7)
There’s nothing wrong with layer masks, but sometimes vector masks are a better solution. Inverting a mask is simple and gives you plenty of opportunities to experiment along the way. A layer mask is a nondestructive editing tool, which means you can use it to make edits to your work that are easy to undo.
Summary of key concepts
- Black conceals, White reveals with layer masks.
- Inverting a layer mask reverses what is shown and hidden.
- Vector masks offer crisper edges and editable paths.
- Use the Pen tools or shape tools to create or modify vector masks.
- Non-destructive editing preserves the original image for easy undoing.