Enhance your photo editing skills by mastering Photoshop’s crop tool, including how to preserve editable pixels and use advanced features like content-aware fill.
Understanding crop options: delete pixels vs. keep pixels
If you choose the default, which is to delete those cropped pixels, when I hit this little check mark here, or I double click anywhere inside, so the little check mark there says I like this, or if I don't like it, I can hit the cancel or hit escape. But if I hit the commit or just double click anywhere inside, that accepts that.
Now luckily I still have the file open, so I can go to my history, and I can go back to when I opened it, but keep in mind that some changes are destructive. Your history is no longer there when you open a file back up, it is only there while you have that file open, and only remembers the last, by default, 50 things that you've done. By unchecking that, even though I go in and crop this, it has kept those pixels. And notice it has converted my background layer into a layer zero.
Regular layers are capable of being transparent, and also having more information that goes beyond the boundaries of your file. Background layers, basically what you see is what you get. So if I use my move tool, it actually has all of my original image. That layer that's there, this is like a regular kind of like sheet of glass kind of layer where there's pixels on it. So it can be transparent, but it can also extend beyond the boundaries of my image, this canvas that I'm working in.
What happens when you delete cropped pixels
If I had left it on the default, which was to delete, they would be gone. Let me actually, let's say I do that, and I choose delete. There is nothing out beyond the boundaries of my canvas. So now I've done some changes here. I just want to revert to the last time that I saved this, which was basically when I opened up the file. And revert is basically, it's kind of like closing the file and opening it back up again so that you get back to the last time that you had saved, or the last time the file had been saved. So this is in its original state with all of the pixels back. Now that only works if you haven't saved, right? So it's not like you can, you know, close a file, save the changes, and later say revert.
Straightening and content-aware fill during crop
Now this image here is on an angle. I didn't quite, when I was taking this photo, I didn't have my camera perfectly level. And this came up really quickly and I just grabbed my camera real quick, opened up the window and just snapped this shot. But I didn't have time to straighten my camera up because before you know it, this was gone, right?
Another nice thing we could do when we go to the crop tool is, let's say I uncheck delete because I don't want to delete anything. There is a straighten tool built into here. And it doesn't matter whether it's a horizontal line or if it was a building, let's say it's a vertical line, either one would work. But it should be perfectly horizontal or perfectly vertical. How cool. It automatically straightened it. I could also manually straighten it as well. I can always do that if I so desire. You simply drag over something that should be straight and it makes it so. So it figures that out.
And if I pull this out, there are some empty areas here that I would either need to crop off or I would need it to fill. So what is it going to do in those areas if we pull this out and we leave those empty transparent areas, which I'm going to do on all four sides, because this looks like a pretty easy thing for it to fill, for it to figure out using its content aware fill as opposed to its AI generative expand. So especially if you have a more blurry, non-detailed generation. So if at all possible, because content aware works at full resolution, I always choose content aware whenever possible. It just looks at your image and tries to figure out, let's take some of this and let's make some new stuff over there.
You do have to choose this now, if you already had accepted the crop and then you try to come back and do it later, it won't work a second time. You have to do this in your initial crop. And then I can either hit the check mark up there, or I can hit done to accept that. But I can also double click anywhere inside. Takes a second to figure out what to put there. Now it is always a good idea to look at those areas and see some of those are fine, but some of those areas, not so fine. Like I don't like what it did here. So I can say fill with content aware, and it'll do a second guess. We could also use our spot healing brush as well. And it'll take a different guess at what it should put there. Now here I do see that there's duplicates here. So I'd want to go hit that again and maybe again until it creates something that's new. That looks better. Looking all around those edges. Now over here on the left, I noticed here, not really a big fan of this. I think the bottom's fine, but maybe I go in here and just do this area. That's better. This area here, I think was a little bit challenging for it. That's definitely better.
Working with aspect ratios and specific crops
Okay. You can also crop to a specific aspect ratio. When you go to your crop tool, first you can take a look at this ratios menu. You could do a video, a movie aspect ratio of 16 by nine. But let's say I do a five by seven, for example. As I drag to the left, it goes horizontal. As I drag up, it goes vertical. And once you have that the way that you like, you can hit the check mark or done to accept that. You still have that aspect ratio. And then you can go ahead and hit done for your finished crop. If you want to do the whole photo while you're cropping, great.
Now, what if you have added type to this? If I use my type tool and I click in here, this is type. And I'm going to make that a lot bigger. It's not so important what that says or that we can read it. If I were to use the crop tool, it would rotate the entire file and that would make the type not straight. Let me just show you. Notice how my type gets rotated. This is rotating the entire file. I'm going to do it with a crop tool. I'm going to do it with something different. So I just want to change this one layer. I don't want to change anything else. I want to do a layer. So when you want to do a layer, you select that layer and you go into a tool. We press and hold to get to the hidden tools, to the ruler tool. Now the ruler tool can be used to measure things such as the angle at which you want to rotate something. I can drag my ruler from one side to the other to say that should be a horizontal line. It measures the angle of that line. So I want to make sure that I choose the layer that I want to straighten. Now notice the straighten layer is grayed out. Why is that grayed out? That's because if it were to rotate this, it might create empty areas. And so notice the background has a lock. But when I unlock those, then, oh, look at this. Now the straighten layer works. You can convert your background layers, which have limitations. Background layers cannot be transparent. Background layers, not everything works on them. You can unlock it and it becomes a regular layer. And now that's a regular layer, it unlocked this straighten feature. So when I click straighten, it just rotates that one selected layer. And then you come up and you click straighten layer, just make sure you have that layer selected.
If you wanted to extend it like this, you would have to load these transparent areas up as a selection and then say to fill those or you could paint over them. So if you'd like to paint, you could paint over that area and it heals that area. There's actually a built-in selection for that. I can choose my layer and I can say, let's select and I'm going to load a selection and I'm going to use that photo's transparency to create a new selection. The only thing is I want everything that is transparent. Right now, it's giving me the stuff that is solid, that's visible. If I fill this with, let's say my, my, let's do 50% gray. See how it's filling the photo. I actually wanted the things that were transparent. If you say inverse, that creates the opposite selection. So if I say to fill, I could fill those with my content aware. Sometimes it will leave a little sliver of area like this, where if I look closely, so it didn't quite make that selection perfectly. If that's the situation, let me undo and go back a couple of steps here before I filled. So if I said to expand, I could expand by one or two pixels. It's not a lot, just a teeny little line. And that way, when I do my fill with content aware, we don't get those little slivers there. And now that looks good.
Tips and keyboard shortcuts for cropping
- To cancel a crop, tap the escape key.
- Command (Mac) | Control (Win) with the Crop tool selected, temporarily enables the Straighten option.
- “I” auto-populates the Width, Height, and Resolution with the dimensions of the active document.
- “P” enables Classic Mode.
- Crop, then Crop Again - after applying a crop, Photoshop automatically hides the crop marquee.
Cropping presets, canvas addition, and safe practices
Cropping to a Specific Ratio or File Size - With the Crop tool selected, choose Ratio from the Aspect Ratio/Crop Size drop-down menu in the Options bar and enter values to constrain the crop to a specific aspect ratio. Choose W x H x Resolution from the Aspect Ratio/Crop Size drop-down menu to enter specific values and crop to a specific image dimension.
Cropping to Another Image’s Dimensions (File Size) - To use the dimensions of one image to crop another image, select the document with the desired dimensions and select Front Image from the Aspect Ratio/Crop Size drop-down menu to auto-populate the width, height and resolution (or tap “I”). Then, switch to the document that needs to be cropped/resized and drag out the Crop marquee. When the crop is applied, the image will be resized to match the width, height, and resolution of the initial image.
To save file size dimensions or aspect ratios (for reuse on future files) choose “New Crop Preset” from the Aspect Ratio/Crop Size drop-down menu. Note: if an image needs to be resized when cropping, Photoshop uses the image interpolation option set in Preferences > General.
Crop Tool Snaps to Edge - By default, the Crop Tool is set to “Snap To” the edges of the document. To disable the snapping behavior, choose View > Snap To and toggle off (uncheck) Document Bounds.
Cropping to a Selection in Photoshop - If a document has an active selection when the Crop tool is selected, Photoshop automatically matches the Crop marquee to the bounding rectangle of the selection. Tapping the escape key resets the crop to the image bounds. Repositioning the crop marquee deselects the area.
Adding Canvas Using the Crop Tool - To use the Crop tool to add canvas to an image, drag the crop handles outside of the image area and apply the crop.
Reducing File Size by Deleting Content Outside of the Visible Image Area - To permanently delete information that extends beyond the visible image area (the canvas), select the Crop tool, check Delete Cropped Pixels in the Options bar, and tap Return (Mac) | Enter (Win). Photoshop previews any information that extends beyond the visible image area. Tap Return (Mac) | Enter (Win) again to apply the crop. Saving the document after cropping this way is permanent, so be sure that you won’t need to move/reposition/resize layers.
Advanced cinematic cropping workflow
Crop and Straighten Photos in Photoshop - To speed up scanning or photographing multiple images, it might be faster to scan them as a single document. This is one of those things you just kind of stumble upon, and think to yourself, “Hey, that looks kinda cool,” but you’re not sure why.
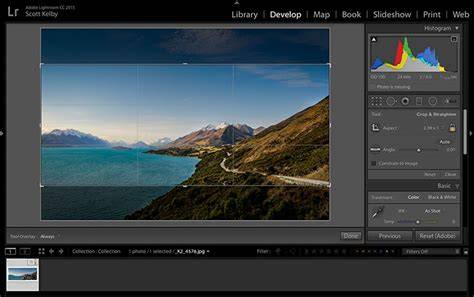
The idea for this came to me while I’m working in Lightroom. I normally work in a view called “Fit” which fits your entire image inside the center preview area, with a bit of gray canvas area around it. For a cinematic feel, you can create a widescreen crop and letterbox using Canvas Size to add black bars, achieving a Panavision-like look.
To create a custom cinematic crop, you can save a preset or enter a precise width x height and resolution in the Crop tool. For example, a cinematic crop may be defined by a 12.111" x 5.389" size at 240 ppi, with letterbox added via Canvas Size. You can save this as a Tool Preset for quick reuse.
Another approach is to use the Enter Custom option in the Crop tool’s aspect ratio menu and type 2.39 by 1.00 to achieve the widescreen cinematic crop. This ratio is associated with Panavision film. If you’re using Camera Raw’s Crop tool, the same concepts apply for constraining and adjusting the crop.
Practical steps recap: applying crop with precision
- Decide whether to preserve cropped pixels or delete them.
- Use the Straighten tool or ruler to correct horizon or verticals on a layer, unlocking the background if needed.
- Choose content-aware fill for transparent or blank areas created by expanding the crop.
- Set a fixed aspect ratio or a custom one, and apply with Enter/Return or the check mark.
- Optionally add canvas for a wider composition or letterboxing for a cinematic look.
- Save a Crop Preset to reuse a chosen ratio and resolution later.