To begin exploring Procreate brushes, you’ll first need to import new brushes into Procreate. Individual brushes come as .brush files and full brushpacks as .brushset files. When you download Procreate brushes or brush sets, it might be that you get a .zip file. Since you cannot import .zip files directly into Procreate, you’ll have to extract the files first.
If you’re working on a PC or Mac, you can unzip the files before transferring them to your iPad, but if you are working on an iPad alone, you’ll have to use an unzip app to extract the files. You can use an app like Winzip or Zip Browser for this. NOTE: If you get a bunch of folders and small files after unzipping, then the file wasn’t meant to be unzipped.
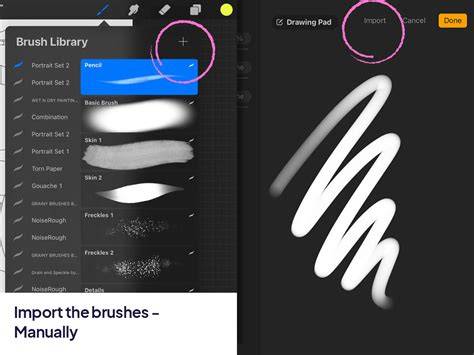
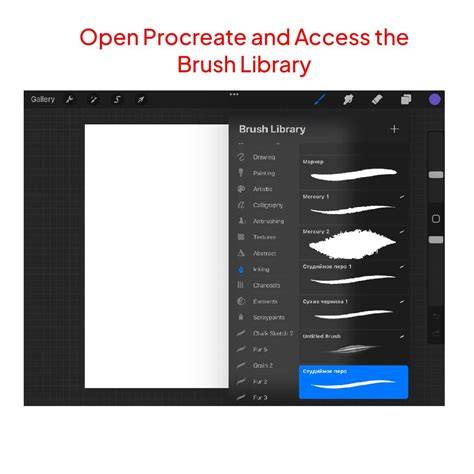
There are multiple ways to import brushes into Procreate. If one way isn’t working for you, please try another method. It’ll take a few seconds for the brushes to import. If you have imported a full brush set, then you’ll find it at the top in the Brush Library.
Open a secondary window by gently swiping upward from the bottom of your screen. An even easier way is to just open your local folders, locate the .brushset file and tap it. It’ll automatically import the new brush or brush set to Procreate! Tada!
The same thing can be done with Dropbox, navigate to the .brushset file, tap the three little dots, select export and navigate to Copy to Procreate. When downloading a set through a Google Drive link, you can import it straight to Procreate.
Ways to Import Brushes: Step-by-Step Options
-
Open the .brushset file directly from your local folders and tap it to import. Procreate will automatically add the brushes to your library.
-
Use the Split View/Multitask feature to access a file explorer and Procreate side by side, then drag the .brushset file into Procreate, if your device supports it.
-
From cloud storage like Dropbox or Google Drive, locate the .brushset file, use export or copy to Procreate, and confirm import.
-
On a PC or Mac, unzip the downloaded brushes, then transfer the .brushset file to your iPad via iCloud Drive, AirDrop, or other syncing methods, and tap to import.
Learn with Procreate Beginnings Series: Whether teaching yourself or others, the Beginners Series is your resource for discovering the fundamentals of Procreate. Get to grips with brushes, tools, gestures and more in this easy and practical series. A great place to start. Start creating digital art right away with this four-part series as it walks you step-by-step through Procreate's essential tools and features. The Beginners Series empowers you with all the skills you'll need to discover the basics of digital art and your own creative potential.
Part One: The Fundamentals
Learn your way around Procreate and start creating digital art right away with basic tools like brush, color, and gestures.
Part Two: Painting Tools
Got the basics down? Delve deeper into Procreate's colors, brushes, layers, and effects as you create a beautiful night scene.
Part Three: Editing Tools
Take your new found skills and discover how they work with Procreate's editing tools. Yup, these are some really nice brushes you should check out.
There are many popular brush packs and creators mentioned in user experiences, including textured brushes for more dynamic artworks, hard brushes that offer precise edge control, and semi-transparent watercolor brushes that add depth. For example, some creators emphasize brushes like Texture Comb for foliage, Square and Edge for bold edges, or watercolor sets that provide nuanced transparency. These terms and examples help beginners understand how different brushes can affect texture, edge sharpness, and mood in digital paintings.
If you’re exploring brush options, you might encounter recommendations from artists such as Matt’s watercolor brush set, Emily’s lineart and sketch brushes, or Marc Brunet’s Starter Brush Pack. Each set brings distinct textures and capabilities, from hard-edged brushes suitable for crisp lines to soft brushes that create gentle blends.
When you’re ready to try brushes in practice, you can search for inspiration through social posts, tutorials, or creator pages and then download brush sets through direct links or cloud storage. After importing, you’ll find the new brushes at the top of your Brush Library, ready to be tested on your next project.
To maximize understanding, start with a few versatile brushes and gradually experiment with textures, edge control, and transparency. Practicing with layers, color, and gesture controls alongside brushes will help you harness Procreate’s full potential for your digital art journey.
Each brush set enhances your toolkit for different styles, from painterly textures to precise linework. As you grow more confident, you can mix and match brushes, adjust brush settings, and use them to build complex scenes-whether you’re sketching, painting, or detailing.
Practical Tips for Beginners
- Unzip correctly: If you download a .zip file, extract it first; otherwise, Procreate won’t import the contents.
- Import methods: Use local tapping, cloud export, or Drive/Dropbox approaches to import brushsets.
- Organize: Keep imported brushes in clearly labeled folders within the Brush Library for easy access.
- Experiment: Try a few brushes at different opacity and size to understand their impact on texture and edges.
- Source variety: Explore brushes from different creators to discover textures that suit your style.
Remember, if one import method doesn’t work, try another. It’s normal to need a moment or two for the brushes to appear in your library after import. With practice, importing becomes instant workflow muscle memory, letting you focus on creating more efficiently.