The SCRIB3D P1 3D pen with display aims to offer versatile 3D drawing capabilities with adjustable speed, a user-friendly kit, and compatibility with ABS and PLA filaments. While it provides a solid entry point for beginners and hobbyists, certain design choices and performance aspects may fall short when stacked against higher-end models like the MYNT3D Super. This article synthesizes practical observations from testing and highlights how the P1 positions itself within the crowded 3D pen market.
Key design and usability notes
- The awkward button placements made it difficult to operate and switch out filaments mid-project compared with higher-end pens.
- Stencils included with the P1 are ideal for testing out multiple 3D pens and getting acquainted with the medium.
- In practice, users may experience fatigue or limitations on longer sessions, with some testers able to work only 5 to 10 minutes at a time.
Performance and control
- Venturing into extrusion, the P1 delivers a manageable extrusion speed for beginners, and layering can be notably better than some more child-friendly iterations.
- The pen features stepless speed control and a side slider to allow precise adjustments, aiding detailed designs or faster infill work.
- A simple workflow is described: plug in, wait 2-3 minutes for heating, double-click the forward button to feed filament, click to stop, and hold or double-click for continuous flow.
Filament compatibility and temperature control
- The P1 can be tuned for use with both ABS and PLA, with PLA presented as a reliable and straightforward option for users at all skill levels.
Completeness of the kit
- The comprehensive kit includes the 3D pen, three starter colors (15 meters) of PLA filament, a power adapter, a step-by-step manual, and a stencil guide with six sample projects.
Comparison with MYNT3D Super
- When comparing usability and ease of operation, the MYNT3D Super often edges out the SCRIB3D P1, particularly in smoother filament feeding and more intuitive control layout.
- Despite these comparisons, the P1’s display and provided stencil resources remain valuable for users exploring different pens and learning curves.
Practical usage tips
- For best results, start with PLA and use the stencil guide to practice basic shapes before attempting more complex designs.
- Take short drawing sessions initially to gauge heat buildup and filament flow, then gradually extend working time as you become more comfortable with the controls.
- Utilize the stepless speed control for nuanced detailing and switch to the side slider when adjusting for speed variations during a build.
Table: quick spec overview
| Feature | Details |
|---|---|
| Display | Integrated display for speed and temperature readouts |
| Filament compatibility | PLA and ABS |
| Power | Power adapter included |
| Starter kit | Three PLA colors, 15 meters total, stencil guide |
| Controls | Stepless speed control, side slider |
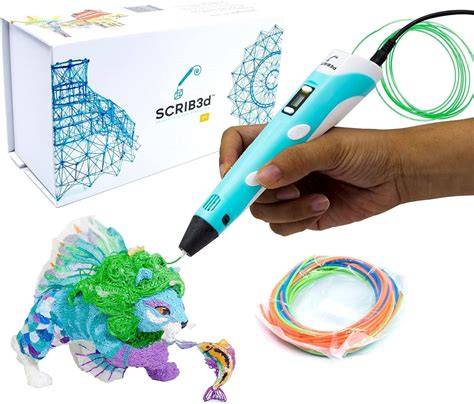
Beyond the text, an infographic illustrating typical heat settings, filament types, and basic drawing workflow can help readers grasp setup and operation steps quickly.
SCRIB3D P1 Getting Started
The video could show plugging in, heating, feeding filament, and performing a simple shape to complement the descriptive guidance.
Conclusion notes for users weighing options
Overall, the SCRIB3D P1 offers a solid entry-level experience with a practical starter kit and reliable PLA performance, but some ergonomic and operational limitations may push users toward higher-end models like the MYNT3D Super for more demanding or longer projects. The included stencil guide and straightforward workflow provide a helpful foundation for experimentation and learning, making the P1 a reasonable option for beginners and hobbyists who value a comprehensive starter package.