White balance is a foundational step in color grading, ensuring that neutrals read as true whites or grays and that all colors render accurately. While Photoshop offers a range of tools and methods, many users seek a fast, reliable one-click or near-one-click solution similar to the neutral-point picker in Camera Raw. This article compiles the most practical approaches using existing Photoshop features and discusses lightweight plugins or workflows that approximate a one-click experience.
One-click and near-one-click approaches within Photoshop
Image > Adjustments > Curves (or layers). Choose the middle eyedropper. Click on a neutral area in the image. This will neutralize any color bias.
For a faster path that stays within Photoshop’s standard tools, you can apply a quick neutral point selection and adjust using Curves or Levels:
- Open the image and add an adjustment layer: Curves or Levels.
- Select the middle eyedropper (Curves) or the white/gray point eyedroppers (Levels).
- Click on a neutral gray or white area in the image. This action centers the color channel values toward neutral, correcting color bias.
- Fine-tune with minor nudges on the curves or input/output sliders to preserve natural contrast and saturation.
Filter > Camera Raw Filter can emulate Camera Raw’s white balance correction in a single step:
- Open Image > Filter Gallery and choose Camera Raw Filter (or press Ctrl/Cmd + Shift + A for newer PS variants).
- Use the White Balance tool (eyedropper) in the Basic panel to click a neutral point in the image.
- Adjust Temperature and Tint sliders slightly if needed, then Apply.
Another quick route is using an Adjustment Layer with a Color Balance or Photo Filter:
- Color Balance: set to Midtones, adjust Cyan/Red, Yellow/Blue, and Green/Mmagenta sliders to remove color casts.
- Photo Filter: choose a neutral or subtle warming/cooling filter and adjust Density for a restrained correction.
Practical tips for fast and consistent results
- Use a neutral target when possible-shoot with a gray card or include a known neutral area in the scene to simplify post-processing.
- Work non-destructively: apply corrections on adjustment layers so you can revert or tweak later without altering the original pixels.
- If skin tones look flat after white balance adjustments, tweak Saturation or use a selective color adjustment to preserve natural hues in portraits.
- Preserve consistency across multiple photos by creating a global adjustment using a reference image or a white balance preset and apply it to a batch of images.
Plugins and quick-access options
There are plugins and external tools that aim to simplify white balance correction, but the core one-click capability in Photoshop usually comes from built-in tools and Camera Raw integration. Popular plugin approaches include:
- Camera Raw Filter as a fast, centralized white balance correction point without leaving Photoshop.
- Lightweight color grading panels or LUT packs that offer pre-made balance profiles; apply a profile first, then refine with temperature/tint.
- Smart presets for daily shooting scenarios (indoor, daylight, mixed lighting) that you can apply and then fine-tune with a single slider.
Note: While plugins can speed up workflows, their effectiveness depends on the image’s lighting conditions and how the adjustments are baked into the final look. Always review color accuracy on a calibrated monitor.
Worked example: a quick three-step workflow
- Open the image and apply a Camera Raw Filter, then click the White Balance tool on a neutral area of the image.
- If needed, slightly adjust Temperature and Tint to refine the neutral point without oversaturating or dulling the image.
- Apply a light global edit (Curves or Levels) to correct contrast after the color bias is neutralized.
Minimal, reproducible steps for consistency
1) Choose a neutral sample in the image or a neutral gray card for accurate correction. 2) Use a one-click or near-one-click tool path (Camera Raw Filter White Balance tool or Curves middle eyedropper) to neutralize color bias. 3) Fine-tune with minimal sliders to maintain natural contrast and skin tones.
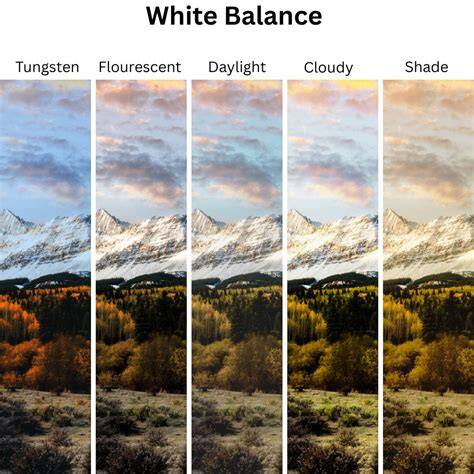
One click to correct White Balance in Photoshop l Tamil l Adobe Photoshop in Tamil
In short, while there isn’t a single universal “one-click white balance” button baked into every Photoshop workflow, you can achieve quick and reliable results by using the Camera Raw Filter’s White Balance tool, a Curves or Levels adjustment with a neutral point, or a lightweight plug-in-enabled workflow. The key is to work non-destructively and to apply a neutral reference under consistent viewing conditions.