There are many tools and capabilities for everything from a light photo retouch to full-scale transformations into artistic, surreal photo art. The first step to editing a photo is importing it into Photoshop. Before you do anything else, make sure your photo isn’t crooked. If your image is slightly off kilter or has a crooked horizon, use the Straightening tool to level things out.
If there are any distracting elements on the side of your image, or your composition is just slightly off, crop it with the Crop tool. Make sure “Delete Cropped Pixels” in the Crop menu is turned off. After you import an image, it can be helpful to duplicate it. Go to Image › Duplicate in the menu to make multiple copies of it. Each duplicate can serve as the basis for an individual layer.
Layers and layer masks are like translucent sheets that you lay over one another to create your image. Put each edit you make on its own layer, and you’ll have greater control over each adjustment you make as well as the ability to undo your changes at any time. Easily undo changes. Layers also allow for nondestructive edits, which can be a major benefit to your workflow. Nondestructive edits are any edits that you can go back and undo or change after you make them. Make targeted edits.
By separating elements of an image into different layers, you can focus on that component on its own. Use fast selection tools to quickly grab one area of an image and then create a layer mask with it. If you have one layer for your sky, you can make adjustments that apply just to the sky, like extra brightness or a blur effect. Photoshop includes countless ways to transform an image. Tools in Photoshop apply permanent effects to the pixels of your image. However, if you use tools on a duplicate layer, you can always undo your change. Tools like the Spot Healing Brush let you cover up blemishes or irregularities.
You can paint on an image with the Brush tools as if they were physical paint brushes. Control the color and tone of an image with Photoshop Adjustment Layers. Adjustments are not filters - but if you’re a beginner it can be useful to think of them like that. Tonal adjustments modify things like hue, contrast, vibrance, and saturation. Color adjustments help you control the colors in an image. Sometimes an image is just about perfect, except for one thing. Stamp out imperfections with the Clone Stamp. The Clone Stamp also works well to cover up unnecessary background bits.
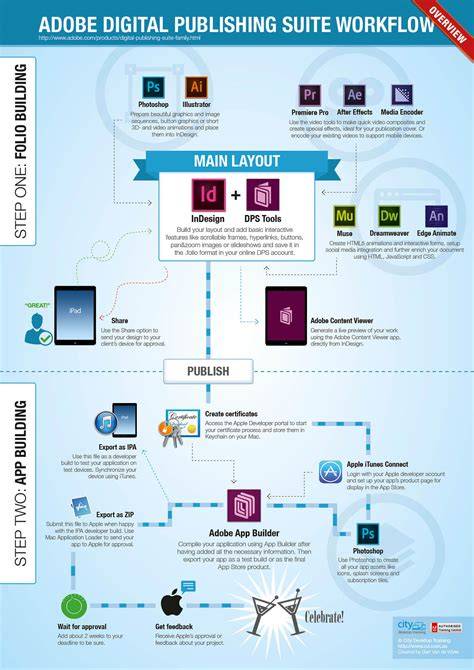
Digital image editing is a vast toolbox, and these Photoshop tips are just the beginning. The industry’s leading photo editing software syncs seamlessly with other Creative Cloud apps like Lightroom, InDesign, and Premiere. The images you transform in Photoshop can also become graphic design elements, stills in a video project, or even parts of animations. Explore photo manipulation, an art as old as photography itself.
Follow the rules of photography - perspective, lighting, shadows and colour - even when crafting the most surreal images. Photo manipulation didn’t begin with the invention of photo editing software. Photographers, editors and retouchers have been cutting up, combining and creating new work out of existing assets for over a century. Photo manipulation can be used for everything from surrealistic photomontages to the creation of alien worlds on the covers of sci-fi novels. “I’d call it a medium by itself,” says photographer Eduardo Valdes-Hevia.
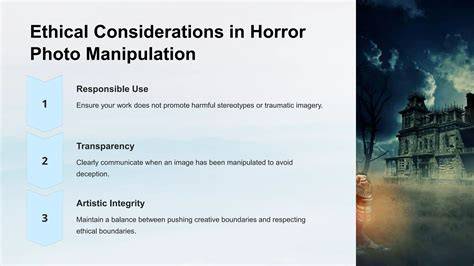
It’s important to understand photo manipulation’s checkered history. A famous Civil War battlefield image of Ulysses S. Grant on a horse is actually the combination of multiple images. Stalinist Russia made ample use of doctored photos for propaganda purposes. If you’re a photojournalist and you’re attempting to represent subjects accurately, you should not combine or distort photos in certain ways. Editing should maintain the integrity of the photographic images’ content and context. Photo manipulation is for artistic and aesthetic expression, not deception.
Before combining any images or manipulating photos, understand what you’re trying to accomplish. “You need to have a very clear idea of what you want,” says Edwin Antonio, an artist who combines modern fashion with historical fine art. “That way, you don’t get distracted. In commercial work, you might want to get rid of elements in the frame that distract from the subject.” “Photo manipulation has always been used,” says Antonio. “Maybe there’s a dustbin in the background or a line on the floor. If you’re creating digital art, think about what you’re combining and what themes you’ll be using in your work. Know what you’re going to do before you start in on your work. Have a clear idea and an outline for your final product before you fire up Adobe Photoshop.”
“It’s good to write down ideas when you have them,” says photographer Ronald Ong. Photographic art can break all laws of physics and reality, but it still has to obey the rules of photography. “The picture you’re creating should be as realistic as possible,” says Ong. That doesn’t mean you can only create scenes that can be found in real life. Of course photomontages and digital art can feature sci-fi and fantasy elements. However, those minotaurs, mermaids and star fighters - all the surreal scenes you create - still need to have realistic perspective, lighting, shadows and colour. Achieving that realism starts with combining complementary photos.
The images you’re working with should have something to do with each other when it comes to factors like colour and light. Perspective is the first thing you’ll want to line up when combining photos. While it’s possible to alter lighting and colours in Photoshop, altering perspective is much more difficult. After that, match lighting, going from darkest to lightest elements in your composition. “When you’re trying to match lighting, you want to match the darkest colour of your subject to match the darkest colour of your background,” says Valdes-Hevia. Making sure colours match is your next step in combining images. Matching shadows and their range of colours, is important. An ordinary viewer might not be able to articulate why shadows look wrong, but they will notice it.
“I always adjust the hue and saturation settings,” says Ong. “Make sure shadows blend into the background. Finding stock images or other existing photos with complementary elements is possible, but sometimes the best photos are the ones you take yourself in a controlled photoshoot. It often looks better if you take your own pictures because you can plan ahead and match all the lighting and perspective beforehand,” says Valdes-Hevia. As you edit, make sure that you can go back and change things or restart your workflow. “One of the first things I had to learn was how to edit non-destructively,” Valdes-Hevia emphasizes. “Make sure you can go back later and change things you’ve done in the beginning. Creating new images out of existing photos is an art. It’s difficult, but rewarding. The best way to get good at it is to do it. “Work on it. Try different things. It’s not going to look amazing at first, but it’s all about practice,” says Valdes-Hevia. “You’ll build an eye for realism, perspective, lighting and colours as prn go along. Double exposure is one of the oldest photo effects. As you practise, learn your tools. “I learn the most just messing around in Photoshop,” says Valdes-Hevia. “I think to myself, I’ve never clicked this. What does it do?”
Be curious as you investigate photo manipulation in Photoshop and get familiar with the software. Grow your budding skills by studying photo manipulation tutorials. Find examples of photos that have clearly been manipulated and try to work backward to figure out what the artist did. Play around with stock images for additional photo manipulation ideas. Try using tools like the AI image extender to give you a larger canvas to experiment with. Follow the rules of photography - perspective, lighting, shadows, and color - even when crafting the most surreal images. Photo manipulation didn’t begin with the invention of photo editing software.
Photographers, editors and retouchers have been cutting up, combining and creating new work out of existing assets for over a century. The manipulated pictures are surreal. It means the viewers can even see a magic fairy or a flying cow. You will need to regulate shadows. The more you have to edit your photos, the harder your job is. The images you’re working with should have similar traits to reduce corrections and boost creativity. Perspective alignment, lighting matching, and color consistency remain foundational to believable composites.
In practice, masterful photo manipulation combines thoughtful conception, careful subject isolation, precise blending, atmospheric effects, and final polish. The best results come from planning, shooting or sourcing compatible images, and non-destructive workflows that keep options open as ideas evolve. Whether you’re constructing a dreamscape, a sci‑fi moment, or a subtle enhancement, the core aim is to tell a compelling visual story with believable cohesion.
Practical steps to get started
- Import and straighten the image; crop if needed while keeping cropped pixels intact.
- Duplicate the image and work with layers, masking, and nondestructive edits.
- Isolate subjects, then combine and blend elements with perspective, lighting, and color adjustments.
- Refine edges, shadows, and atmosphere; apply final color grading for cohesion.
- Review against a clear concept and iterate non-destructively to refine the result.
Tips for realism and artistry
- Match perspective first, then lighting, then color; align darkest and lightest tones across elements.
- Use adjustment layers for non-destructive tonal and color modifications.
- Plan ahead with a concept and reference images to guide the final composition.
- Experiment with blending modes, masks, and atmospheric effects to deepen realism.
- Keep shadows consistent with light direction and source to avoid visual discord.
Integrated Adobe ecosystem features, such as cloud storage, fonts, stock previews, and seamless syncing, support a smooth workflow for photo manipulation projects across devices. Adobe Photoshop remains the industry-standard tool for photo manipulation, enabling precise edits and professional composites with a rich toolbox of layers, masking, adjustment tools, and AI-assisted features.
tags: #adobe #photoshop #photo #manipulation