If you want to remove red eye from a photo using Adobe Photoshop, this guide is for NEWBIES. You can follow a simple, step-by-step process to achieve natural-looking results.
Start with the Spot Healing Brush Tool and Red Eye Tool
Go to the left-hand side toolbar. Click on the “Spot Healing Brush Tool.” Scroll down to the bottom of the “Spot Healing Brush Tool” menu to select the “Red Eye Tool.”
The Red Eye Tool is designed to target red reflections in eyes caused by flash. This dedicated option simplifies the correction, especially for beginners who are still learning terminology.
Adjust the settings for a natural result
Go to the top left-hand side of the menu and make sure Pupil Size = 50% and Darken Amount = 50%. (This is a best practice, maybe you will want to do different %s.)
These settings influence how much of the eye area is affected and how dark the corrected pupil will appear. For most photos, 50% for both parameters provides a balanced starting point, and you can tweak them as needed for different lighting or eye colors.
Apply the correction
Click and drag around the red eye, and then unclick. Red eye should be GONE. The tool replaces the red color with a natural pupil color based on surrounding tones, giving a convincing result when used carefully.
- Identify each affected eye in the photo.
- Use the Red Eye Tool to draw a selection around the red area near the pupil.
- Release the mouse to apply the correction.
- Zoom in to inspect the result and adjust if necessary by repeating the process with slightly altered settings.
Tips for better results
- Work on a duplicate layer so you can compare with the original and undo changes easily. Non-destructive editing preserves the original image data.
- If the eye still looks off, try slightly reducing the Darken Amount or increasing the Pupil Size to better blend with the iris color.
- For challenging photos, consider using multiple passes or combining the Red Eye Tool with the regular Spot Healing Brush Tool to smooth any remaining inconsistencies along the eyelid and skin tone.
Optional enhancements and considerations
After correcting red eye, you may want to perform additional adjustments to improve overall realism, such as correcting exposure, white balance, or contrast to ensure the eyes match the rest of the face.
If the image has multiple subjects or lighting variations, repeat the steps for each eye or each person as needed, maintaining a consistent editing approach across the photo.
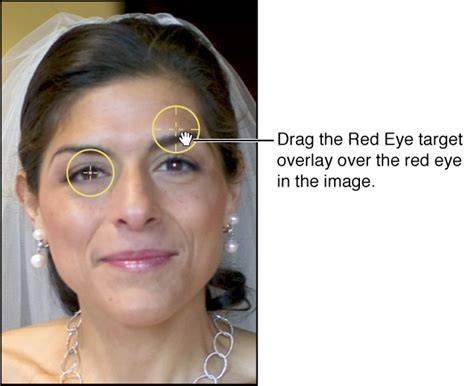
How To Fix Red Eyes In Photoshop (2026 Easy Guide)
In summary, simply switching to the Red Eye Tool, configuring Pupil Size and Darken Amount, and clicking around the eye yields a clean removal of the red glow, preserving natural eye detail.