Learn how to use comfy-cli, the official command-line tool for managing ComfyUI, the powerful node-based UI for AI image generation. comfy-cli is the official command-line interface for ComfyUI, a modular, node-based GUI and backend for diffusion models. ComfyUI itself is the most powerful open-source interface for Stable Diffusion, FLUX, and other diffusion models. Install via pip with pip install comfy-cli. Requires Python 3.9 or later. Run comfy install to set up ComfyUI with its dependencies and a standalone Python environment.
Overview: what comfy-cli is and why it matters
ComfyUI is a modular, node-based GUI and backend for diffusion models, and comfy-cli provides a direct, scriptable way to control it from the command line. This combination enables automated workflows, batch processing, and integration into larger pipelines without relying on the graphical user interface. The CLI is particularly useful for reproducible experiments, rapid iteration across prompts and settings, and headless operation in servers or CI environments.
It is important to note that ComfyUI is the most powerful open-source interface for Stable Diffusion, FLUX, and other diffusion models, and comfy-cli serves as the official bridge to drive these capabilities from text-based workflows. The setup workflow typically starts with pip install comfy-cli and follows with comfy install to configure ComfyUI and a standalone Python environment.
Initial setup and prerequisites
- Install via pip: pip install comfy-cli
- Ensure you have Python 3.9 or later
- Run comfy install to set up ComfyUI with its dependencies and a standalone Python environment
These steps establish the required environment for scripting interactions with ComfyUI, enabling automation and reproducibility across runs. The following sections describe example patterns, including iteration over prompts, random seeds, and image size adjustments.
A simple Part 1 workflow: scripting a batch of images
For a concrete example, consider a simple script that iterates through a list of 4 prompts, assigns a random seed for each iteration, uses a default image size of 512x640, and sets a batch size of 4. In the final prompt, the image size is increased to 512x768. This approach demonstrates how to drive ComfyUI using its API and exchanges via the CLI or a script rather than manual interactions in the UI.
The script assumes a basic working knowledge of how to use ComfyUI and a little Python, but it is designed so that you could copy blocks directly to run them. The default workflow is used, and while running it via the API you may not see the UI trigger, the workflow data will be generated and queued accordingly.
Key steps in the workflow and notable details
- Enable Dev Mode: Access the cogwheel icon on the upper-right of the Menu panel to enable Dev Mode and Options.
- Save the API format: Use the Save (API Format) button to generate a file named workflow_api.json. This JSON file represents the API-friendly view of the current workflow.
- Drag-and-drop caveat: Regular workflow JSONs load into the UI via drag-and-drop, but the API-format JSON currently lacks positional or layout information. To visualize the workflow, save the regular workflow JSON as well using the normal Save button.
- Inspect the API JSON: The JSON representation contains sections identified by Node IDs. Node IDs can differ between runs, and primitive nodes may not appear in the API format-only core nodes.
- Example node inputs: You may see inputs like "model": ["4", 0], "positive": ["6", 0], "negative": ["7", 0], indicating connections between nodes by ID and output index.
Next, a Python script named basic_workflow_api.py can be created to automate workflow manipulation. The script loads the API-formatted workflow, defines a set of prompts, assigns names to nodes for convenience, loads a checkpoint, sets image dimensions and batch size, and queues prompts in a loop with randomized seeds. The final iteration increases the image height to 768 and assigns a filename prefix based on the prompt.
Core ideas you will implement in your own script include:
- Load the API-formatted workflow from workflow_api.json.
- Create a list of prompts and inject them into the workflow inputs for the prompt node.
- Assign random seeds for each iteration to ensure varied results.
- Adjust image dimensions and batch size through the corresponding nodes (for example, the EmptyLatentImage node).
- Queue the workflow for each prompt, producing a batch of outputs with distinctive filenames derived from the prompts.
The approach highlights how the API JSON represents workflows differently from the standard workflow files and why understanding node IDs, connections, and input naming is essential when scripting ComfyUI tasks from the CLI.
- Automate repetitive experiments by scripting prompt variations, seeds, and image sizes to ensure consistency across runs.
- Leverage Dev Mode and API export features to programmatically modify workflows and integrate with external data sources (e.g., prompt lists from a file).
- Be mindful of node IDs and potential differences between runs. Use meaningful identifiers or titles to simplify scripting.
- Remember that the API export contains only core nodes, so some UI-only features may not appear in the API format.
Scope and limitations
This guide focuses on Part 1 style automation and basic scripting concepts for comfy-cli. It intentionally assumes familiarity with ComfyUI basics and does not re-cover installation steps. For broader automation strategies or advanced control flow constructs, additional custom nodes or more sophisticated scripting may be required, as out-of-the-box control flow tools in the UI are limited and may necessitate workarounds for loops and conditionals.
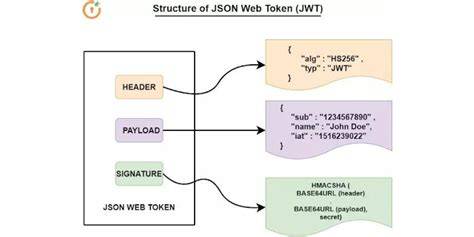
Figure: API-formatted workflow structure showing node IDs and connections.
COMFYUI from SCRATCH: Generate Images and Videos with LOCAL and FREE AI
Video: Demonstration of loading a workflow API JSON, modifying prompts, and queuing iterations from Python.
Table: representative settings and values from the example
| Parameter | Value | Notes |
|---|---|---|
| Prompts | 4 prompts | Iterated in a loop |
| Seed | Random per iteration | Ensures variation |
| Default image size | 512x640 | Base resolution |
| Final image size | 512x768 | Increased height for last prompt |
| Batch size | 4 | Number of images per run |
These values illustrate a concrete pattern for automating image generation across multiple prompts and checkpoints, demonstrating how to integrate prompt drift, seeds, and size variations into a cohesive pipeline via comfy-cli.