Do you use MS Word or Pages to write and lay out your books? Have you found that designing a perfect book interior is a challenge? If so, you’re not alone. While word processing software is great for writing, designing a book means a specific program. For most, this means using Adobe InDesign, the industry standard for desktop publishing. Or a professional to do the work for you.
What is Affinity Publisher?
Affinity Publisher is desktop publishing software for PC and Mac that works in very nearly the same way as InDesign. The program is from Serif, a company dedicated to building design software with designers in mind. Which means they aim to compete with Adobe. Affinity Publisher is the third program they’ve created, with Affinity Photo and Affinity Designer released in 2014 and 2015. Publisher focuses on offering a streamlined publishing experience. For users who own all three, they also make it easy to swap between programs. You can layout a page in Publisher, then switch to Photo to touch up an image, and then over to Designer to fix a chart. The same file is saved across all three tools!
But that’s possibly more than most authors would use Affinity Publisher for. What really makes this software shine is how closely it matches InDesign’s functionality at a fraction of the cost. For any author who doesn’t want to pay an annual fee for InDesign just so you can lay out one or two books a year, Publisher is a great alternative.
Understanding InDesign Principles
I’m a novice book designer. So I will not try to provide a deep dive into how to use Affinity Publisher. They’ve got a great series of tutorials and an active Forum with users supporting each other. The software worked great for me while laying out a couple of book interiors (and one truly horrible cover design). All three Affinity products are actively supported, so updates appear regularly to fix bugs and improve functionality.
If you’re interested in learning how to use desktop publishing software, I encourage you to check out our series on using InDesign to lay out your book. The principles are unchanged. You’ll still be using Master Pages, adding text blocks, working with page spreads, and layering content on the page.
What makes Affinity a different desktop publishing app?
The first thing I did after downloading the software was to watch the 16 tutorial videos, which totaled about 45 minutes of viewing time. They broadly cover the basics of using the interface, setting up a document, setting up styles, and using basic features. These videos are exceedingly basic and high-level, so you’ll need to use the forums and possibly just some trial and error to figure out the more complex actions. For example, here are a couple of ways Affinity Publisher is not a one-to-one analog of InDesign.
The most obvious difference is linking text frames so the text flows. If you’re familiar with InDesign, you know how useful it is to set up a Master Spread for a book’s body copy, then simply paste in text and let the pages-more or less-build themselves. Affinity has the same capability but it doesn’t make it immediately clear how to link one spread to the next: As you can see in this example, the first image shows two spreads with unlinked text. The text on the right side page flows outside of the text box. In my master, I linked the left and right pages in the spread, but the text doesn’t automatically link to the next spread. It requires using a ‘shift+click’ (which is displayed lower left in the tooltip) to turn on ‘autoflow’ and allow the text to continue populating more text frames until all the text is visible. Not complicated, but one of those small differences that have to be learned to make efficient use of Affinity Publisher.
What Makes Affinity Publisher Unique?
Again, if you’re familiar with InDesign, you won’t see a lot of differences. The workflow is not exactly the same, but the variety of controls and options are essentially the same. But, if you’re primarily a book creator, you may find Affinity more intuitive. I say this as someone who has some experience laying out text-heavy books, but much less experience with graphic-heavy books like a course book or magazine. For a simple book layout, Affinity was faster and easier to use than InDesign for me.
The main differences I found are: Updating the contents, spreads, and master page layout loaded much faster with Affinity. Using Sections to control design and assign master pages is more intuitive. Editing the master layer on an individual page was simple (once I found the option to edit the layer). Editing styles felt more like working in MS Word and was even easier to control. Using Sections Assigning ‘Sections’ to the overall document made it much easier to control page numbers and header/footer content in the document. This is often something Word handles poorly. And while InDesign can handle these operations, Affinity does it in such an easy manner that I was able to figure out the intricacies on my own, in a matter of minutes.
Applying and Editing Styles When I write in Word or Google Docs, I tend to use the minimum amount of styling. Usually just Heading 1 (title), Heading 2 (chapter titles), and body text (everything else). The Styles Panel looks and acts much like you’d expect from Word, but is clear and concise with little to no bloat. Most significant is how simple it is to select and edit large quantities of text without slowing down the software. In Word (or even InDesign) editing all the body text can result in long waits or the dreaded spinning beach-ball (on Macs). Affinity makes it simple to edit a Style and to update that Style quickly.
A Viable InDesign Replacement? We have to appreciate that Affinity Publisher is still in the Beta phase. This is great since it means we can test Affinity for laying out book pages without paying anything. But also means we’re not testing a finished product. Once the product is released to the public, it will cost something. Based on the price point for Affinity Photo and Designer, we can guess Serif will charge something around $40 or $50 to get the complete Publisher software. Which is a steep discount when you consider InDesign is a $19.99 per month subscription. If the Beta is a clear indication, it’s quite likely the average, DIY book designer will find Affinity to be a potent and affordable replacement. Affinity Publisher can match InDesign’s efficiency for print book and ebook layouts (and even cover design).
Have you tried the Affinity Publisher Beta? When it comes to page layout programs for graphic designers, for some it comes down to Adobe InDesign versus Affinity Publisher. Note: This post is from 2021. As a graphic designer, you might be wondering the pros and cons of Adobe InDesign and Affinity Publisher and if one is better than the other. You might also be asking: Should you switch from Adobe InDesign to Affinity Publisher? The versions that I am comparing are Adobe InDesign 2021 and Affinity Publisher 1.9.3. Both are for page layout, so they can handle anything from a one-page poster design to large books and reports. Generally speaking, the programs are very similar to one another. You can try Affinity Publisher free for 30 days. With InDesign, it’s only 7 days. Now, let’s take a look at pricing. Adobe InDesign is only available through subscription-based pricing, which is a huge turn-off to many designers. Affinity Publisher is a low one-time fee that cannot be beat. If you subscribe to only InDesign with Adobe’s Creative Cloud subscription, that’s about $21 USD per month. Many designers who use Affinity Publisher switched from InDesign. For what it’s worth, most of my career has been spent in publication design and layout. I worked in Quark XPress back in the day, version 4.11. I went kicking and screaming into InDesign when it came out, when my place of work forced me to. I didn’t use Affinity Publisher until I created my Brand Style Guide Builder product in multiple formats. I picked it up quickly because I found it very similar to use. I found the master pages and layers work a bit differently from InDesign. They confused me for a minute. Both programs share a ton of similar features. However, Affinity Publisher uses different terminology for some of its features. Let’s talk compatibility when it comes to opening InDesign files. You can’t open the native InDesign format (the INDD file) in Affinity Publisher right out of the box. You can also open a PDF (all or just certain pages). There are a few caveats with this though. One is that any hyphenated words in the PDF will have those as manually inserted hyphens, which means if you reflow text, the hyphens will remain. Both programs integrate with their own suite of drawing and photo editing programs. This is different from Adobe InDesign, where you have to edit images separately in Illustrator or Photoshop-and have to wait several minutes for them to even open. Affinity’s Studio Link allows you to work on the images from within Publisher while accessing the actual program features from there. Paragraph styles are another feature, and these work similarly in both programs but they are called different things. Both programs give you placeholder text. What I like about Publisher’s filler text is that it’s dynamic. The other thing is that in Publisher, the filler text gets treated like one unit by default. There’s no selecting it at the paragraph or character level, unless you check that option in the preferences. Footnotes and endnotes are another thing to consider. If you don’t work with documents that have any, this won’t be an issue. If you did need them, the work-around is to add them manually. When it comes to creating and editing tables, Publisher makes this easy by giving you options right there on the page when you click inside a table. When it comes to creating a table of contents, I know how much designers avoid using an automated table of contents with their document and will do it manually. When it comes to interactivity, InDesign offers more options, as you can embed multimedia files into InDesign, create hyperlinks and bookmarks, and even build forms. In terms of accessibility, unfortunately, this is not possible with Affinity Publisher. It does not allow you to export to a tagged PDF, which is the basis for an accessible PDF. Adobe InDesign, on the other hand, does allow this and helps you get most of the way there with accessibility. Saving the document’s history is an interesting feature that Affinity Publisher offers, which InDesign does not. In Affinity Publisher, you can save the document’s history with the document, if you choose. That may or may not be what you want to do. So tell me which one are you using? Which is better for you, Affinity Publisher or InDesign?
Affinity Publisher integrates with Affinity Designer and Affinity Photo, meaning you can easily edit images and add graphics within your layout. By using the same file formats you can include vectors from Affinity Designer, edit an image in Affinity Photo and then use them in your layout in Affinity Publisher. Adobe InDesign is known for its industry standard-features such as auto-style; simplifying the process of styling your pages so they fit your theme. InDesign also offers generative expand, this automates complex edits by extending your images and filling in missing areas based on surrounding pixels.
Fewer options; Affinity Publisher has fewer template options than other software. Industry standard; InDesign has many resources and community support as it is the industry. Well, if you’re a beginner or a freelancer looking for easy-to-use software, then Affinity Publisher is the best choice for you.
Ready to master your skills? Vivienne Le is a designer and artist based in Berlin, Germany. In this video and guest post, she designs a bookmark in both Adobe and Affinity software to compare and contrast them. Did you know that every purchase of a Wacom One pen display or drawing tablet comes with a free trial of the Affinity Suite? If you want to know more about the differences between Affinity and Adobe software, you can also check out Viv's previous guest posts and videos with Wacom: How to get the most out of Affinity Designer with your Wacom tablet, or Adobe Illustrator vs. Today, I’ll be designing a bookmark with Adobe InDesign and Affinity Publisher to compare and contrast the key features of each program. Just to give you some context, the bookmark combines a 2D illustration and a short poem written by my friend on the backside. As you can see from this original scan, I want to erase the paper lines. In Lightroom, I am using a tool called Generative Remove. This is a new tool released by Adobe as of 2024 and I think it’s the best for clean up jobs like this. I pair it with my Wacom One tablet to make straight selections that easily remove the lines. I’ll go ahead and finish cleaning this up. Then, I extended the paper background of the scan using Adobe Photoshop. Now let’s put the drawing into Adobe InDesign. Although I am calling this a bookmark, I am actually sizing my design to be the size of a standard postcard, 4 by 6 inches. I begin by setting up my document to the bookmark dimensions. It’s important to add bleed and margins. The standard for both is 0.15 inches. Bleed means you have to extend the background by 0.15 inches to make sure the printers cut the print correctly. If you don’t include bleed, there’s a chance your prints could be cut with white borders around it. InDesign makes it easy to customize layouts with its robust tools. Then, I bring in the 2D illustration. InDesign handles imported files well - whether they’re vectors or raster images. It’s easy to adjust the size and position without losing quality. Next, I add the poem. InDesign’s typography tools are highly detailed. When it comes to preparing for print, InDesign gives a lot of options for setting color profiles, like CMYK for print. Now, let's move over to Affinity Publisher. Setting up the document in Publisher is similar - you can adjust dimensions, margins, and guides easily. Bringing in the illustration is simple here too. One advantage Publisher has is its ‘StudioLink’ feature. Adding text is straightforward, and Publisher has a good range of typography tools, although not as many advanced options as InDesign. Affinity Publisher also offers print preparation tools, letting you set up your design in CMYK and export directly to print-ready PDFs. So, how do these two programs compare when it comes to designing a bookmark?
Practical Takeaways for Book Designers
Ease of Use: InDesign has a steeper learning curve but is incredibly powerful once you master it. Artwork & Vectors: InDesign’s vector handling is top-notch but often requires jumping into Illustrator for detailed edits. Typography: If you need high-level text control for complex layouts, InDesign is the way to go. Preparing for Print: InDesign excels with detailed checks and advanced export settings, making it ideal for professional print work. So, which software is right for you? If you're a professional designer working on large, complex projects, Adobe InDesign's powerful tools and extensive options are unbeatable. For a specific bookmark design, both tools worked well. Affinity Publisher felt a little quicker to navigate for a simple layout, while InDesign gave me a few extra features to finesse the final look.
In summary, Affinity Publisher offers a compelling, cost-effective alternative to InDesign with strong compatibility across its suite and fast performance for many common book layouts. InDesign remains the industry standard for professional, feature-rich workflows, especially when accessibility, interactivity, and advanced export options are critical. Your choice depends on budget, project complexity, and the importance of ecosystem integrations.
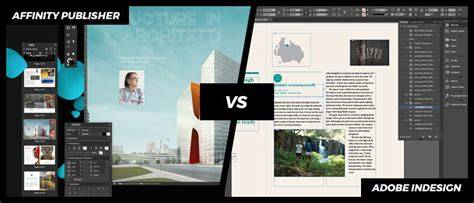
I Tried Affinity Publisher After 10 Years in InDesign… WOW
Situational Recommendations
- Use Affinity Publisher for straightforward, text-heavy books where quick layout and a lower cost are priorities.
- Choose InDesign for complex layouts, accessibility tagging, interactivity, and long-term professional workflows.
- Leverage StudioLink in Affinity to streamline editing images within the layout, minimizing context switching.
- Consider file compatibility needs: InDesign files (INDD) aren’t natively opened in Publisher; PDFs can be imported with some caveats.
| Aspect | Affinity Publisher | InDesign |
|---|---|---|
| Price model | One-time or bundle (lower cost) | Subscription-based |
| Master pages & sections | Intuitive with sections | Powerful but steeper learning curve |
| Typography & styles | Strong, Word-like styling | Extensive, industry-standard |
| Interactivity & accessibility | Limited (no tagged PDFs) | Rich (interactive elements, tagged PDFs) |
| Image handling | StudioLink for editing within Publisher | Requires separate apps (Illustrator/Photoshop) |
Ready to decide? If you’re a professional designer, InDesign offers unmatched depth and ecosystem support. If you want a capable, affordable tool that covers most book-layout needs and integrates with other Affinity apps, Affinity Publisher is a strong contender.