Export multiple images in Photoshop at once, without even opening them up. Think about how much time you can save during the process. In the name of saving time spirit, you can read a previous article about batch rename photos, if you are interested. As well as export multiple layers from Photoshop and Create a single multi-page PDF with Adobe Photoshop. As you already know Adobe Photoshop is an amazing piece of software.
Why someone wants to export a bunch of images from Photoshop! I am pretty sure you already faced this issue in the past. Either you are a photographer and you wanted all those beautiful pictures you took to re-export them for some reason in a different way. If you don’t have Photoshop to help you out, you could have wasted a lot of time, again depending on the number of your pictures, you have for further adjustment.
Another awesome way to export multiple images is through Droplet. Basically, you create an exe file that has been produced by Photoshop to simplify the process of actions. Now, as I said, you don’t even have to open your images in Photoshop in order to export them. You can find the Image Processor command, from File - Scripts - Image Processor. Click on it.
Let’s say for example we have a bunch of pictures, and we want to add a Sepia Toning filter on all of them, which is a built-in preset as action in Photoshop. Also, we want to export them in TIFF format. Once again, go to File - Scripts - Image Processor, to open up the popup window. After that, Photoshop will really quickly open all of your images, which were contained in the chosen folder and make the necessary changes, and close all the images automatically. You don’t have to do anything.
Of course, we could export our images in more formats such as JPG and PSD at once. We could also use some of our own actions that we had built over time in Photoshop and choose those actions instead of a predefined preset. As you already know, Photoshop is an amazing piece of software. We can do all sorts of things with it.
You may wonder, can you also do video editing? The short answer is yes. We can do all sorts of things with Photoshop.
TL;DR Summary: Mastering How to Batch Export Layers in Photoshop revolutionizes design workflows, saving countless hours by automating asset creation. This guide reveals 15 powerful methods, from Quick Export to advanced scripts, enabling designers to efficiently export layers, groups, and artboards as perfectly named PNGs, JPGs, SVGs, or PDFs. Discover the fastest, most reliable methods to batch export layers in Photoshop and skyrocket your workflow efficiency.
Learning how to batch export layers in Photoshop is one of the highest-ROI skills any designer, photographer, or UI artist can master. In today’s age, with complex UI kits, sprite sheets, social media packs, and icon libraries being the norm, knowing exactly how to batch export layers in Photoshop has become essential. Pro Tip 😉: Go to Preferences > Export to change default format and location. Most tutorials stop at the basics, but real efficiency in 2025 comes from combining batch export with non-destructive editing. Why this matters: You can update one icon or illustration in the master file, then re-run “Export Contents” on every Smart Object in seconds. Bad layer names = chaos. ☐ All unnecessary layers hidden or deleted☐ Layer names clean (no / : * ?
The average designer spends 4-8 hours per week manually exporting assets. Mastering how to batch export layers in Photoshop will save you dozens (sometimes hundreds) of hours every year. Ready to 10× your efficiency? Open Photoshop right now and try the first method.
Exporting layers in Photoshop is the bridge between static design and functional web architecture. Utilizing the ‘Quick Export’ and ‘Layers to Files’ features allows for the seamless extraction of UI components. Knowing how to efficiently batch export layers photoshop style is an absolute game-changer. Designers today work with files that routinely contain 50, 100, or even 300+ layers. Manually duplicating each layer to a new document and saving it individually is not just slow; it is borderline unacceptable in professional workflows. The good news? File Name Prefix: Add something meaningful like “Icon_Set_” or “UI_Elements_“. Trim Layers: Uncheck this if you want every image to maintain the full canvas size (essential for aligned assets like UI elements).
Photoshop will now create a new document for each layer, copy the layer content, and save it automatically. Tip: Name your layers properly before running batch export layers photoshop with this method. While Layers to Files is perfect for exporting everything, sometimes you only need specific layers exported. Need something even quicker? Go to File > Export > Quick Export Settings and choose your preferred format (most people choose PNG or WebP in 2025). This is the method I use 20+ times per day. Sometimes automation is not ideal. Click OK. Yes, it sounds slow, but once you record it as an Action (Window > Actions), you can batch-process hundreds of layers across multiple files using File > Automate > Batch.
WEBP images are a new modern format for images. They are smaller and the same quality as JPEG images. If you still absolutely MUST use JPEGS follow this tip. For progressive modern web formats you should be using WEBPs. They are smaller, load faster and are quickly becoming the standard web image format. The answer is simple: Turn each group into a Smart Object temporarily (right-click > Convert to Smart Object), then run batch export layers photoshop using Layers to Files.
Stop wasting hours clicking layer by layer. Slow loading speeds do more than frustrate human visitors and destroy your visibility. Clear the bottleneck with the Performance Speed Accelerator Package.
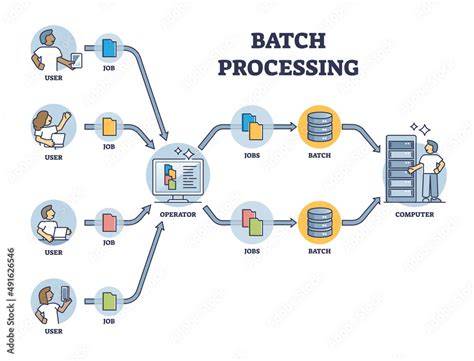
How to Batch Render in Photoshop
- Image Processor: batch resizing, format changes, and actions without opening each image
- Layers to Files: export each layer as a separate asset, with options for prefixes and trimming
- Quick Export: fast path for common formats like PNG and WebP
- Batch with Actions: automate repetitive tasks across many files
- Convert to Smart Object: ensure consistent export results for groups
The best practices include ensuring ICC profiles are included, verifying that layers actually have visible pixels, and naming layers properly to avoid chaos. Embedding an ICC profile helps color consistency across devices and formats. If colors appear wrong after export, check Include ICC Profile. If some layers export blank, verify that the layer actually has visible pixels. For sprite animations or game assets, combine batch export layers in photoshop with proper naming (frame_0001, frame_0002, etc.) and then import the sequence into After Effects or your game engine.
Images and assets saved via batch export significantly accelerate workflows, especially when dealing with UI kits, icon libraries, and social media packs. The high-ROI skill of batch exporting layers enables teams to generate consistent assets rapidly, reduce manual repetitive work, and streamline collaboration across design and development stages.
In summary, mastering batch export in Photoshop encompasses techniques from Image Processor to Layers to Files, Quick Export, and scripted automation. This toolkit empowers designers, photographers, and UI artists to produce consistently named assets in multiple formats, including PNG, JPG, SVG, WebP, and PDFs, while preserving quality and color accuracy. The practical payoff is dramatic time savings and greater consistency across projects.