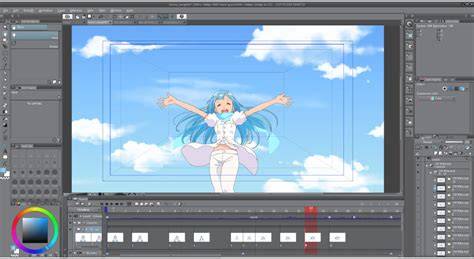
Clip Studio Paint is a super powerful piece of art software, that is primarily popular among anime/manga artists and illustrators. It offers a wide range of features that make it a great option for both beginners and professionals. When you download Clip Studio Paint, you will see that the software has a parent launcher called Clip Studio. It will seem a bit clunky at first - lots of menus, lots of buttons, and so on, but if you stick with it things will start to make sense pretty quickly.
The launcher gives us the ability to launch into Clip Studio Paint, or to launch the Modeler App which helps with posing figures for drawing. This is what you get in the top left corner of the Clip Studio launcher. Pick between the Clip Studio Paint app or the Modeler which helps set up 3D models for reference. There is more to this Clip Studio launcher, however. You can use it to sync artwork between devices and instances of Clip Studio Paint, as well as to download brushes and assets to your device. We will go over all this below.
Before we begin, if you are looking for Clip Studio Paint shortcuts, here is a quick reference guide for the most used shortcuts. One of the most notable features of Clip Studio Paint is its ability to handle a wide range of file formats. My favorite feature when it comes to file formats of Clip Studio Paint is that it can both Open and Save Photoshop files. Yes, big Photoshop files with hundreds of layers! Yes you can save a drawing you started in Clip Studio Paint to PSD format. You get all those layers in Clip Studio Paint, and the file is almost identical outside of some advanced features. It is super helpful if you work between the two programs. On top of the super useful .PSD capability, Clip Studio Paint is compatible with all standard image files, JPG, PNG, TIFF, and more. It also supports vector files, such as AI, EPS, and SVG, making it easy to import and export from various sources.
Starting Your Project: Studio Mode vs Simple Mode
Clip Studio Paint has two main workspaces: Simple Mode and Studio Mode. Simple Mode is an easy-to-use interface to start drawing right away, even for beginners. Studio Mode has all tools Clip Studio Paint has to offer and is ideal for a deeper workflow with workspaces, vector tools, and more. After launching Clip Studio Paint, set the pen pressure and interface to match the project you want to draw. Challenge yourself by drawing an illustration on smartphone using materials to decorate your illustrations on smartphone. Studio Mode has all tools Clip Studio Paint has to offer, including workspaces, vector tools, and more.
Simple Mode is great for getting started quickly: you can learn how to use brushes and layers, and you can draw a simple illustration with a traditional feel. Try drawing a simple illustration first by using the pencil and brush tools. Simple Mode provides an approachable entry point for beginners, while Studio Mode allows you to take your digital drawing to the next level with advanced features and customization.
Tools and Brushes: Getting Comfortable
Clip Studio Paint offers a wide range of brushes and tools that are suitable for different types of art, including pencils, paintbrushes, markers, and more. Everything is also super customizable, you can create new brushes, and the software offers a variety of tools for adjusting brush size, angle, and pressure. Brushes: You will primarily be drawing and painting with the Pen, Pencil, Brush and Airbrush tools. From top down: Pen, Pencil, Brush and Airbrush tools of Clip Studio Paint. Generally, you will be creating lineart with the Pen tool and sketching with the Pencil tool. But there is a way to create lineart with the Pencil tool as well. If your lineart feels better as a more sketchy pencil line, use that tool. You will be painting with the Brush tool, and the Airbrush tool. The Brush tool is more painterly, the Airbrush is much more of a soft transition for really nice gradients. There is one more tool that you will use often for painting in addition to the Brush and Airbrush. This tool is called Blend. The Blend tool in Clip Studio Paint is amazing. Blending is natural, and if you ever painted with watercolors or oils, it just feels like it blends in the same way.
With each tool in the Tool palette, there is a massive Sub tool palette that functions as the editing menu for the Tool’s many functions. To access this treasure trove of functions for each tool, select the tool and then go up to the top of the Tool palette, and click on an arrow pointing right. The software’s pencil and paint brushes are as realistic as the best digital tools can provide. The brushes can also be customized to your liking. You will want to pause and play around with the features of the Sub tool palette for each brush. Make a small change, then draw a bit and see how it feels, then make another change and draw more. Experiment to get to know the various ways you can change how the brushes look and feel. Try adjusting the size, shape, and texture of the brush. Remember that in the beginning, it is best to keep it simple. You do not need super fancy brushes to create great art. In fact, if you are just starting out, all the brushes you need are probably already in Clip Studio.
Color, Layers, and Non-Destructive Workflows
One of the most useful features of Clip Studio Paint is its layer system. Layers allow you to work on different parts of your artwork separately, and make changes without affecting the other layers. You can create multiple layers, each with its own settings, such as opacity, or blending mode. In its basic features, layers in Clip Studio Paint are very similar to Photoshop, which is great since Photoshop layers tools are the standard. The software also has a feature called “Clipping Layers” which allows you to clip one layer to another. When you clip a layer, the selection of the clipped layer will follow the pixels of the layer it is clipped to. This is the same feature as “Create Clipping Mask” in Adobe Photoshop. The feature is a must for digital painters and the Clip Studio Paint version works really well. To use this, right-click on the layer you want to clip and select “Clip to layer below”.
Clip Studio offers a variety of color options, including a color wheel, color palette, and color picker. You can also create custom color palettes, and adjust the transparency of colors. Everything you need for creation of hues and shades that you want in your work is already built in. At the very basic level, the eyedropper tool allows you to sample a color from the canvas. Clip Studio Paint has a variety of Color Spaces to choose from. While you can choose CMYK or RGB, you can also choose HSV (Hue, Saturation, Value). To choose this go to Window > Color Slider. HSV Color Set allows you to think in foundational art terms. I like the HSV color space because it focuses my thinking on the foundations of color theory - Hue, Saturation, and Value. what is the right saturation of that hue? Working from the HSV color set allows easy access to the framework of the properties of color.
Line Art, Inking, and Rendering
One of the more incredible tools available in Clip Studio Paint is the ability to adjust line width after the line is drawn. To do this, go to Filters → Correct line → Adjust line width. The dialog box enables you to make the line thicker or thinner. If you are looking to make delicate illustrations, it is definitely a tool to check out for thinner more subtle lines - especially when they are not always easy to make in digital art.
Lineart versus painterly vibes can be achieved with different methods, and you can render skin convincingly in this context. The Sub tool palette for each brush holds many settings to tailor texture, size, and shape. You can use Smart Bucket Tool to color quickly by recognizing edges, and you can enable refer to other layers in the Sub tool palette to fill from a color layer separate from your lineart. Smart bucket tool is a super power! It recognizes your lineart allows you to paint in separate parts very quickly, even if you are painting in on a separate layer from your lineart.
Animation and Comics: From Static Images to Motion
There are great animation tools in Clip Studio Paint. The software offers a timeline, keyframe animation, and onion skinning. The onion skinning feature allows you to see multiple frames at once and help you animate smoothly. There is frame-by-frame animation which allows you to create animations in a traditional 2D animation style. The timeline is located at the bottom of the screen. You can even add camera movement to your animations. The options in the software are truly impressive, especially since it seems to take up a lot less resources than Photoshop from my experience on multiple machines. There are also many resources for comics, manga, and graphic novels, including panel layout tools and word balloons. To begin using these tools, start a new canvas by going to File > New, and then select Comic from the Project list.
Assets, Cloud Sync, and Sharing
You can use Clip Studio ASSETS to download brushes, textures and 3D models to Clip Studio Paint. Together Brushes, Textures and 3D models are called “materials” within the software. They can be found under the ASSETS tab in the Clip Studio Launcher. Clip Studio Paint also offers cloud syncing to share your artwork across multiple devices. The first step to sharing your work across multiple devices is to log into the SAME account for both devices. After signing in, you can manage works and enable cloud syncing. You can also record a time-lapse of your drawing in Clip Studio Paint, exporting the timelapse to review your process later. Export options include image files (JPG, PNG, PSD) and animations as video files.
Practical Tips and Common Pitfalls
When you’re ready to customize your workspace, you can adjust the Navigator palette for a thumbnail view of your project, which helps you see the whole artwork while you work on details. If you want to flip the canvas, you can do it from the Navigator or through Edit → Rotate → Flip canvas → Flip Horizontal, and you can set a quicker shortcut via Shortcut Settings. The Hand tool (to move the canvas) and the Move tool (to reposition content) are essential for navigation in larger canvases. The Perspective Ruler tool lets you create and maintain accurate perspective, which is especially helpful for backgrounds and complex scenes. You can also import 3D backgrounds to build scenes quickly, or create reusable backgrounds with pattern brushes and textures. The fill tool can be one of your most useful tools on your roster, and you can create your own seamless brushes or use existing assets to speed up production.
Practice Plan: A Simple First Illustration
Try drawing a simple illustration first by using the pencil and brush tools in Simple Mode to get a feel for line quality and color. After sketching, switch to Studio Mode to take advantage of additional tools like vector capabilities and more advanced layer options. Decorate the background with materials from Clip Studio Assets to elevate the piece, and add detail to clothing and hair with materials from the assets library. If you want a more traditional feel, aim for clean lineart, careful shading, and a subtle color palette. Then experiment with dynamic poses to add energy and life to your character. You can render hair realistically and explore shading techniques to enhance depth. For a longer project, storyboard a short scene using the panel layout tools and speech balloons to practice storytelling in comics form.
- Set up your workspace and pen pressure for your project.
- Create a simple line drawing with Pencil and Pen tools.
- Color on a separate layer and apply shading with the Brush and Blend tools.
- Utilize Clipping Layers to keep colors confined to lineart areas.
- Explore Simple Mode for fast results and Studio Mode for advanced features.
- Decorate with assets to enhance clothing, hair, and backgrounds.