When thinking about the Curves tool in Adobe Photoshop, the phrase “With great power, comes great responsibility” is a thought that comes to mind. Curves is the most powerful tool in Photoshop for adjusting brightness, contrast, tonality, and color. All that power comes at a price and if not wielded carefully it can easily wreck an image. That’s why it’s best to work on a copied layer or use an adjustment layer when using Curves. With that in mind, let’s dig in.
The Curves Panel(s)
The Curves panel appears in two main forms: the classic Curves panel and the Curves adjustment layer properties dialogue box. Figure 1 shows the classic panel, which appears when applying Curves to an individual layer, accessed from Image>Adjustments or by pressing CTRL+M (PC) / CMD+M (Mac). Figure 2 shows the Curves adjustment layer properties dialogue box as it appears when called from the Adjustments panel. Note that when using the Curves Adjustment layer, you interact with the controls through the properties window, with most of the controls from the classic panel available in the same way.
Working with Curves
In both views, you will see a diagonal line running from the lower left to the upper right of the displayed grid. This line represents the relationship between the tones present in the image (input) and how they are to be adjusted (output). In RGB mode the center of the grid is 128 (out of 255). By clicking on that center point and dragging upward, the output values increase, lightening the mid-tones of the image. The curve formed by moving control points creates the characteristic curve that defines Curves.
As adjustments are made, nearby values shift too but to a lesser degree, producing a gradual change along the curve. Raising highlights while lowering shadows, for example, shows how the curve influences tonal balance. It’s very easy to “wreck” an image with Curves, so adjustments should be made in small increments. The arrow keys on the keyboard help with precise movement of selected control points, which is handy for fine-tuning.
When a control point is created on a curve, it becomes an anchor. Wherever placed on the line, that point remains fixed and will influence the curve to the left and right to maintain the value at that anchor. This is useful for protecting certain tonal values from change. Multiple control points shape the curve, with the point closest to center exerting a greater influence on the overall curve shape to keep adjustments smooth.
Photoshop also offers a draw tool (pencil icon) to manually sketch a curve, which can yield very specific tone changes. The classic panel includes a “smooth” button that can be activated after drawing a curve, while the Curves adjustment layer has a smoothing option in its draw tool controls. Smoothing is cumulative as you apply more adjustments.
Adjusting Contrast and Brightness
Curves is especially favored for adjusting contrast. The more vertical the curve, the greater the contrast; flatter curves produce lower contrast. While the Brightness/Contrast tool exists, Curves provides far more nuanced control. Levels can be versatile, but Curves remains superior for complex tonal and color adjustments.
In a sample image with low contrast, you can use the eyedropper approach to set starting points. After opening Curves, the cursor can become an eyedropper, allowing you to sample tonal values directly from the image. This works in the classic Curves panel as well as the Adjustment Layer version, though the sampling method differs slightly between methods. You can also use the lower-left hand icon with up/down arrows to place a point by sampling the image directly and raising or lowering tonal values, a faster workflow for quick adjustments.
Three adjustments are demonstrated: deepening shadows, sampling dark tones from a dress, and lifting lighter tones to add pop. Subtle changes to the curve can produce noticeable results. Often, final touch-ups are made with the arrow keys for precision. The result is a more dynamic image with more “pop,” but further refinements are possible to refine tonal balance and preserve natural appearance.
Let’s Go to the Lab
RGB-mode curves can increase saturation inadvertently; to address this, switch to a color space that separates lightness from color. Go to Image>Mode and choose Lab color. In Lab, adjustments to the Lightness channel affect brightness and contrast without altering color saturation, preserving skin tones better. Figure 9 demonstrates a more drastic lightness adjustment while maintaining color fidelity. Lab color opens up new possibilities for color and contrast correction, and sharpening can be more effectively applied to the Lightness channel rather than RGB. The topic of Lab color is extensive and could fill a book, but this article focuses on Curves within Lab as a practical technique.
Adjusting RGB Channels Individually
Another powerful use of Curves is applying adjustments to individual RGB channels for color correction. For example, a reddish cast in a headshot can be reduced by selecting the Red channel and sampling the red area on the cheek, then lowering the red output slightly (e.g., from 225 to 220). The adjustment can be done with either the Adjustment Layer or the classic Curves panel; using an Adjustment Layer with a mask provides the ability to localize changes to the face while preserving the shirt’s original color. Duplicating the layer and applying a Curves adjustment on that copy is another approach, though returning later to original data becomes less straightforward if not using a non-destructive workflow. Exploring adjustments to individual channels across RGB and other color spaces expands the potential for precise color tuning.
Eye Dropper Tools
Both the Classic Curves panel and the Curves Adjustment layer include three eyedropper tools at the bottom (classic) or in the Properties panel (adjustment layer). The Sample Black Point picks the darkest area to normalize, the Sample White Point selects the brightest area, and the Sample Gray Point targets a neutral gray to balance midtones. In a low-contrast, bluish image, using Black to sample deep shadows and White to sample blown-out highlights can lift and neutralize tones. The sample results may reveal color cast corrections across channels, which can be refined by adjusting individual channels or sampling more neutral gray points for balanced midtones. The Gray Point sample often helps find a neutral balance that optimizes skin tones without over-saturating colors.
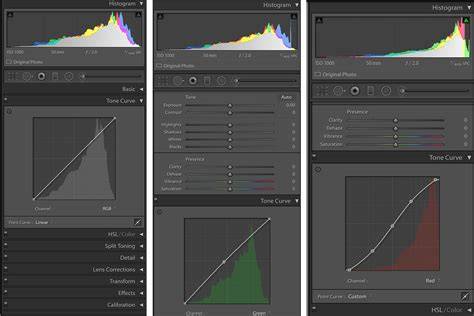
Practical workflows include combining eye-drop sampling with anchor points on the curve, using the click-and-drag method for fast adjustments, and then refining with the arrow keys for precise control. The approach is iterative: sample, adjust, sample again, and adjust again to achieve a natural look.
Master Curves from Start to Finish in Photoshop
These techniques illustrate how Curves can shape contrast, color, and tonality in flexible ways while preserving or enhancing image quality. Keep in mind that Curves adjustments are non-destructive when used on Adjustment Layers, which allows for non-permanent experimentation with different tonal strategies. The combination of classic and adjustment-layer approaches gives a robust toolkit for photographers and designers alike.
Layer Panel Options
When using an Adjustment Layer, you’ll find options such as viewing the histogram, baseline, and more in the upper-right menu of the properties box. Classic Curves adjustments apply directly to the chosen layer, but using an Adjustment Layer with a mask enables targeted edits, better control over color, and easier re-editing in the future. The results and workflow can be chosen to fit the project and the preference of non-destructive editing over permanent changes.
In Practice: A Quick Recap of Key Points
- The Curves tool maps input tones to output tones through a controllable curve with anchors.
- Adjustment layers provide non-destructive edits with masking flexibility.
- RGB-channel adjustments enable targeted color corrections; Lab mode helps separate lightness from color for precise tonal work.
- Eyedropper tools help establish precise starting points for shadows, midtones, and highlights.
- Subtle adjustments, gradual curve changes, and thoughtful sampling yield more natural results.
tags: #curves #adjustment #layer