You can often get away with visual errors when it comes to video editing. That’s why fading out audio is a core skill you’ll need to know to make your edits sound more seamless. Fortunately, this process is straightforward in DaVinci Resolve. So let’s take a look at how it’s done.
Fade out with simple drag handles
Expand the Track Height: Go to the timeline and expand the track height by selecting the bottom of the track on the track selector and dragging it downward. We need to do this because, to fade out audio using the default handle method, you’ll need to make sure the waveform is visible. Once that’s done, simply hover over any audio clip.
Apply the fade: Click the clip to select it. Hover over the top corner of the audio clip. A small white fade handle appears. Drag the left handle inward to fade in, or the right handle inward to fade out. The further you drag, the longer the fade out will be. You’ll see two white handles at each end and the fade line itself.
Adjust the fade curve for a natural sound
Click the fade line itself to adjust the curve. A linear fade changes volume at a steady rate, a logarithmic fade tapers more naturally to the ear. The white dot in the center of the fade line lets you apply a curve to the transition. Simply click and hold the white dot, then drag it up or down to adjust the intensity of the fade.
Precise control with keyframes
What if you want to remove audio from a clip without affecting the following sections? If you want more control and need the fade to begin at a specific point in the clip, we can add a keyframe. Hold Alt (or Command on a Mac), then click the line to add a keyframe. Move forward in the timeline and click again to add a second keyframe. It’s essential to set an anchor keyframe first. While we’re on the topic of keyframes, it’s also worth noting that you can add multiple keyframes throughout a clip to quieten or amplify specific sections as needed.
In this example, I’ve placed two anchor keyframes before and after an overly loud section. Then, I’ve added two additional keyframes just inside those anchor points. Using the audio level line to adjust keyframes can be a bit finicky, especially if you’re trying to keep specific audio level limits. Open the Inspector in the top-right corner. Under Volume, click the white diamond icon to add a keyframe. Move forward in the timeline, add another keyframe, and lower the volume slider.
Crossfades for transitions between clips
If you want to fade in and out between two audio clips, don’t worry about using handles, keyframes, or the Inspector. What you need here is a cross-fade transition. Just click between two audio clips so the edit point highlights green, then press keyboard shortcut Ctrl + T to automatically apply a cross-fade transition.
Bonus: Crossfading Between Two Clips. If you’re blending two overlapping audio clips rather than fading a single one in or out, use a crossfade instead. Overlap the two clips on the timeline. Click the edit point where they meet so it highlights green, then press Ctrl+T to apply an automatic crossfade. Or, open the Effects Library, go to Audio Transitions, and drag a Crossfade (0dB, +3dB, or -3dB) onto the overlap manually. Drag the edges of the crossfade box to extend or shorten its duration.
Fairlight automation for professional mixing
The third method to fade audio in DaVinci Resolve is an automatic way to add fade-out and fade-in transitions. The settings on the Crossfades effects are preset, but you can adjust them in the Inspector tab. Fairlight is DaVinci Resolve’s dedicated audio page, and it’s where professional sound editing actually happens. Click the Fairlight tab (the music note icon) at the bottom of the interface. Select the track header for the clip you want to adjust. Open Automation and enable volume control. Adjust the fader sliders to build a gradual fade in or out. Layer in EQ, reverb, or dynamic processing if the fade needs more than a volume change to sound right.
Choosing the right method for your workflow
DaVinci Resolve gives you three different ways to fade audio, from a two-second drag to full manual control in Fairlight. Here’s a quick comparison to help you decide which method to use. For most everyday edits, fade handles cover it. Reach for keyframes or Fairlight once your project needs more precision than a drag-and-release can offer. And once you’re comfortable with those tools, it’s worth exploring DaVinci Resolve’s best plugins for noise reduction and mixing tools that pair well with manual fades.
Practical workflow summary
- Expand track height and use fade handles for quick fades.
- Use keyframes for precise control over when fades start and end.
- Use crossfades to blend two overlapping clips seamlessly.
- Switch to Fairlight automation for professional multi-track mixing.
Frequently Asked Questions
How do I fade audio in DaVinci Resolve? Select your audio clip in the timeline and hover over the top corner. A small white fade handle appears, drag it inward to fade in or out. Click the fade line to adjust the curve for a smoother transition.
What is the easiest way to fade out audio in DaVinci Resolve? Fade handles. Click the clip, find the handle on the top-right corner, and drag it inward. No extra setup required.
Can you fade audio using keyframes in DaVinci Resolve? Yes. Alt+click (Cmd+click on Mac) on the volume line to add a keyframe, then adjust its position. This gives more control than fade handles, especially for fades that need to happen mid-clip.
How do you crossfade audio in DaVinci Resolve? Overlap two clips on the timeline, then either press Ctrl+T on the edit point for an automatic crossfade, or drag a Crossfade effect from the Audio Transitions section of the Effects Library. Why is my audio fading out too fast? The fade handle or keyframe spacing is too tight. Drag the fade handle further inward to extend its duration, or space your keyframes further apart for a slower, more gradual fade.
Related tips and resources
For more on DaVinci Resolve, check out our articles on how to record audio, adding subtitles, and how to export your projects. To enhance the audio of your projects, you can find thousands of royalty free music tracks and sound effects in the Storyblocks library. And if you’re just starting out with video editing, check out our YouTube channel. There are many tools that allow us to give our videos a professional look, but few people take into account that the quality of our audio is as important as the video.
The waveform visibility is essential for effective fades using handles, as it lets you visualize how the fade will affect sound over time.
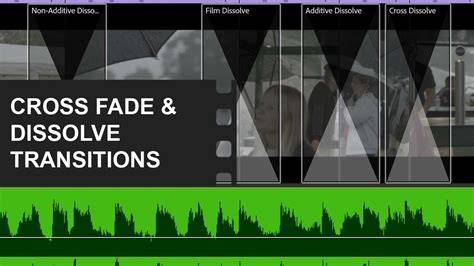
Crossfades provide a seamless blend between two audio clips and can be applied quickly from the timeline or the Effects Library.
Keyframe Mastery Guide in CapCut | For Next level Edits!
A short video demonstrating the difference between using fade handles and keyframes for precise control over fades.