A common task for video editors and motion designers is to export a video in DaVinci Resolve with an alpha channel so that it can be used by a client or colleague. In this tutorial, we look at creating transparency on the Edit and Fusion pages.
Three ways to create transparent backgrounds
1. Create Transparency from the Color Page
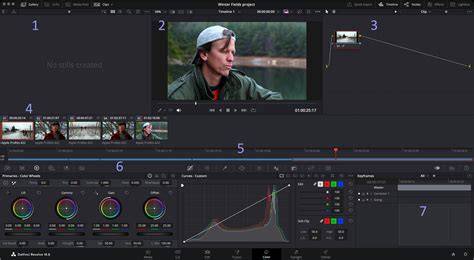
In this example, we’ll be using the free fire clip. This clip doesn’t have an alpha and shows fire on a black background. We want to remove the black, so this clip can be exported and then placed on top of other footage in another app or Resolve. What we select is kept (the fire), and the black becomes transparent. With the Fire clip on the timeline, click on the Color page at the bottom of the interface. Right-click in the gray area of the Nodes, and click Add Alpha Output. Drag from the blue (alpha) output of the Node to the alpha output. We need to create transparency (drop out the black) by using a Luma Key. Generally, you would want to finesse the key, and the higher quality footage (10 bit vs 8 bit), the easier it is to get a clean key.
2. Create Transparency from the Fusion Page
This time we will use Fusion and a luma key. For this example, we’ll be using this free dust clip. This clip doesn’t have an alpha, the dust is mainly gray (semi-transparent) and white (opaque). In Fusion, we will be working with Nodes, instead of layers like in Premiere Pro or After Effects. Each thing we want to do goes on its own node. With the dust clip selected in the timeline, click on the Fusion page at the bottom of the interface. MediaIn is the dust footage and MediaOut1 is the output.

3. Export settings and codecs for alpha
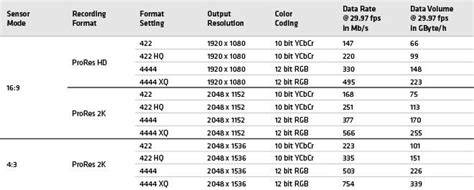
The only tricky part of exporting an alpha is remembering to select Individual Clips, as the Single Clip option can’t output an alpha channel. You’ll also need to pick a codec that supports alpha channels because most formats don’t support it. There are generally three codecs used for exporting alphas: ProRes 4444 and 4444 XQ, GoPro CineForm RGB 16-bit, and multiple flavors of DNxHD.
Select the Delivery page. Exporting a video clip with an alpha channel in DaVinci Resolve allows you to bring that rendered clip back into the program as a transparent asset, import into another NLE, or motion graphics app. We hope this tutorial helped you understand the various ways you can export with transparency.
Practical notes and tips
To improve key quality, prefer higher bit depth (10-bit clips) and ensure good contrast between subject and background. When using Fusion, think in nodes: start with MediaIn, apply a Luma Key, preview with MediaOut, and then proceed to output. In Color, adding an Alpha Output to the node tree is essential for a clean alpha extraction. For export, choose a codec that preserves alpha and set the correct clip handling for per-clip alpha output.
- Ensure you are exporting Individual Clips.
- Choose a codec that explicitly supports alpha channels.
- Test the resulting file in the target app to confirm the alpha behaves as expected.
Export Transparency (Alpha Channel) in DaVinci Resolve!
tags: #davinci #resolve #transparent #background