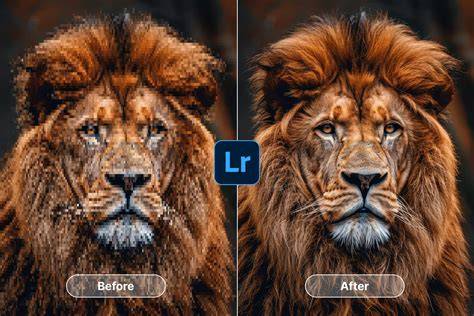
Creating high-resolution files for print production may be a big part of your professional workflow, especially if you're a graphic artist or print production specialist. If you're given low-resolution files and asked to turn them into high-resolution versions, you'll get better results if you can start with natively high-resolution files. Some low-resolution files can become high resolution without losing quality, depending on the size you need. However, in some cases, you’ll need to upsize the file to meet your resolution requirements.
Reinterpret and Upsize: Two Paths to Higher Resolution
Reinterpret Resolution: Open your file in Adobe Photoshop and press Shift-Ctrl-I to bring up the Image Size dialog box. Check the Document Size section in the dialog box. If the width and height measurements are large but the resolution is 72 pixels per inch, your image was probably created with a digital camera. Uncheck the Resample Image box and change the resolution to 300 ppi. At the top of the dialog box, you’ll notice the Pixel Dimensions-the width, height, and file size-stay the same, but the width and height in the Document Size section will shrink. For example, an 8-bit RGB image that measures 25 inches by 16.667 inches at 72 ppi will measure 6 inches by 4 inches at 300 ppi, but the file size will still be 6.18MB. Click OK to apply the changes. Review your image. Its size and appearance won’t change because you’ve simply told Photoshop to reinterpret the resolution, not increase it. Instead of having a very large, low-resolution image, you’ll now have a smaller, high-resolution one.
Increase Resolution: Open your file in Adobe Photoshop and press Shift-Ctrl-I to bring up the Image Size dialog box. Check the Resample Image box and set the resolution to 300 ppi. This time, you’ll notice the Pixel Dimensions at the top of the dialog box increase, while the width and height in the Document Size section stay the same. For example, an 8-bit RGB image that is 432 pixels wide by 288 pixels high at 72 ppi will still measure 6 inches by 4 inches at 300 ppi, but it will now have dimensions of 1800 pixels by 1200 pixels. The file size will increase from 364.5KB to 6.18MB. Click OK to apply the changes. Check your image window and quality. Because you increased the resolution and file size, your image window will look larger. However, this comes with some pixelation, as Photoshop has interpolated new pixels to enlarge the image.
Latest Features in Photoshop for Image Resizing and Quality Enhancement
Recent versions of Adobe Photoshop have introduced advanced features that make resizing and upscaling images more effective, while helping to maintain image quality. Super Resolution uses artificial intelligence to dramatically increase an image’s resolution, effectively doubling its width and height while preserving details. It’s particularly useful for enlarging photos without introducing noticeable pixelation or artifacts. Preserve Details 2.0 is an improved resampling algorithm that helps retain sharpness and clarity when resizing images, reducing artifacts and improving overall quality. The Updated Image Size Dialog Box includes a real-time preview feature, letting you see adjustments immediately for precise results. AI-Powered Upscaling enables machine learning to upscale low-resolution images with minimal effort, enhancing them into higher-quality versions while maintaining detail and clarity.
Practical Tips for Upscaling and Enhancement
- Sharpen your image after you increase resolution, not before. Sharpening first may introduce artifacts that reduce quality after enlargement.
- Always double-check client-supplied images from digital cameras. Large dimensions at low resolution may require adjustments to meet resolution needs.
- Enable Preserve Details 2.0 to increase the resolution of an image while preserving details during upscaling.
- Use adjustment layers to increase contrast and saturation to make colors pop, and apply the Spot Healing or Patch tools to remove blemishes.
- Experiment with the Curves adjustment to fine-tune color and contrast in a single powerful step.
Workflow Variants: Reinterpreting vs Upscaling for Print
When working with print-ready files, you may reinterpret resolution to optimize existing image dimensions or perform a true upscaling for print production. In situations where a poster or large-format print is required, upscaling with high-quality interpolation methods can preserve detail better than simple enlargement. For JPEGs and other raster formats, Camera Raw Filter with Super Resolution can dramatically boost quality while maintaining detail. For non-destructive editing, convert layers to Smart Objects before applying upscale operations in Camera Raw or via the Image Size dialog box.
Camera Raw and AI Upscaling Tools
Camera Raw provides quick, real-time adjustments with sliders for color temperature, contrast, and clarity. Right-click the image in Camera Raw and choose Enhance to access Super Resolution, which creates a higher-resolution version while preserving details. This is especially effective for enlarging JPEGs without noticeable pixelation. In the Layers panel, using a Smart Object ensures non-destructive edits during upscale.
Practical Practices for Consistent Results
- Compare a resized image against its original to judge artifacts and sharpness.
- Use the Red Eye, Spot Healing, and Patch tools to clean up distractions after resizing.
- Keep a backup copy of the original image before experimenting with aggressive upscaling or retouching.
- When presenting options to clients, demonstrate the upscaled result to show potential downsides and benefits.
Understanding Resolution, Resampling, and Print Readiness
Image resolution refers to the amount of detail an image holds, typically measured in pixels. Higher resolution means more pixels, resulting in sharper images. For print, 300 PPI is a standard target, while 72 PPI is typical for web. Resolution impacts how images appear on different devices, and Photoshop offers tools to adjust resolution and size while balancing file size and quality. Upsampling increases the pixel count through interpolation, while downsampling reduces it to save space or optimize performance.
Table: Quick Comparison of Upscaling Methods
| Method | Quality | Best For | Notes |
|---|---|---|---|
| Reinterpret Resolution | Low change in pixel count | Preserve file size; adjust print readiness | Does not add detail |
| Upscale with Resample | Higher pixel count; possible pixelation | Print-ready sizes | Depends on interpolation method |
| Super Resolution (AI) | High detail; strong preservation of edges | Large prints, posters | AI-based; real-time preview |
| Preserve Details 2.0 | Balanced sharpness and artifacts | Detail-rich enlargements | Improved resampling |
Additional Resources: AI Upscalers and Comparisons
Upscale tools and compare alternatives can be useful for quick enhancements, though Photoshop remains a robust, professional choice for precise control. Online tools like Let’s Enhance, Deep Image, Waifu2x, Bigjpg, AI Image Enlarger, VanceAI, PixBim Enlarge AI, Fotor, PhotoZoom Pro offer various AI-driven approaches, while Photoshop provides integrated AI-powered upscaling with more granular adjustments. Weigh the trade-offs between simplicity and control when selecting a solution for your project.
Conclusion: Integrating Resolution Mastery into Your Workflow
Improving image quality in Photoshop CC is an essential skill for graphic artists and print production specialists, especially when working with files that need to meet high-resolution requirements. Whether you're reinterpreting resolution to optimize existing image dimensions or increasing resolution for print production, Photoshop offers a range of tools and techniques to achieve professional results. The best approach depends on the source image, the target print size, and the acceptable level of artifacts. By leveraging Super Resolution, Preserve Details 2.0, real-time previews, and non-destructive workflows, you can elevate images from good to print-ready with confidence.