Flattening in Photoshop refers to the process of merging all the layers of an image into a single background layer. This technique helps streamline the editing process and brings the final image one step closer to being print-ready or suitable for uploading on the web.
Flattening an image is a permanent action, meaning any changes or corrections required after flattening will no longer be possible. Therefore, it's crucial to be aware of any alternatives and workarounds, as well as to take precautions before flattening an image. Always keep a backup of your original Photoshop document before making significant changes or exporting to a different format.
Reasons to Flatten and When to Use It
- Flattening reduces file size by merging all visible layers into the background and discarding hidden layers, which can streamline workflow and improve sharing and archiving.
- Flattening is useful when exporting for web use or client delivery, as flattened images offer greater compatibility across platforms.
- Printing workflows often benefit from flattened images, since some printers do not handle layered files well.
- Flattening helps ensure your final image appears consistent across devices by preserving appearance after consolidation of layers.
How to Flatten Pages and Workflows
To flatten an image, you can either navigate to the Layer menu and select Flatten Image, or right-click (Win) or Control + click (Mac) on any layer in the Layers Panel and choose Flatten Image from the context menu. As of July 2024, Photoshop’s legacy 3D features have been removed.
First, ensure all necessary adjustments have been made to the individual layers and adjustment layers. Locate the Layers panel within the Photoshop interface. To flatten the layers, click on the Layer menu and select Flatten Image. Alternatively, right-click on a layer and choose Flatten Image from the context menu.
When you flatten, any transparent areas will be filled with white. If you want to keep editability while reducing complexity, you can instead merge specific layers or convert to smart objects before finalizing the design.
Flatten vs. Merge: Key Distinctions
When deciding how to combine layers, there are several options:
- Merge Down: Merge two adjacent visible layers where the bottom is a pixel layer (Layer > Merge Down).
- Merge Visible: Merge a selected set of layers after hiding others.
- Stamp Visible: Stamp visible combines all visible layers into a single layer while preserving the ability to step back by duplicating layers beforehand.
- Flatten Image: Merges all visible layers into the background, discarding hidden layers and filling transparent areas with white.
In addition to merging, you can stamp or flatten layer effects selectively. Flatten All Layer Effects allows you to apply a single rasterized result for layer styles without flattening the entire image.
Preserving Editability and Backups
Before flattening, it is recommended to duplicate your work or save a copy of the original layered file (PSD). If you need to maintain the ability to edit content in the future, keep a copy of the original Photoshop (.psd) file. You can also export to other formats while preserving layers by saving a non-flattened version of the file.
When saving as a PDF, Photoshop retains layers by default, even if you’ve flattened the image before saving. To ensure a PDF is flattened, flatten the image before saving and confirm by checking the Layers panel for a single background layer.
Saving Flattened Files in Different Formats
Several file formats are commonly used after flattening, each with its own trade-offs:
- PSD preserves layers and editable data, but is not always suitable for web delivery.
- JPEG compresses with some loss of quality, small file size, and no transparency.
- PNG supports lossless compression and transparency but may have larger file sizes for complex images.
- TIFF retains high image quality and supports layers, but creates large files; flattening a TIFF can reduce size further.
When saving a flattened image, you can use the Save As command to choose the desired file format and adjust options such as compression level. Keep in mind that not all formats support layers or transparency.
Practical Tips for Working with Layers
- As you add layers or layer groups, name them reflectively by double-clicking the layer or group name in the Layers panel to enter a new name. This helps you stay organized as the project grows.
- Color coding layers and groups helps you locate related layers quickly in the Layers panel.
- Be aware that you cannot use painting tools or filters on layers that contain vector data (such as type layers, shape layers, vector masks, or Smart Objects) or generated data (such as fill layers).
- Once your layer is rasterized, you cannot edit them in their original vector form, so duplicating the layer before rasterizing preserves a path back to the original.
Workflow Scenarios: Merging, Flattening, and Backups
To merge all layers in Photoshop, open the Layers panel, click the menu icon, and select Flatten Image. This combines all visible layers into a single layer. Flattening enables easier management and distribution of the final image, but remember it is destructive. If you later need to revert, you should rely on a backup PSD.
To preserve flexibility while finalizing, you can merge only certain layers or convert layers to Smart Objects. Converting to Smart Objects keeps the ability to revert edits while presenting a single consolidated appearance in the final export.
Additional Considerations
Be mindful of how flattening affects resolution; if layers have different resolutions, they may be converted to the background layer's resolution on flattening. When merging layers with varying opacities, the resulting appearance may differ from expectations. Always inspect opacity settings after merging to ensure the final output matches your design intent.
For a streamlined workflow, you may consider alternatives to flattening, such as merging visible layers or using smart objects, to maintain editability while aiming for smaller file sizes. Keeping a transparent background can be useful for designs intended to be layered over other images later.
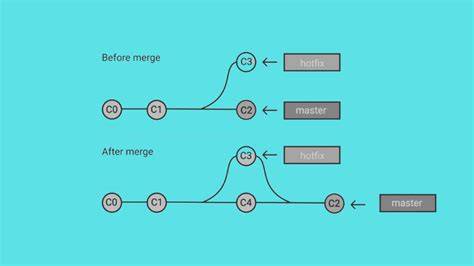
When appropriate, you can include diagrams or infographics that illustrate the relationships between flattening, merging, and stamping workflows to help readers visualize the processes described above.
How to Flatten Layers in Illustrator (Flatten Transparency vs Flatten Artwork)
Short tutorial videos can accompany the article to demonstrate key steps like Flatten Image, Merge Down, and Stamp Visible, providing a practical reference for readers who learn better via video.
Sample Scenarios: Quick Reference
- Flatten a complete document before exporting to PDF for client delivery. Ensure a single background layer in the Layers panel to confirm flattening is complete.
- Before flattening, duplicate the PSD to preserve an editable version. Then, flatten for final export or archiving.
- Merge specific layers when you want to reduce complexity while retaining the ability to edit other parts of the image.
- Use Flatten All Layer Effects if you want to consolidate layer styles without flattening the whole image.
Key Takeaways
- Flattening merges all visible layers into a single background layer, reducing file size and simplifying export processes.
- Flattening is destructive; you should keep backups or use non-destructive alternatives when possible.
- PDFs preserve layers by default; verify flattening by checking the Layers panel for a single background layer before saving as PDF.