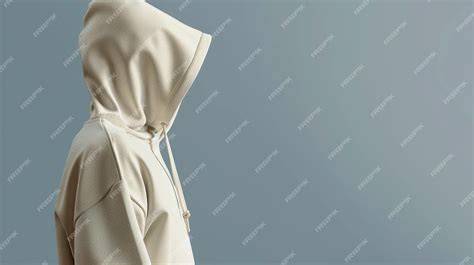
In this tutorial, you’ll learn how to make a hoodie mockup in Photoshop step by step. If you need a hoodie mockup fast, you can start by opening your file with File > Open and then create two copies of the hoodie layer by pressing Ctrl + J twice. This quick workflow lays the foundation for a flexible and editable mockup that can be reused for branding, merch, or apparel concepts.
Starting the mockup: setting up the base and smart objects
Begin by selecting the Rectangle Tool. Please set it to Shape mode and choose any color to create a base shape over the hoodie where you want to apply a design. Right-click the shape layer and choose Convert to Smart Object from the context menu to preserve editability and non-destructive changes as you warp or transform the texture.
Double-click the shape layer to open its contents, then go to File > Place Embedded. Select a texture image and click Place to integrate a texture that can simulate fabric, prints, or branding. This method keeps the texture editable and non-destructive, which is essential for high-quality presentation.
Go to File > Save to preserve your initial setup. Open the main window and change the Blend Mode of the texture or shape layer to Linear Burn to achieve a realistic interaction with the hoodie underneath. Right-click the layer and select Blending Options to fine-tune shadows, highlights, and color interactions for a more convincing result.
Layer management and color variations
Unhide the top hoodie layer to ensure visibility of the design on the front and maintain proper layering for the mockup. That’s it. Follow this quick guide on how to make a hoodie mockup in Photoshop and Mockey AI.
You can pick from different hoodie types, change the background, and switch hoodie colors to suit various branding needs. Pick a hoodie template and add your own designs, logos, or images on the next page. You can also use AI tools such as AI Photoshoots and AI Anime to preview effects or generate inspiration.
Creating different hoodie looks: black hoodie, 3D, and more
To create a black hoodie mockup in Photoshop, start by opening a hoodie PSD file and hiding the shadows. Then, draw a rectangle over the front of the hoodie and convert it to a smart object. Add your design using a clipping mask and warp it to match the hoodie’s shape for a natural fit. To create a 3D hoodie mockup in Photoshop, start by getting a 3D hoodie model and adjusting its angle. Launch Photoshop and open the 3D model’s PSD file. Hide the shadows and place a rectangle over the front of the hoodie. Convert the rectangle into a smart object, clip it to the hoodie, and warp it to match the fabric’s shape for a convincing three-dimensional look.
Mockey AI lets you create free hoodie mockups. Just upload your design or logo and see it in real-time. You can change colors, backgrounds, and more. Plus, you get high-quality downloads with no watermarks. You can get free hoodie mockups without watermarks from sites like Mockey AI. This free hoodie mockup gives you a clean, photorealistic way to present branding, merch, or clothing graphics. You can edit online in your browser with our online mockup generator, or download the fully layered PSD for Photoshop work. The scene shows a front-view hoodie in high resolution, sized at 4500x3000px. The isolated shadow and background make it easy to place into different layouts. Inside the file, smart objects let you swap designs quickly, so you can test logos, prints, and apparel concepts without slowing down. It also fits naturally in our Hoodie Mockups collection.
Practical tips for high-quality results
Use smart objects for any design layer to maintain sharp edges when transforming the artwork. Always test the mockup against multiple background colors to ensure visibility of logos and prints. Consider adding subtle shadows or ambient light to enhance realism, especially for darker hoodie tones. If you need to present multiple variants, duplicate the smart object layer and adjust the texture, color, or warp to demonstrate different branding options without recreating the whole scene.
- Keep a clean layer structure with named groups for quick edits.
- Use non-destructive edits such as Smart Objects, adjustment layers, and clipping masks.
- Save separate PSD files for each color or design variant to streamline client reviews.
- Open a hoodie PSD and duplicate hoodie layers as needed.
- Apply textures via Place Embedded and convert to smart objects for flexibility.
- Warp and clip designs to fit the hoodie contours and test lighting options.
- Export ready-to-use mockups in PNG or high-resolution PSD with clean backgrounds.