In Final Cut Pro, you can edit title text and change a title’s style, color, and opacity. You can edit text in the viewer or in the Text inspector, and you can adjust a title’s appearance using the Title and Video inspectors.
Editing title text
In Final Cut Pro, do one of the following: Select a title clip in the timeline, then move the playhead over the selected title clip. Double-click a title clip in the timeline. The title appears in the viewer, and the text in the first text object in the title clip is selected. The playhead moves to the point in the timeline where the first text object is fully visible in the viewer. (For example, to make the animated text you’re editing visible in the viewer, you may need to move the playhead to a different point in the animation.)
Do one of the following: Double-click a text object in the viewer. Select the text in the Text inspector. Edit the text. To exit text editing, press Command-Return.
Changing a title’s color
Double-click a title clip in the Final Cut Pro timeline. The title appears in the viewer, and the text in the first text object in the title clip is selected. Note: To modify a different text object in the same title, select it in the viewer.
If the inspector isn’t already shown, do one of the following: Choose Window > Show in Workspace > Inspector (or press Command-4). Click the Inspector button on the right side of the toolbar. Click the Text button at the top of the inspector. Tip: Double-click the top bar of the inspector to switch between half-height view and full-height view. Click the color well in the Face section of the inspector and choose a color. Note: To add a background color to your title, see Add backgrounds.
Changing a title’s text style
You can change a title’s text style-for example, the text’s font, color, size, and alignment. Double-click a title clip in the Final Cut Pro timeline. The title appears in the viewer, and the text in the first text object in the title clip is selected. Note: To modify a different text object in the same title, select it in the viewer.
If the inspector isn’t already shown, do one of the following: Choose Window > Show in Workspace > Inspector (or press Command-4). Click the Inspector button on the right side of the toolbar. Click the Text button at the top of the inspector. Tip: Double-click the top bar of the inspector to switch between half-height view and full-height view. Adjust the available settings as needed. Note: To reveal the controls in each of the sections, you may need to scroll down in the Text inspector and double-click each section name. For a complete list of available controls, see Text inspector controls.
- Basic: Sets the basic text settings such as font, size, alignment, tracking, and line spacing.
- 3D Text: Sets depth, depth direction, weight, front/back edge types, and inside corner type for 3D text objects.
- Face: Sets the type of color fill, the fill color, opacity, and blur.
- Outline: Sets the type of color fill, the fill color, opacity, blur, and width.
- Glow: Sets the type of color fill, the fill color, opacity, blur, and radius.
- Drop Shadow: Sets the type of color fill, the fill color, opacity, distance, and angle.
To exit text editing, press Command-Return. Tip: You can quickly add preset text styles to titles and save text appearance settings for future use. See Apply preset text styles.
Changing custom title settings
You can modify the title controls and parameters that are unique to a specific title. Depending on the title, you may be able customize certain features or parameters such as the title’s scale, position, color, or animation timing.
Select a title clip in the Final Cut Pro timeline. If the inspector isn’t already shown, do one of the following: Choose Window > Show in Workspace > Inspector (or press Command-4). Click the Inspector button on the right side of the toolbar. Click the Title button at the top of the inspector. Tip: Double-click the top bar of the inspector to switch between half-height view and full-height view. Adjust the available settings as needed.
You can design, build, and modify titles in Motion for use in Final Cut Pro. When you save a title template in Motion, you can choose which parameters to publish in the Title inspector in Final Cut Pro. See more information about Final Cut Pro templates in the Motion User Guide. Note: You can also animate some titles by keyframing settings in the Title inspector. For more information about animating effects using keyframes, see Add video effect keyframes.
Changing multiple text objects in a title at once
You can adjust the settings (such as the color, font, or size) of more than one text object at once. Select a title clip in the Final Cut Pro timeline. Move the playhead over the selected title clip. In the viewer, do one of the following: Holding down the Command key, select the text objects you want to modify. Drag to select the text objects you want to modify. If the inspector isn’t already shown, do one of the following: Choose Window > Show in Workspace > Inspector (or press Command-4). Click the Inspector button on the right side of the toolbar. In the Text inspector, adjust the available settings as needed.
Opacity, blend mode, and HDR brightness
You can change a title’s opacity or how it blends with the clip beneath it in the timeline. When you connect a title clip to an HDR video clip in the timeline, the superimposed text in the viewer may seem dimmer than the video (because they were created in an SDR color space). You can increase the color intensity of title elements to HDR levels by adjusting the Graphics HDR Level slider.
Double-click a title clip in the Final Cut Pro timeline. If the inspector isn’t already shown, do one of the following: Choose Window > Show in Workspace > Inspector (or press Command-4). Click the Inspector button on the right side of the toolbar. Click the Video button at the top of the inspector. Tip: Double-click the top bar of the inspector to switch between half-height view and full-height view. To exit text editing, press Command-Return.
In the Compositing section, do any of the following: Change the title’s opacity: Drag the Opacity slider or use the value slider. Note: Some titles allow you to adjust the text opacity separately from the opacity of the rest of the title graphics. See Change a title’s text style. Note: You can also keyframe a title’s opacity setting. Change how the title blends with colors in the clip beneath it in the timeline: Click the Blend Mode pop-up menu, then choose an option (Darken or Multiply, for example). Note: The blend modes in Final Cut Pro for Mac are identical to those in Motion and in Final Cut Pro for iPad.
Practical tips for adding text and titles
Adding titles and subtitles to your videos increases engagement and accessibility and adds value to your content. It helps people better understand the message by displaying subtitles, captions, titles, and text to highlight important information without relying solely on the audio when watching the video in loud environments or at low volume. Final Cut Pro X has built-in features for adding text and titles to your videos. Follow the steps to enhance your videos with titles, captions, and lower thirds.
Step 1: Organize Your Video Project. On your video editing software, create a new project or open a previous Final Cut Pro X project. Ensure that your clips are organized in the Final Cut Pro timeline before you add text and titles. Move the playhead in the timeline to the position where you want to add text.
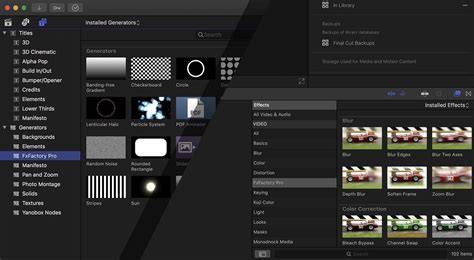
Step 2a: Add Basic Titles. A basic title is a title text with no animation or effects. Go to Edit > Connect Title > Basic Title to add a basic title. The title will be placed at the playhead position. Click the title clip to display the Text Inspector options, where you can modify and customize your text format. You can also go to Titles and Generators menu and select from the titles and lower thirds available. Find the Titles and Generators button in the menu. You can identify it by the T symbol on it. You can also go to Window > Go To > Titles and Generators.
Step 2b: Add a Lower Third Title. Instead of using a Basic title, you can use a lower third. Lower thirds are an essential title format used in videos to transmit extra information. You can add lower third titles from the Edit menu, Connect Title > Basic Lower Third or select a lower third from the Titles and Generators. Then, you can go to the inspector to type and edit your text.
EASY: Make Lower Thirds & Video Titles | The Graphics Creator
Step 2c: Add Captions and Subtitles. Closed captions and subtitles are necessary and helpful for social media and short-form videos. Final Cut Pro has a way to add captions quickly. Go to Edit > Captions > Add Caption. In the inspector, you can type and edit your text.
Step 3: Add Animated Text to Your Video. Final Cut Pro comes with pre-installed titles of different text styles and animations that are easy to use and add to your video. In the Titles and Generators sidebar, click Titles to show all the different text and title styles in the browser. Drag and drop the desired title to the timeline or double-click the title to place the title clip at the playhead position. Another option for a customizable animation is to add a custom basic title and modify the parameters in the Text Inspector to animate opacity, scale, position, rotation, blur, spread, and more. Then, you can add effects to these title clips. Click the Effects tab and drag the effect to the title clip.
Step 4: Edit Text in the Title Clip. To type your title, click the title clip in the timeline. Double-click the title text in the viewer and type directly in the text box. You can also go to the title menu in the inspector and type in the text editor. In the inspector, you can customize the text, such as font, size, alignment, color, and add a shadow. If you need to change the duration of the title, drag the edges of the title clip in the timeline and then drag it left or right.
Step 5: Export Video. Play your video clip and make the necessary adjustments in your text. Once everything is as you want it, click the export button and save your new file.
Continuum FCP and Title Studio
Continuum FCP provides a suite of plugins for Final Cut Pro users, including text templates for different formats and auto animation options. You can apply Continuum effects to your title clips and customize them with on-screen controls. Creating Titles with the Standalone Version of Title Studio allows more advanced text creation, keyframes, and exports to compatible hosts before bringing them into Final Cut Pro X.
Final Words. Final Cut Pro is a great option for beginner content creators and professional video editors alike. There are built-in and Motion-based options for text, with a variety of styles and methods to add and customize titles, captions, and lower thirds. Remember to use titles effectively: keep on-screen text readable, purposeful, and well-timed with your video content.